You pop the hood and see years of grime built up around the valve covers, hoses, and intake. Maybe you are preparing to sell the car, hunting for an oil leak, or just tired of opening a dirty engine bay every time you check fluids. A car engin wash sounds like a straightforward solution, but it is one of those jobs where a small mistake can cost you thousands.
The truth is that modern engine bays are packed with sensitive electronics, exposed connectors, and components that do not react well to water. Per manufacturer service guidelines from multiple automakers, direct high-pressure spraying into certain areas is a leading cause of check-engine lights and electrical failures immediately after washing. Before you grab a pressure washer and a bottle of degreaser, it pays to understand exactly what you are dealing with under that hood.
Why Getting This Right Matters (More Than You Think)
A dirty engine bay will not fail a safety inspection. But a poorly executed wash can turn a routine task into an expensive repair. We are not talking about minor inconvenience.
We are talking about damage that leaves your car sitting in a shop for days.
The risks come down to two things. First, water intrusion into areas never designed to get wet. Second, chemical damage to plastics, rubber hoses, and unprotected metal surfaces.
As of 2026, the average cost to replace a modern engine control module runs anywhere from $800 to $2,000 depending on the make and model. A soaked alternator can set you back $300 to $600. The real headache comes from intermittent electrical gremlins that show up weeks later, long after you thought everything was fine.
This is precisely why an engine wash falls under the expert your-money-or-your-life category. It is not that you cannot do it yourself. It is that you need to know exactly where the boundaries are.
A clean engine bay helps with heat dissipation, makes leak detection easier, and improves resale value. But only if you do it without introducing new problems.
Image source: Wikimedia Commons / Gunn, Thomas Butler, 1826-1903
What Actually Happens When You Wash an Engine
When you spray water into an engine bay, a few things happen simultaneously. The water carries away loose dirt and grease, which is what you want. But it also finds every tiny gap, every unsealed connector, and every electrical junction it can reach.
Here is what typically occurs in the moments after a wash:
- Water pools around spark plug wells. If the seals are old or compromised, that water seeps down into the combustion chamber. The result is a misfire, rough idle, or in extreme cases, hydro-lock.
- Moisture gets trapped inside electrical connectors. Modern vehicles use weather-pack connectors, but age and heat cycles degrade the rubber seals. Once water gets in, corrosion starts. It is the kind of slow copper oxidation that causes random sensor failures six months later.
- The alternator takes on water through its cooling vents. Alternators are not sealed units. They need airflow to stay cool, which means they also take in moisture. A wet alternator can fail on startup or develop bearing noise over time.
- The serpentine belt gets slippery. Water on the belt and pulleys causes temporary squealing. That usually dries out, but if grit gets between the belt and pulley, accelerated wear follows.
None of this means you should never wash your engine. It means you need to approach it with the same caution you would use for cleaning an expensive piece of electronics. Because that is essentially what you are doing.
The Real Risks: What Can Go Wrong
Let us get specific about the damage that can happen. These are documented failures that mechanics see regularly after customers attempt a DIY engine wash.
Water in the Wrong Places
The most common entry points for water damage are the air intake, the fuse box, and exposed electrical connectors.
- The air intake. If you spray directly into the intake opening, water enters the engine cylinders. Even a small amount can cause a misfire. A significant amount can bend connecting rods. That is an engine rebuild or replacement.
- The fuse box. Modern fuse boxes sit under the hood and have a cover, but the cover is not waterproof. Water that pools on top seeps down into the relays and fuses. The result is random electrical failures. Wipers that turn on by themselves. Fuel pumps that stop working. Lights that flicker.
- Sensor connectors. The mass airflow sensor, oxygen sensors, and throttle position sensor all have electrical connectors. Water in these connectors causes erratic readings that trigger check-engine lights. The codes often point to a failed sensor, but the sensor itself is fine. It is just wet.
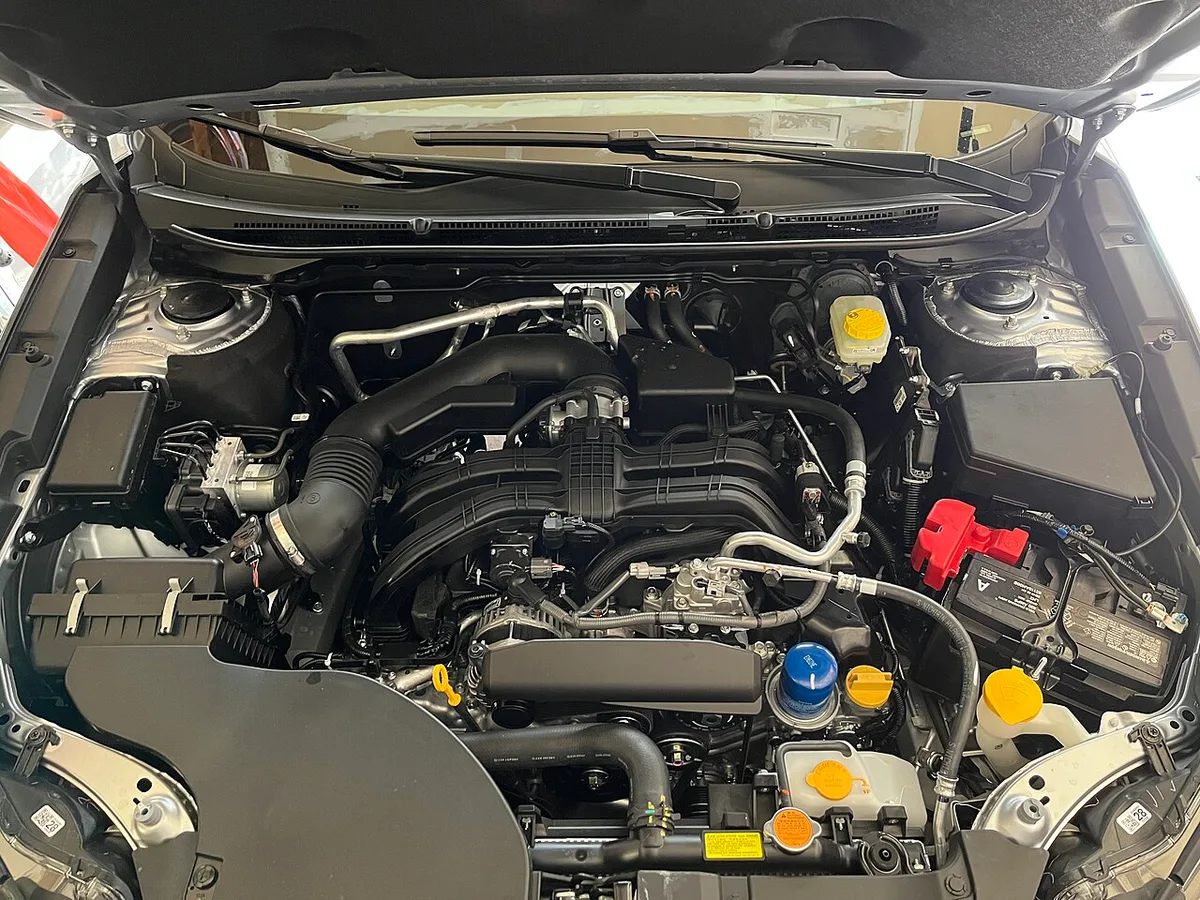
Image source: Wikimedia Commons / Colin Venable
Damaging Sensors and Electronics
Engines built after roughly 2005 have significantly more electronics than older models. Even a basic economy car today has more computing power under the hood than the Apollo guidance system.
The mass airflow sensor is particularly vulnerable. It uses a thin wire heated to a specific temperature. Air flowing over the wire cools it, and the sensor measures that change to calculate air density.
If water hits that wire while it is hot, the thermal shock can crack it. A replacement MAF sensor costs anywhere from $80 to $400 depending on the vehicle.
The same applies to the throttle position sensor, the camshaft position sensor, and the knock sensor. None of them are designed to handle direct water spray.
Belt and Alternator Issues
Your serpentine belt is a rubber component that runs over metal and plastic pulleys. When it gets wet, it loses friction temporarily. That is the source of the high-pitched squeal you hear after a car wash.
On most vehicles, this is harmless once everything dries out. But on some engines, particularly those with automatic belt tensioners that are already worn, the added slip can cause the belt to jump a groove. That means no alternator, no water pump, and no power steering.
You are stranded.
The alternator itself is a common casualty. Most alternators have internal cooling fans that pull air through the housing. They also have small drainage holes at the bottom.
Under normal operation, that is fine. Rain splashes are brief and limited. But a sustained spray from a pressure washer overwhelms those drains, and water sits inside the housing.
Alternator bearings do not like water. They rust, and the alternator fails.
Chemical Damage to Plastic and Rubber
Engine degreasers are formulated to break down oil and grease. That is their job. But some formulations are aggressive toward certain plastics and rubber compounds.
OEM engine covers, vacuum lines, and wiring loom sheathing are made from various polymer blends. Harsh chemicals can cause these materials to become brittle, crack, or discolor. A cracked vacuum line creates an air leak that causes rough idling and poor fuel economy.
A brittle wiring loom leaves exposed wires that short out.
The rule of thumb is to avoid any cleaner labeled as containing toluene, xylene, or acetone. Stick to products specifically formulated for engine bay cleaning, which are pH-neutral or mildly alkaline and include plastic-safe additives.
Before You Start: What to Check First
Not every engine should be washed the same way. The condition of your vehicle's components dictates the safest approach. Before you even buy a bottle of degreaser, run through this checklist.
Is Your Engine Even Safe to Wash?
Ask yourself these questions:
- Are your spark plug tube seals known to leak? On some engines, particularly older BMWs, VWs, and certain Ford models, the valve cover gasket and spark plug tube seals harden with age. If they are already leaking oil into the spark plug wells, adding water on top of that oil creates a conductive sludge that grounds out the spark. Skip the wash until the seals are replaced.
- Is your air intake aftermarket or modified? A cold air intake with a cone filter sitting low in the engine bay is much more exposed than the factory air box. Water can splash directly onto the filter element and be drawn into the engine. If you have an aftermarket intake, either remove the filter before washing or cover it with a plastic bag and tape.
- Does your fuse box have a history of moisture? Some vehicles have known issues with water pooling in the engine bay fuse box. Check the underside of the fuse box lid. If you see signs of water staining or corrosion on the fuses, do not introduce more water. Clean those contacts with electrical cleaner first.
- Is your battery properly secured? A loose battery can shift during the wash process and short against the hold-down bracket. Tighten the battery hold-down before you start.
If you answer yes to any of the above, address that issue before washing. A $10 valve cover gasket replacement is cheaper than a $1,200 engine repair.
When to Absolutely NOT Wash Your Engine
There are situations where an engine wash is the wrong call entirely.
- If you have exposed aftermarket wiring. Aftermarket wiring often has unsealed splices and exposed connections. Water finds them every time.
- If the check-engine light is already on. Washing the engine before diagnosing an existing problem adds a variable. You will not know if the new code is from the wash or from the original issue. Get the code read first.
- If the engine is hot. Washing a hot engine causes thermal shock. Rapid cooling can crack exhaust manifolds, cylinder heads, and certain plastic components. Let the engine cool to room temperature. A hand placed on the valve cover should feel cool to the touch.
- If you have a modern luxury vehicle with extensive underhood electronics. Some high-end German and Japanese vehicles have multiple ECU boxes, active suspension components, and high-voltage hybrid wiring under the hood. These should be handled by a professional detailer who knows the specific vehicle. The manual for these cars often explicitly warns against water cleaning under the hood.
If none of those apply, you are clear to proceed with the right tools and method.
What You Will Need: Tools and Supplies
An engine wash done right requires specific items. Do not substitute. The wrong brush or cleaner is where most people get into trouble.
Degreasers
You want an engine-specific degreaser. Not a general-purpose cleaner. Not dish soap.
Not oven cleaner.
- Citrus-based degreasers are a solid choice for most engines. They break down oil and grease without attacking plastic or rubber. Products with d-limonene as the active ingredient are effective and relatively safe.
- Water-based alkaline degreasers work well on heavy grease buildup. Look for pH in the 9 to 10 range. Anything above 11 is too aggressive for engine bay plastics.
- Avoid solvent-based degreasers unless you are dealing with caked-on oil sludge that nothing else touches. Even then, use them sparingly and avoid rubber components.
If you need a strong cleaner for a particularly greasy engine, use the right shampoo in a foaming gun to get even coverage without pooling degreaser in one spot.
Brushes and Tools
- A soft-bristle detail brush. Think the kind you would use on paint, just dedicated to the engine. Stiff bristles scratch plastic and remove paint from brackets.
- A longer reach brush for getting between hoses and into crevices.
- Microfiber towels. At least three. One for drying, one for applying protectant, one for buffing.
- A low-pressure sprayer or a garden hose with a spray nozzle set to shower or mist. Never use a pressure washer on its highest setting within the engine bay. If you are unsure about the safe pressure for your specific setup, refer to manufacturer guidance or stick with standard garden hose pressure.
Protective Gear and Covers
- Plastic bags and rubber bands or tape for covering the alternator, air intake opening, fuse box, and any exposed electronics.
- Heavy-duty aluminum foil works as well as plastic bags and molds around irregular shapes better. Some professional detailers prefer foil because it does not trap heat the way plastic can.
- Nitrile gloves. Degreasers strip the natural oils from your skin. And you do not want engine grime embedded in your hands.
- Safety glasses. Splashes happen. Degreaser in your eyes is not a good start to your afternoon.
Additionally, use a dedicated sprayer for car washing rather than a high-pressure unit when rinsing the engine bay. The lower pressure gives you far more control.
Step-by-Step: How to Wash an Engine Safely
You have checked your engine bay, gathered the right supplies, and the engine is cool to the touch. Now it is time to work through the process methodically.
Step 1: Cool Down and Disconnect
Let the engine sit for at least 30 minutes after your last drive. A warm engine evaporates water faster, which sounds helpful but creates thermal stress. Cold water on hot metal causes warpage in some components.
Play it safe. Let it cool completely.
Disconnect the negative battery terminal. This kills power to the ECU and prevents short circuits if water reaches any live connections. Use a 10mm wrench for most vehicles.
Wrap the disconnected terminal in a rag so it does not accidentally touch the battery post.
Step 2: Cover Sensitive Components
This step is non-negotiable. Take the time to bag every component that should not get wet.
- Alternator. Cover it completely with a plastic bag or aluminum foil. Secure it with tape or a rubber band.
- Air intake opening. Stuff a clean rag into the intake tube or tape a plastic bag over the filter housing opening. Do not forget this. Water entering the intake is the fastest way to destroy an engine.
- Fuse box. Even with the lid on, wrap the entire fuse box housing in plastic. Tape the edges.
- Exposed electrical connectors. If you see any connectors that look unsealed or cracked, cover them individually.
- Aftermarket components. Any non-factory wiring, amplifiers, or sensors need protection.
If you are unsure whether a component is sensitive, cover it. Redundant protection costs nothing. A replacement alternator costs hundreds.
There is a separate guide on what to remove before washing the engine that covers components like battery covers, engine beauty covers, and loose trim pieces that trap water.
Step 3: Apply Degreaser the Right Way
Start with a dry engine bay. Spray the degreaser onto the greasy areas first. Begin at the bottom and work your way up.
This prevents the degreaser from dripping onto already clean surfaces and drying into streaks.
Focus on the valve covers, the oil filler neck area, and anywhere you see visible oil seepage. Avoid spraying directly onto the alternator or fuse box even if they are covered. Spraying them is unnecessary and increases risk.
Let the degreaser sit for three to five minutes. Do not let it dry completely. If it starts looking dry, mist it lightly with water to keep it active.
Step 4: Agitate Without Damaging
Use your soft-bristle detail brush to work the degreaser into the grime. Gentle circular motions are enough. You do not need to scrub hard.
The degreaser does the chemical work. The brush just helps it reach every surface.
Pay attention to crevices between hoses and around brackets. These are the areas where oil and dirt build up into thick sludge. A longer reach brush helps here.
Do not use a stiff wire brush or a scouring pad. These scratch plastic and remove paint from metal brackets. Keep it soft.
Step 5: Rinse With Care
Switch your hose nozzle to a shower or mist setting. Do not use a concentrated jet stream. Keep the pressure low enough that water runs off surfaces rather than blasting into gaps.
Rinse from the top down. Start at the highest point of the engine bay and work your way around. Let the water carry the degreaser and loosened grime downward and out.
Avoid pointing the nozzle directly at any covered component. Even with plastic bags, the force of a direct spray can push water past the seals. Keep a safe distance of at least 12 inches from all electrical components.
If you are using a pressure washer, your maximum safe PSI for the engine bay should not exceed 1200 PSI, and you should use a 40-degree or wider nozzle tip.
Step 6: Dry Thoroughly Before Starting
This is the step most people rush. Do not.
Remove all the plastic bags and covers. Use compressed air to blow out every electrical connector, crevice, and recessed area you can reach. Pay special attention to the spark plug wells, the fuse box base, and around the battery tray.
Use a clean microfiber towel to dry all accessible surfaces. Open the hood and let the engine bay air dry for 15 to 30 minutes. The goal is zero standing water anywhere.
Reconnect the negative battery terminal. Start the engine and let it idle for a few minutes. The heat will evaporate any remaining moisture.
Listen for unusual sounds like belt squeal or misfires. If everything sounds normal, you are good to go.

Image source: Bing (Web (fair-use with source credit))
Common Mistakes That Cost People Money
Let us look at the errors that mechanics see most often. These are not theoretical. They happen every week in driveways across the country.
Using a Pressure Washer on Full Blast
A pressure washer on its highest setting forces water past seals that a garden hose could never breach. The seals on spark plug tubes, electrical connectors, and the alternator are designed to handle rain and road splash. They are not designed to handle a 2000 PSI direct spray.
If you must use a pressure washer, keep the nozzle at least two feet from any component. Use the widest spray pattern. Never aim directly at the alternator, fuse box, or intake.
Washing a Hot Engine
This mistake is surprisingly common. People finish a drive, pop the hood while the engine is still hot, and start spraying. The thermal shock can crack exhaust manifolds and cylinder heads.
The rapid cooling also causes steam that forces moisture into areas it would not normally reach.
Let the engine cool. There is no shortcut here.
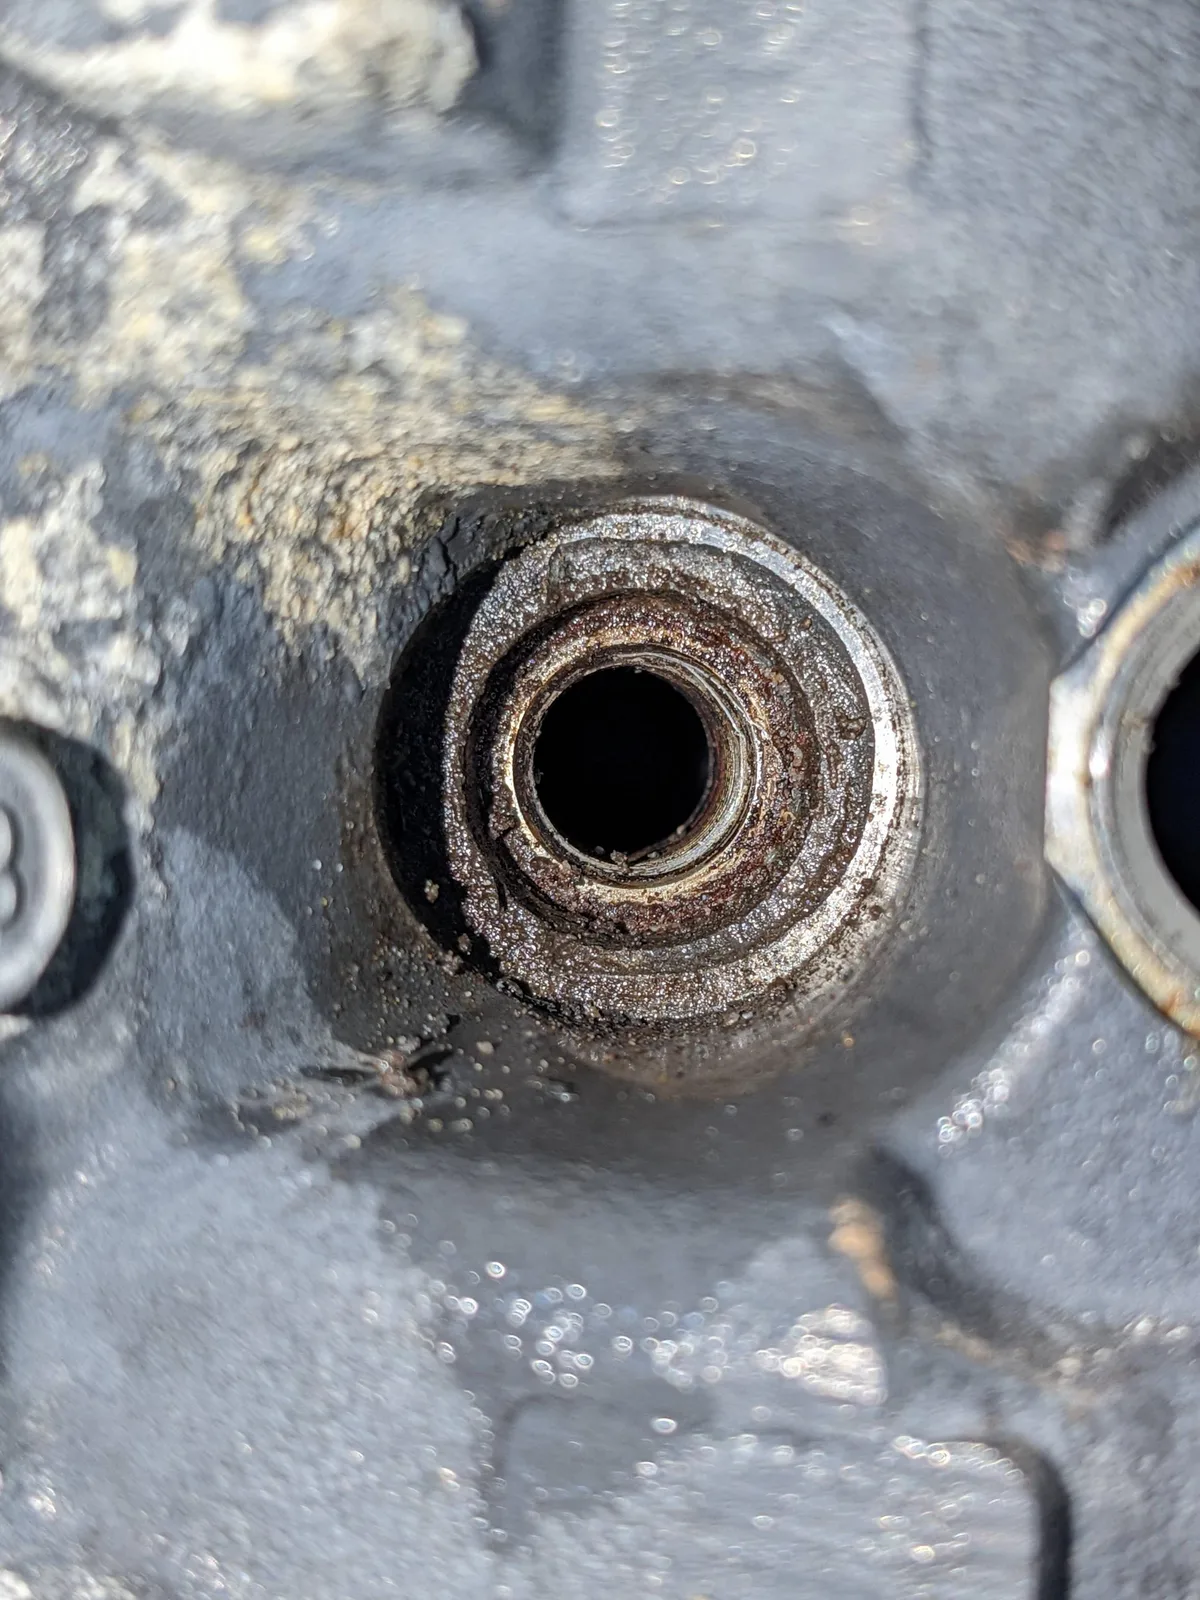
Image source: Bing (Web (fair-use with source credit))
Skipping the Drying Step
Water left sitting in connectors causes corrosion over time. The check-engine light might not come on immediately. It comes on three weeks later when the copper pins have turned green and the connection fails.
Compressed air is the best tool for drying. If you do not have an air compressor, use a leaf blower or a shop vac set to blow mode. Just get the water out.
Using the Wrong Cleaner
Dish soap is too alkaline for engine bay components. It strips protective coatings from plastic and rubber. Solvent-based cleaners evaporate too quickly and leave a residue that attracts more dirt.
What works on paint does not always work under the hood. Stick to an engine-specific degreaser.
Forgetting to Reconnect Everything
It sounds ridiculous, but people forget to remove rags from the intake or reconnect the battery before starting the engine. Double-check that every cover is removed and every connector is plugged back in before you turn the key.
When to Call a Pro Instead of DIY
Some engines should be cleaned by someone who does this for a living.
You Have Electronic Suspension or Hybrid Components
Many modern luxury vehicles have air suspension compressors, ride-height sensors, and high-voltage cables under the hood. Water intrusion in these systems is expensive. A professional detailer who specializes in engine bay cleaning knows which components to avoid and how to work around them.
Your Engine Bay Has Heavy Oil Sludge
If the grime is thick enough that you cannot see the valve cover bolts, you have a different problem. The sludge likely means there is an oil leak that has been ignored for too long. A degreaser and a brush will not fix the underlying issue.
Wash the engine only after the leak is repaired. Otherwise, you are just cleaning up the symptom.
You Are Not Comfortable With the Process
If reading through the steps in this guide made you nervous, trust that instinct. A professional engine bay steam cleaning costs between $75 and $150. That is cheaper than a single sensor replacement.
Paying a pro once is better than paying a mechanic later.
How Often Should You Wash Your Engine
There is no universal schedule. It depends on where you drive and what you drive.
| Driving Condition | Recommended Frequency |
|---|---|
| Normal street driving, garage kept | Once every 12 to 18 months |
| Off-road or dusty conditions | Every 6 months |
| City driving with frequent stop-and-go | Once a year |
| Leak diagnosis needed | Before and after repair |
| Pre-sale preparation | One time before listing |
Overwashing is not helpful. Each wash carries inherent risk, even when done carefully. Wash only when there is a real reason.
Visual cleanliness alone is not a sufficient reason for most drivers.
Quick Decision Guide: Can You Wash It Yourself?
| If this is true… | Then… |
|---|---|
| Engine is cold, no known leaks, stock components | DIY is safe with proper precautions |
| Check-engine light is already on | Diagnose first. Do not wash until the code is resolved |
| You have hybrid or high-voltage components | Call a pro who specializes in those systems |
| Heavy oil sludge covering the engine | Fix the leak first. Wash after repair |
| Aftermarket intake or wiring | Cover everything. If unsure, call a pro |
| You just want a cleaner bay, no mechanical issues | DIY with the step-by-step method above |
If you notice cracked or faded plastic components after the wash, a plastic trim restoration treatment brings them back without replacing parts.
The Bottom Line
An engine wash is not complicated. But it demands respect for the electronics and seals under that hood. Cover what matters.
Use low pressure. Dry everything. And if something feels off, stop and call someone who does this every day.
A clean engine bay makes diagnostics easier and your car look cared for. Just make sure you do not create new problems while solving old ones.