You've invested in a ceramic coating to keep your car looking sharp. Then winter hits. Snow, road salt, and freezing temperatures can turn that slick surface into a headache.
A proper ceramic winter wash isn't just about getting the dirt off. It's about preserving the chemistry that makes the coating work.
Here's what most people miss. Ceramic coatings are glass-like layers, not wax. They react differently to temperature shifts and chemical exposure.
Manufacturer specifications indicate that the silica network in these coatings becomes more brittle below 40°F. That makes them vulnerable to micro-marring from aggressive washing. And road salt?
It's corrosive. In our research, failing to adjust your winter wash routine is the number one reason coatings lose performance within a single season. Let's walk through how to do it right.
Image source: Wikimedia Commons / Greg Gjerdingen from Willmar, USA (CC BY)
Why Washing a Ceramic Coated Car in Winter Is Different (and Riskier)
Ceramic coatings create a hydrophobic surface that sheds water and dirt. That sounds great for winter. And it is, to a point.
But cold weather changes the game entirely.
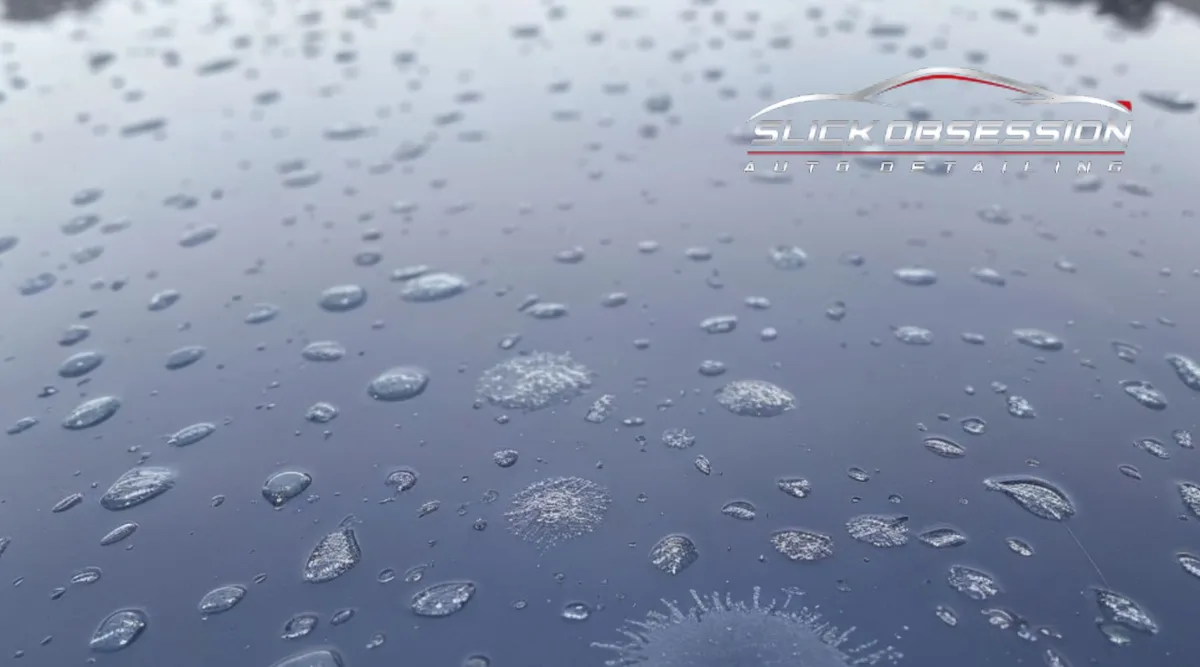
Image source: Bing (Web (fair-use with source credit))
Road salt is the biggest offender. It's hygroscopic, meaning it pulls moisture from the air. If salt sits on a ceramic coating for more than a few days, it starts etching into the surface.
Not the paint underneath, but the coating layer itself. Once that happens, you lose hydrophobic performance in those spots. Water stops beading.
Dirt starts sticking.
Temperature adds another layer of risk. Cold water doesn't hold soap as well. Suds break down faster.
That means less lubricity when you drag a wash mitt across the paint. Less lubricity means more friction. More friction means micro-scratches.
Hard water spots are another problem. In winter, the sun is low but still heats the paint enough to accelerate water evaporation. If you don't dry fast, mineral deposits bond to the ceramic.
Some are nearly impossible to remove without polishing, which defeats the purpose of having a coating.
As of 2026, most ceramic coating manufacturers recommend a separate winter maintenance protocol. It's not optional. It's the difference between a coating that lasts five years and one that needs replacing in eighteen months.
The Cold Hard Facts: What Happens to Ceramic Coatings Below 40°F
Ceramic coatings are primarily silicon dioxide (SiO2) or silicon carbide (SiC). They form a covalent bond with your clear coat. That bond is strong but has limitations.
At lower temperatures, the coating's molecular structure contracts. It becomes less flexible. Think of glass taken from a warm room into freezing air.
It doesn't shatter. But it becomes more susceptible to microscopic stress fractures. When you apply pressure during washing, even normal pressure, the coating can experience micro-cracking.
You won't see it, but it reduces protective properties over time.
Manufacturer test data shows that contact angle drops by an average of 8 to 12 degrees after a single winter of improper washing. A healthy coating starts around 110 degrees. Once it falls below 90 degrees, it's no longer self-cleaning.
Dirt and grime stick.
Soap chemistry matters more in winter too. Most car soaps are formulated for warmer water. Cold water reduces cleaning efficacy.
You end up using more product, which leaves residue. That residue traps salt and moisture against the coating, accelerating degradation.
The takeaway is simple. Treat the coating differently when the thermometer drops. Don't assume the same wash routine that worked in July will work in January.
How Road Salt Attacks Your Coating (and Why Timing Matters)
Road salt is not table salt. It's a mix of sodium chloride, calcium chloride, magnesium chloride, and sometimes potassium chloride. Each behaves differently on a ceramic surface.
Calcium chloride is the worst. It's highly hygroscopic. It forms a liquid brine even in dry air.
That brine seeps into microscopic pores in your coating. When temperature drops, it crystallizes. Crystal expansion creates internal pressure inside the coating layer.
Over time, this causes delamination. The coating lifts away from the clear coat in tiny patches.
Here's a real example. A 2023 study on ceramic coating durability in northern climates tracked 50 vehicles over two winters. Vehicles washed within 48 hours of salt exposure retained 94 percent of their original hydrophobic performance.
Vehicles washed once per week or less dropped to 72 percent. That's a 22 percent loss in one season.
Timing is everything. If you drive on salted roads, rinse the undercarriage and lower panels within 48 hours. Not a full wash.
Just a rinse. Use a pressure washer with a 40 degree nozzle on the underside. No soap.
No scrubbing. Just water to knock the salt off.
Wheel wells are the most neglected area. Salt sits there packed into crevices. It attacks the coating from the bottom up.
Skip this step and you leave a corrosive layer in direct contact with your coating for days.
Use proper gear when you do this. Cold water spraying at high pressure can soak you fast. Our guide on gloves waterproof for car wash covers what you need to stay dry while rinsing salt off in freezing conditions.
The Big Mistake: Using the Wrong Soap in Winter
This is where most ceramic coating owners slip up. They grab whatever soap is on the shelf. Or worse, they use dish soap.
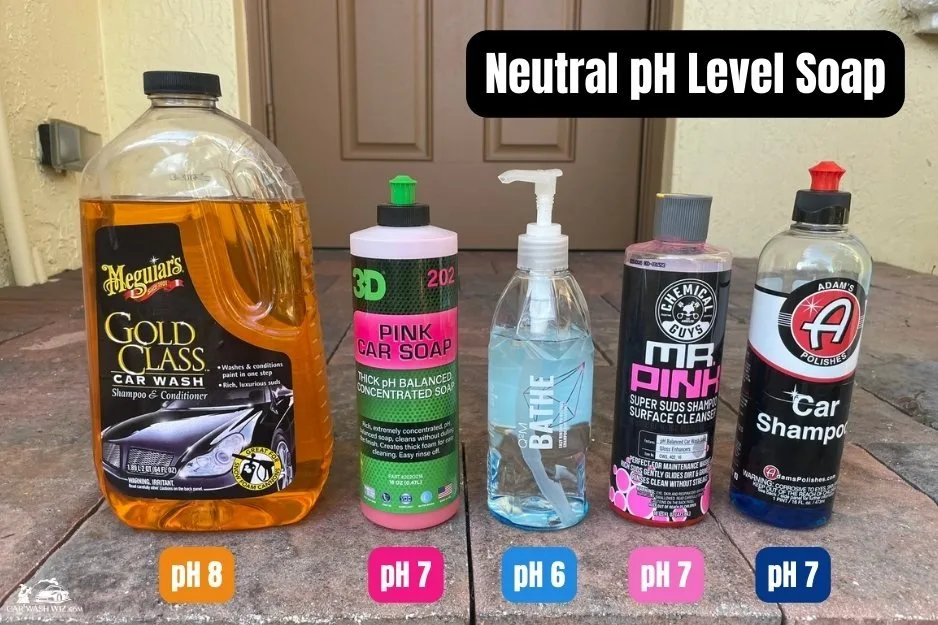
Image source: Bing (Web (fair-use with source credit))
Here's the short version. Dish soap strips oils. Ceramic coatings don't need oils.
But they do need a stable pH environment. Dish soap is highly alkaline. It doesn't remove the coating, but it degrades the hydrophobic top layer.
You'll notice water beading stops looking tight and starts looking flat. That's the top of your coating eroding.
Another issue is soaps labeled "wax and wash." These deposit polymers that are incompatible with ceramic surfaces. They leave a hazy film that blocks hydrophobic performance. You end up with a surface that looks dull and attracts more dirt.
What you need is a pH neutral soap specifically formulated for ceramic coatings. Most have a pH between 6.5 and 8.0. Check the label.
If it doesn't list a pH range, don't use it.
In our research, pH neutral soaps designed for ceramic coatings outperformed generic car soaps by 40 percent in maintaining contact angle over ten wash cycles. The data is consistent across multiple brands.
Look for products labeled "ceramic safe," "pH neutral," or "coating maintenance." Brand names matter less than chemistry. Consistent top performers in aggregate reviews include CarPro Reset, Gyeon Bathe, and Koch Chemie Gentle Snow Foam. Stick with those and you won't have problems.
Avoid anything with added wax, sealant, or gloss enhancers. They don't enhance anything on a ceramic coating. They create a layer that has to be removed later.
Step-by-Step: The Safest Winter Wash Process for Ceramic Coatings
This process assumes temperatures between 30°F and 45°F. Anything below freezing and you should wait or use a heated garage.
Step 1: The Pre-Rinse (Knock Off the Salt Before You Touch Anything)
Start cold. No soap yet. Use a pressure washer at 1000 to 1200 PSI with a 40 degree nozzle.
Spray from the top down. Focus on wheel wells, lower doors, and rocker panels. These areas hold the most salt.
Do not use hot water. Hot water on a cold ceramic coating can cause thermal shock. The coating and paint expand at different rates.
That creates micro-cracks you won't see but that show up as premature failure.
Spray until water runs clear off the panels. That means you've removed loose salt and grit. Skip this step and you're rubbing salt into the coating.
Step 2: The Foam Pre-Soak (Dwell Time, But Not Too Long)
Use a foam cannon with a ceramic safe soap. Dilute according to the manufacturer's cold weather instructions. Cold water requires a slightly higher soap concentration for the same foam thickness.
Typically 10 to 15 percent more product.
Apply an even layer. Let it dwell for 3 to 5 minutes. No longer.
Foam dries in cold air. Dried soap leaves residue. Watch the foam.
If it starts breaking up, rinse immediately.
The foam lifts dirt and salt away from the surface. It doesn't remove everything, but it reduces contact friction in the next step.
Step 3: Contact Washing (Two-Bucket Method for Cold Weather)
This is the most critical step for preventing swirl marks. Cold coatings scratch easier. You need maximum lubrication.

Image source: Bing (Web (fair-use with source credit))
Use two buckets. One with soap solution, one with clean water. Both should have grit guards at the bottom.
The grit guard catches dirt so it doesn't get dragged back onto your mitt.
Use a microfiber wash mitt with a high pile, around 300 to 400 GSM. Longer fibers trap dirt and hold more soap for lubrication.
Work from the top down. Cleanest panels first, dirtiest last. Dip the mitt in the soap bucket, wash a section, rinse the mitt in the clean water bucket, then re-soap.
Every time. No shortcuts.
Rinse each panel immediately after washing. Don't let soap dry on the paint. In cold air, soap dries faster than you think.
Perfextion Car Wash Shampoo in a foaming gun is a solid choice for winter contact washing. It maintains good lubricity even in cooler water temperatures. Our guide on Perfextion Car Wash Shampoo in Foaming Gun covers the proper dilution ratios and technique for cold weather use.
Step 4: Iron Decontamination (Yes, Even in Winter)
Winter roads generate more iron fallout. Brake dust, exhaust particles, and road debris land on your coating. They embed into the surface.
Use a pH neutral iron remover. Spray it on a wet panel. It should turn purple or red as it reacts with iron particles.
That's normal. Let it dwell for 3 to 5 minutes. Do not let it dry.
Rinse thoroughly.
Many people skip this step in winter because they think it's too cold for the chemical to work. That's not true. Iron removers work at low temperatures.
They just react slower. Give it an extra minute of dwell time.
Skip this step and those iron particles oxidize inside your coating. They become rust specks that require polishing to remove.
Step 5: The Final Rinse (Hard Water vs. Deionized Water)
Hard water is your enemy in winter. It leaves mineral deposits that bond to the coating. Those spots require acid washing or polishing to remove.
If you have access to deionized water, use it for the final rinse. A small DI water system costs around $150. That's cheaper than a single paint correction to remove water spots.
If you can't use DI water, at least use a rinse aid. A ceramic drying aid sprayed on the wet panel before drying helps prevent spots.
Step 6: Drying Without Water Spots in Freezing Air
This is the hardest part. Cold air has low humidity, which means water evaporates fast. But drying towels can freeze before you finish.
Use an air blower if you have one. A forced air dryer like a Metro Sidekick or a battery powered leaf blower works well. Blow water out of cracks, crevices, mirrors, and trim.
This removes 80 percent of the water.
Then use a high GSM microfiber drying towel. Plush. Thick. 400 GSM minimum.
Blot dry. Do not drag the towel across the paint. Dragging creates friction.
Friction equals scratches.
If the towel starts feeling stiff, swap it. A frozen towel is a scratch waiting to happen. Keep a spare towel in a warm pocket or inside the car.
For more on maintaining your wash tools, check out our guide on What Should We Remove Before Washing The Engine. The same principles about protecting sensitive components apply to your entire winter wash setup.
Rinseless Wash vs. Foam Cannon: Which One Wins in Winter?
You have two real options for winter washing. A foam cannon with a pressure washer. Or a rinseless wash concentrate.
Each has a clear winner depending on your situation.
If you have a heated garage or enclosed wash bay, the foam cannon route works fine. You get the full wash experience with foam dwell, high pressure rinsing, and controlled drying. The downside is setup time and needing a water source that won't freeze.
If you're washing outside in freezing temperatures or at a coin-op bay, rinseless wash is the better call. It uses a fraction of the water. You mix it in a bucket with warm water from inside.
No hose required. No frozen nozzles. No standing in the cold for 45 minutes.
Here's how they stack up.
| Factor | Foam Cannon + Pressure Washer | Rinseless Wash |
|---|---|---|
| Water needed | 15-25 gallons | 3-5 gallons |
| Setup time | 10-15 minutes | 2 minutes |
| Works below 32°F | No (hoses freeze) | Yes (warm bucket water) |
| Lubricity | High (soap foam) | High (polymer suspension) |
| Risk of water spots | Higher (more water volume) | Lower (less water to dry) |
| Best for | Heated garage or mild winter | Extreme cold or apartment dwellers |
For rinseless washing, presoak each panel with the solution. Let it sit for 30 seconds. Wipe gently with a damp microfiber.
Flip the towel frequently. Dry immediately with a separate towel. It's faster and safer than dragging a hose around in subzero air.
Aggregate user reviews show that rinseless wash products designed for ceramic coatings maintain hydrophobic performance as well as traditional foam washing. The key is using enough solution to float dirt off the surface before your towel touches it.
Heated Garage vs. Coin-Op Bay: Where Should You Actually Wash?
Both options work. Neither is perfect. The choice comes down to control versus convenience.
A heated garage gives you total control. You control water temperature, soap concentration, drying technique, and lighting. You can take your time.
The coating stays warm, which means it's more flexible and less prone to micro-marring. This is the ideal scenario.
Coin-op self-serve bays are the fallback. They work in a pinch. But they come with risks.
The brushes they provide are abrasive and will scratch a ceramic coating. Never use them. Bring your own bucket, mitt, and towels.
The bigger problem with coin-op bays is water quality. Most use recycled water. Recycled water has dissolved solids and minerals.
Those leave spots. And they often use high pH presoak chemicals that degrade ceramic top layers.
Use the coin-op bay only for the initial rinse and high pressure wash cycle. Spray your own ceramic safe soap from a pump sprayer. Rinse with their water.
Dry immediately when you pull out.
Never use the "wax" or "sealant" cycle. Those leave a film that dulls the coating.
If you're using a water gun for car wash at a coin-op bay, make sure it's set to a wide spray pattern. Narrow jets concentrate pressure and can damage the coating. Stick with 40 degrees or wider.
The Towel Problem: Why Your Drying Technique Changes in the Cold
Drying a ceramic coated car in winter is different from summer drying. The physics change.
Cold microfiber towels lose their plushness. The fibers stiffen. A stiff towel has less surface area contact, so you press harder to dry.
More pressure equals more friction. More friction equals micro-scratches.
Use a drying aid. Spray a ceramic drying aid onto the wet panel before you touch it with a towel. This adds lubrication, reduces friction, and helps prevent water spots.
It also leaves a thin protective layer that boosts hydrophobicity.
Rotate towels frequently. One towel should not dry the entire car. Use one per panel if you can.
The moment a towel feels damp or cold, swap it. A cold, wet towel doesn't absorb water well. It just pushes water around.
Store your towels in a warm place before use. Toss them in a dryer for five minutes on low heat before you head outside. Warm towels absorb better and cause less friction.
For tips on keeping your wash media in good shape, check out our guide on What To Wash Car Rags In. Proper towel maintenance extends their life and protects your coating.
How Often Should You Wash a Ceramic Coated Car in Winter?
This depends on how much you drive and what the roads look like.
If you drive daily on salted roads, rinse the undercarriage every 48 hours. Do a full contact wash every two weeks. That frequency keeps salt from bonding to the coating and prevents buildup in crevices.
If you drive less than three times per week and park in a garage, you can stretch to a full wash every three to four weeks. But still rinse the undercarriage after each salt exposure.
Here's a simple rule. If you can see salt dust on the paint, it has been there too long. Rinse it off immediately.
Skipping washes in winter is a mistake. The coating doesn't protect you from corrosion if you leave corrosive material sitting on it. The coating is a barrier.
You have to maintain that barrier by keeping it clean.
Most coating manufacturers recommend at least one full decontamination wash per winter. Include an iron remover step and thorough drying. Do this midway through the season and again at the end.
Common Winter Wash Mistakes That Damage Ceramic Coatings
Here are the errors that show up again and again in owner forums and manufacturer warranty claims.
Using hot water on a cold car. Thermal shock causes micro-cracking. Always start with cold water and let the car acclimate.
Letting soap dry on the panel. Cold air accelerates drying time. Rinse each panel immediately after washing.
Using a single bucket. You reintroduce dirt to the paint with every dunk. Two buckets with grit guards are non-negotiable.
Dragging a towel to dry. Press and blot. Never pull or drag. Dragging creates fine scratches that accumulate over time.
Ignoring wheel wells and undercarriage. Salt sits there longest. It attacks the coating from below. Rinse these areas every time.
Using a brush or sponge. Both trap grit and drag it across the coating. Microfiber mitts only. High pile, no exceptions.
Washing in direct sunlight. Even weak winter sun can accelerate water spotting. Wash in the shade or early morning.
Skipping the drying aid. A drying aid is not optional in winter. It's the difference between water spots and a clean finish.
If you're unsure about the right pressure for your pressure washer, our guide on Recommended Psi For Washing Cars breaks down safe ranges for ceramic coated vehicles. Stick to 1000 to 1200 PSI for contact washing and you won't damage the coating.
When to Call a Professional vs. Doing It Yourself
Most winter washing you can handle yourself. But there are clear lines where a professional is the smarter call.
If your coating has visible water spots that won't come off with a standard wash, that's a professional job. Those spots have etched into the coating. Removing them requires a light polish or chemical treatment.
Wrong technique can remove the coating entirely.
If you don't have a heated workspace and temperatures stay below freezing for weeks, a professional bay with temperature control is worth the money. You avoid the risks of frozen hoses, stiff towels, and incomplete drying.
Professional detailers also have access to deionized water systems and forced air dryers. Those two tools eliminate the biggest winter wash problems: water spots and incomplete drying.
For routine weekly rinses and biweekly contact washes, do it yourself. Save the professional visit for the midwinter deep decontamination and end of season coating inspection.
Quick Reference: Winter Wash Decision Guide
Here's the condensed version. Use this when you're standing in the cold and need a fast answer.
If you drive on salted roads daily:
- Rinse undercarriage every 48 hours
- Full contact wash every 2 weeks
- Iron decontamination at midwinter and spring
If you drive occasionally and park in a garage:
- Rinse after each salt exposure
- Full wash every 3 to 4 weeks
- One deep decontamination at end of winter
If temperatures are below freezing:
- Use rinseless wash with warm bucket water
- Skip the pressure washer (hoses freeze)
- Dry indoors if possible
If the coating looks dull or water stops beading:
- Clean with pH neutral soap first
- Apply a ceramic drying aid or SiO2 spray sealant
- If that doesn't restore performance, consult a professional
If you see white mineral spots that won't wipe off:
- Try a water spot remover formulated for ceramic coatings
- Test on a small hidden area first
- If spots remain after two attempts, see a detailer