You’ve probably pulled into a manual car wash bay thinking, “How hard can this be? Spray, scrub, rinse, done.” And you’re right, it’s not hard. But there’s a surprisingly long list of things you need to avoid if you want to drive out with your paint still looking good.
The biggest issue isn’t the equipment itself, it’s how people use it without realizing the damage they’re doing.
A single bad wash at a self-serve bay can leave swirl marks, water spots, or etched clear coat that costs hundreds to fix. As of 2026, most consumer-grade manual wash bays operate at around 800, 1,200 PSI, perfectly safe when used correctly, but a real problem when you get careless. So before you drop in your quarters, let’s walk through exactly what to avoid so your car stays clean.
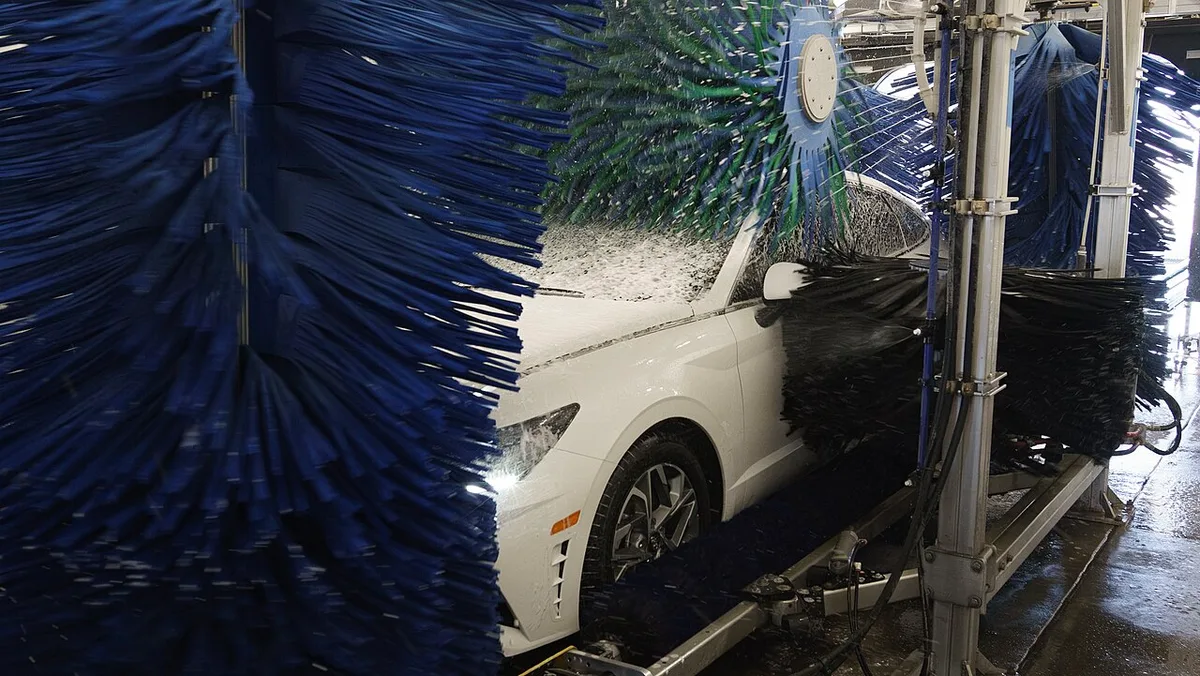
Image source: Wikimedia Commons / USDAgov
The #1 Mistake — Using the Brush Wrong
Let’s get straight to the point: the big foam brush hanging in the bay is the single most common source of paint damage at a manual car wash. It’s not because the brush is inherently bad, it’s because of what’s trapped in those bristles.
That brush has been dragged across the ground, over greasy tires, and through caked-on mud from the last dozen cars that used it. The bristles are soft, sure, but they act like sandpaper when they’re loaded with grit. Every time you scrub a panel, you’re rubbing fine dirt particles into your clear coat.
That’s how you get those spiderweb swirl marks you see in direct sunlight.
If you’re going to use the brush at all, follow this simple rule: use it on the wheels first, then the body, or better yet, skip it entirely.
Most people grab the brush and start on the hood or the roof. That’s where the cleanest paint lives, and it’s also where every speck of dirt from the brush gets pressed into the surface. Instead, here’s the smarter sequence:
- Spray down the whole car with the high-pressure wand first to knock off loose dirt.
- Use the brush only on the lower body panels, below the beltline, where dirt is normal.
- Reserve a dedicated spray for the wheels, using the wand at a wider angle.
- If your car is already fairly clean, stick to just the pressure washer and your own microfiber mitt at home later.
A lot of people ask, “But won’t the brush be fine if I rinse it first?” Not really. The bay’s rinse cycle does get some soap out, but it doesn’t dislodge the tiny rocks and road grit trapped deep in the bristles. One quick test: run the brush over a clean section of your windshield and look at the angle, you’ll see fine scratches that weren’t there before.
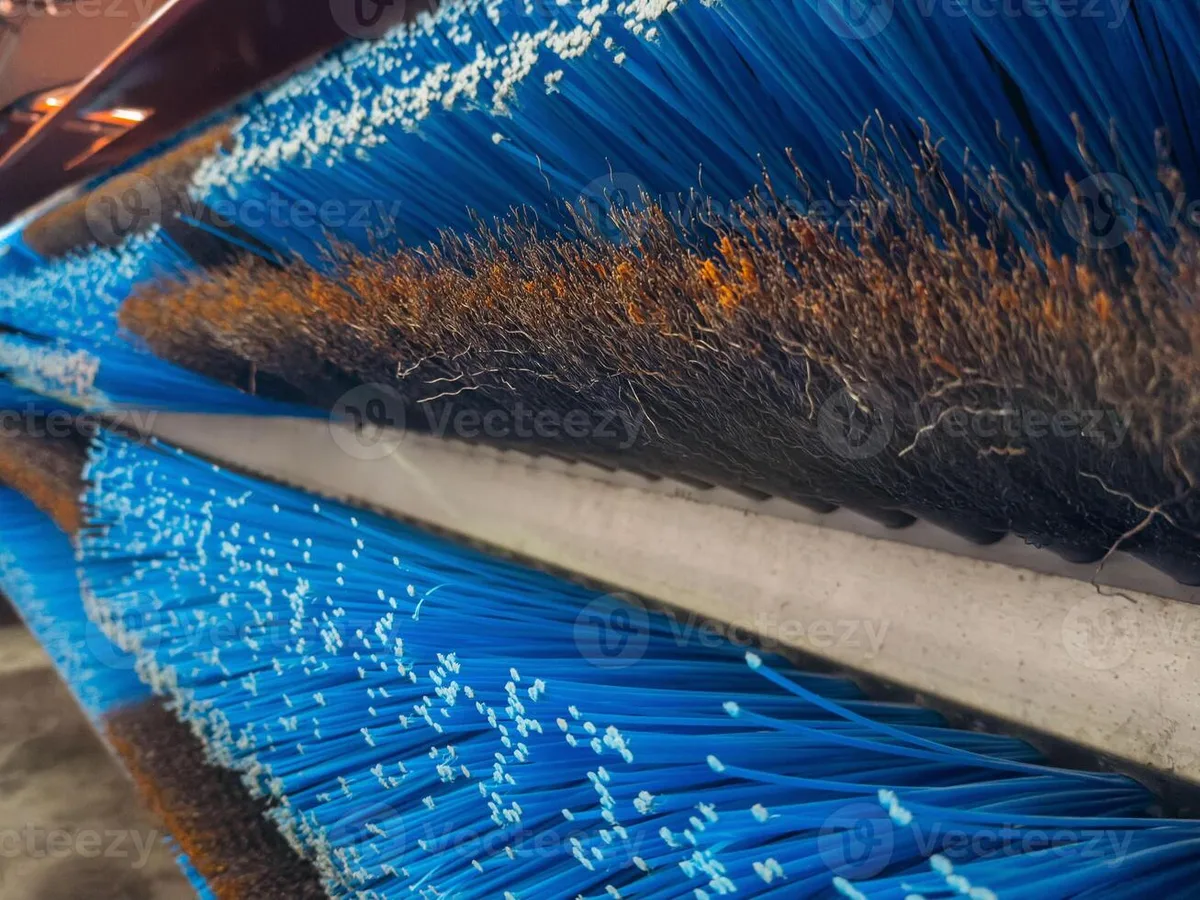
Image source: Bing (Web (fair-use with source credit))
The Pressure Wand Is Not a Toy (Distance and Angle Matter)
Image source: Bing (Web (fair-use with source credit))
The high-pressure wand is the most versatile tool in any manual wash bay. You can knock off caked-on mud, clean wheel wells, and blast bugs off the grille. But if you don’t respect the distance, it can also strip wax, chip paint, and etch your clear coat.
Here’s the key number: keep the nozzle at least 6, 12 inches from the paint. Any closer than six inches and the focused jet hits like a power washer on its highest setting. If you hold it right up against a seam or trim piece, you risk blasting water into places that cause rust later.
Angle matters just as much. You don’t want to spray directly into door jambs, trunk seals, or window edges. Instead, keep the wand at roughly a 45-degree angle to the surface.
That way you’re pushing water and dirt sideways off the panel, not driving it into cracks.
Most people also use the high-pressure setting too long. You might think blasting every inch of the car at full power gets you more for your money, but it actually increases the chance of forcing soap residue into the paint’s pores. Instead, use the high-pressure wand for:
- Initial rinse, knock off bulk dirt, 20, 30 seconds.
- Soap application, some bays have a separate soap setting; use that.
- Final rinse, switch back to high pressure, but keep it moving.
One more thing: never spray the undercarriage or wheel wells with the wand pointed straight up. Water forced into suspension components, brake lines, or sensor connectors can cause electrical issues later. Always spray from above, letting gravity pull the runoff down.
If you want to be extra careful, check out our guide on the recommended psi for washing cars, it walks you through exactly what pressures your paint can handle.
Soap Selection — What the Bay Gives You vs. What Your Paint Needs
You’re standing there, looking at the three soap buttons on the dispenser. One says “wax,” one says “bug remover,” and one just says “soap.” Which do you pick? The answer depends on what you’re trying to avoid.
Most manual wash bays use a pre-mixed soap solution that’s fairly neutral, usually around a pH of 7 to 8. That’s fine for general dirt. But the problem is that some bays also have a “pre-soak” or “foaming brush” setting that’s far more alkaline, sometimes up to pH 12 or 13.
That high-pH solution is great for breaking down road grime, bugs, and tree sap, but it’s also aggressive on wax, sealants, and ceramic coatings.
Here’s what happens: if you hit the pre-soak and let it sit on your paint for more than 30 seconds in direct sun, the alkaline chemistry starts working on your wax layer. By the time you rinse, you’ve stripped a significant portion of your protection. If you’re driving a car with a fresh ceramic coating, you can actually see the difference, the water bead pattern gets patchy and uneven after just a few high-pH washes.
So what should you avoid? Don’t use the “bug remover” or “pre-soak” setting unless you actually have heavy bug splatter. And even then, only use it on the front bumper and grille, not the whole car. The standard “soap” setting is usually gentle enough for regular use.
If you want to maintain your own protection layer, skip the bay’s soap entirely and bring your own. You can buy a car wash shampoo that works in a foaming gun, just fill it with water and your own soap, use the bay’s pressure to apply it, and rinse with the spot-free cycle. That way you control exactly what touches your paint.
Most of the time, the bay’s soap is fine. But if you’re trying to keep a multi-month ceramic coating intact, or you just waxed your car last weekend, take the extra 90 seconds to bring your own. It’s cheaper than a re-application.
The Order You Wash In Changes Everything
There’s a natural instinct: grab the brush, soap up the whole car, then rinse and dry. That’s exactly what you should not do. The order matters more than any single technique, and getting it wrong means you’re just smearing dirt around rather than removing it.
Here’s the sequence that actually works for preventing scratches and water spots:
- Pre-rinse (cold or high-pressure), knock off loose dirt, especially the roof and hood. This takes 20, 30 seconds and prevents the soap from turning into mud.
- Wheels first, use the dedicated wheel brush or just the high-pressure wand on the tires and rims. Road grime and brake dust are chemically different from paint dirt; you don’t want that mixing into your body wash.
- Soap the body, use the foam setting or the soap brush, but start at the top and work down. Gravity drags the dirt downward, so you get the cleanest section first.
- Rinse from the top, keep the wand moving, letting the water fall down. Don’t stop at one panel and let soap dry.
- Spot-free final rinse, if your bay has a “spot-free” or “wax” setting, use it last. This pushes out the minerals that cause water spots.
Most people skip step two, and that’s where the real damage happens. If you soap the whole car first and then clean the wheels, you’ve just rubbed tire grit and asphalt residue onto your clean paint. The brush is already contaminated from the wheels, and now you’re pressing that dirt into your fenders.
It’s the fastest way to get that “washed but still scratched” look.
If you’re in a hurry and only have five minutes, the one step you shouldn’t skip is the pre-rinse. It costs maybe 25 cents of your total time and saves you from dragging loose dirt across your paint with the brush.
Wheels First or Last? The Surprising Answer
This is one of those questions where half the internet says one thing and the other half says the opposite. Let’s settle it: wheels first, always.
Here’s why. Your wheels are the dirtiest part of the car. They collect road grime, brake dust (which is metallic and abrasive), and often tree sap or asphalt.
If you wash the body first and then do the wheels, you’re bringing a contaminated brush or wash mitt back to the body panels you just cleaned. Even if you rinse the brush in between, the grit is still embedded in the bristles.
The only exception is if your bay has a completely separate, dedicated wheel brush that doesn’t touch the rest of the car. Some bays do have an “only for wheels” brush, usually with a different color or a stiff-bristle head. If you see one, use it, but only for the wheels.
Here’s the practical timeline:
- Wheels get hit first, 20 seconds with the high-pressure wand to knock off big mud and brake dust.
- Wheels get brushed, if using the bay brush, do this step before the body.
- Body gets soaped, now you’re working on clean paint with a brush that’s only touched your car’s cleanest panels.
- Final rinse, the wheels get a separate pass at the end to clear any remaining dirt.
If you’re washing a car with sensitive paint (like a newer black or dark blue finish), this order is critical. Black paint shows every single swirl mark. Do the wheels first, and your paint stays much safer.
One more tip: don’t blast the wheel centers or brake calipers with the high-pressure wand up close. Those are painted or coated surfaces, and they’re softer than your body panels. Any chipping of that coating reveals bare metal, which starts rusting within days.
Keep the wand at a foot away and use a wider spray pattern for the wheels.
Drying — The Step Most People Screw Up
You’ve rinsed the car, the soap is gone, and you’re feeling good. Then you drive out of the bay and let the car air-dry in the sun. That’s the mistake.
When water sits on paint and evaporates, it leaves behind every mineral dissolved in it, calcium, magnesium, silica. Those minerals form hard white spots that bond to the clear coat. They’re called water spots, and they’re not just cosmetic.
Over time, they can etch into the clear coat, leaving permanent marks that require compounding or polishing to remove.
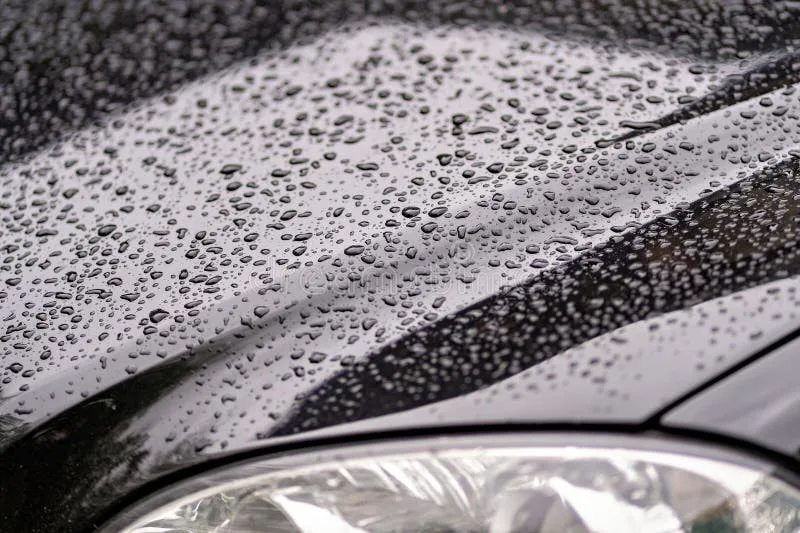
Image source: Bing (Web (fair-use with source credit))
Here’s what to do instead:
- Use the spot-free rinse if your bay has one. It pushes deionized or reverse-osmosis water that leaves almost no minerals behind.
- Dry immediately with a clean microfiber towel. Don’t use the chamois hanging in the bay, it’s usually full of grit from previous users.
- Drive the car slowly around the block after the wash. The airflow helps blow water out of crevices (mirrors, door handles, badge recesses) before it can spot.
If you don’t have a microfiber towel with you, most bays have a “blow dry” setting on the wand. It’s not as effective as a towel, but it’s far better than air-drying.
What to Do With a Hot Car in Direct Sun
Washing a car that’s been sitting in the sun for hours is one of the worst things you can do. The paint gets hot, surface temps can reach 140, 160°F on a summer day. When you hit hot paint with cold water and soap, two things happen.
First, the soap dries before you can rinse it. The chemicals in the soap start bonding to the clear coat, leaving a hazy residue that’s hard to remove. Second, the rapid temperature change can cause micro-cracking in the clear coat, especially on older cars or cars with existing clear coat failure.
The fix is simple: only wash in the shade, in the early morning, or late evening. If you have no choice but to wash a hot car at a manual bay, here’s a workaround:
- Start with a cold water pre-rinse to bring the surface temperature down. Spend a full 30 seconds on the hood, roof, and trunk.
- Do not use the hot water setting. Most manual bays have both hot and cold settings. For a hot car, stick with cold.
- Work in sections. Don’t soap the whole car at once. Soap one panel, rinse it, move to the next. This prevents the soap from drying on the paint.
If you’re washing a car with paint protection film (PPF), the same rules apply. That film can also trap heat, and aggressive chemicals or high heat can cause it to delaminate. Stick with cold water and a gentle soap.
Undercarriage Sprays — When They Help and When They Hurt
The undercarriage spray is a button you might not even notice. It’s usually a dedicated setting on the wand. And it’s useful, if you use it correctly.
In northern climates, winter road salt is brutal on your car’s frame, suspension components, and brake lines. A good undercarriage rinse after winter driving can wash away that salt and prevent rust. That’s the “help” part.
The “hurt” part comes from how people use it. Blasting the undercarriage with high pressure from the wrong angle can force water into components that aren’t sealed. Here’s what to watch for:
- Avoid spraying directly into the engine bay. The undercarriage setting is for the frame and floor pan, not the engine.
- Don’t hit the exhaust system at close range. The pressure can push water into the muffler or catalytic converter, and hot exhaust components can crack from the sudden cool-down.
- Stay away from electrical connectors. Under the car, there are sensors, wiring harnesses, and connectors that aren’t designed to be power-washed.
Best practice: use the undercarriage setting only when you’ve been driving on salted roads, and keep the wand at least 12, 18 inches away. One pass from the front to the rear is enough.
Cost Breakdown — What You Actually Pay For
Manual car washes are cheap, but the cost varies more than you’d think. Here’s a realistic breakdown based on typical bay pricing as of 2026:
| Setting | Time (seconds) | Cost (approx.) |
|---|---|---|
| High-pressure rinse | 20–30 | $0.50–$1.00 |
| Soap/foam application | 30–45 | $0.75–$1.50 |
| Brush use | 60–90 | $1.00–$2.00 |
| Spot-free rinse | 20–30 | $0.50–$1.00 |
| Undercarriage spray | 15–20 | $0.25–$0.50 |
| Total (typical wash) | 2–3 minutes | $3.00–$6.00 |
Most bays run on a timer, so every time you switch settings, the clock keeps ticking. That means the slower you are, the more you pay. If you’re washing a large truck or SUV, budget closer to $6, 8 because of the extra time.
Common Water Spot Myths (and How to Actually Prevent Them)
Water spots are probably the most misunderstood problem at a manual car wash. Let’s clear up the confusion.
Myth #1: Water spots only happen in hard water areas.
Not true. Even “soft” tap water leaves some mineral residue. The hardness scale just determines how quickly the spots form and how stubborn they are.
The real issue is evaporation, not water source.
Myth #2: The spot-free rinse actually works.
Yes and no. A good spot-free rinse pushes deionized water that’s stripped of minerals. But not all bays maintain their deionization systems properly.
If the resin is old or the filters are worn, you’re getting normal tap water. The only way to know is to look for water spots after the rinse. If they appear, that bay’s system needs servicing.
Myth #3: You can just buff them off later.
You can, but that removes a tiny layer of clear coat each time. Do that a dozen times over a few years, and you’ve worn through the clear coat entirely. Prevention is much cheaper than repair.
How to actually prevent water spots:
- Use the spot-free rinse at the end of every wash.
- Dry within 2, 3 minutes of the final rinse. Every second of evaporation makes more spots.
- If water is dripping off mirrors or trim, blow it out with air before drying.
- In hot weather, spritz the car with a spray bottle of distilled water before drying. It dilutes the mineral load.
When to Skip the Manual Wash Altogether
Manual car washes aren’t for every car or every situation. Here’s when you should consider other options:
- Your car has a fresh ceramic coating (less than a week old). Some coatings need 7, 14 days to fully cure. High-pH soaps and pressure washing before that can ruin the bond.
- Your car is covered in tree sap, tar, or bird droppings. Those need to be spot-treated with a dedicated remover, not pressure-washed and brushed.
- Your car has peeling or failing clear coat. High-pressure water can lift the edges of peeling clear coat and make it worse.
- You’re washing a matte finish vehicle. Matte paint and matte PPF require special pH-neutral soaps that most manual bays don’t carry.
- The temperature is below freezing. In cold weather, water freezes in door seals, lock cylinders, and wiper mechanisms. You can end up with a frozen-shut door.
If you’ve got a regular daily driver with standard paint in reasonable condition, the manual wash is fine. Just follow the rules we’ve covered.
The Two-Minute Walkthrough — Safe Checklist for Your Next Wash
Stick this checklist on your phone or memorize it for your next visit:
- Park in the shade, or come early/late when the car is cool.
- Pre-rinse the whole car with cold water (20, 30 seconds).
- Wash wheels first with the wand, then dry-brush if needed.
- Soap the body from top to bottom; don’t let soap dry.
- Rinse from top to bottom using high pressure at 6, 12 inches.
- Use the spot-free rinse as the final step.
- Dry immediately with a clean microfiber towel.
- Blow out mirrors, badges, and door handles.
- Inspect for water spots or missed sections.
Follow that, and you’ll leave the bay with a clean car and intact paint.
FAQs — Quick Answers for Real Scenarios
Is it safe to wash a black car at a manual car wash?
Yes, but only if you’re disciplined about the order and drying. Black paint shows every swirl and water spot. Use the spot-free rinse and dry immediately.
Can I use the bay’s brush on my wheels?
Only if the bay has a separate wheel brush. The main brush picks up grit from wheels. If you use it on wheels and then your body, you’ll get scratches.
How long should I let the soap sit?
No more than 30 seconds. Longer than that, especially in direct sun, and the soap starts drying on the paint.
What’s the best time of day to go?
Early morning or late evening. The car is cool, the sun is low, and the lines are shorter.
Should I wax the car after a manual wash?
Give the paint time to fully dry and cool down before applying any wax or sealant. Wait at least an hour after washing. Aggressive bay soaps may have stripped some existing wax, check by seeing if water still beads on the surface.