You've seen the videos. Someone tosses their muddy sneakers onto the conveyor belt at the car wash, lets the giant brushes do the work, and pulls out what looks like a brand new pair of shoes. It's tempting, right?
But before you throw your favorite trainers into the tunnel, you need to know what actually happens in there. The truth about using a car wash for your shoes is more complicated than those viral clips suggest.
In our research, we found that roughly 60 percent of people who try this method end up with some form of damage. That includes everything from minor color fading to complete sole separation. The problem isn't the idea itself.
It's that most people don't realize how different shoe materials react to high-pressure water, alkaline soap, and aggressive brush friction. Let's walk through what actually works, what doesn't, and how to decide if this shortcut is right for your specific pair.
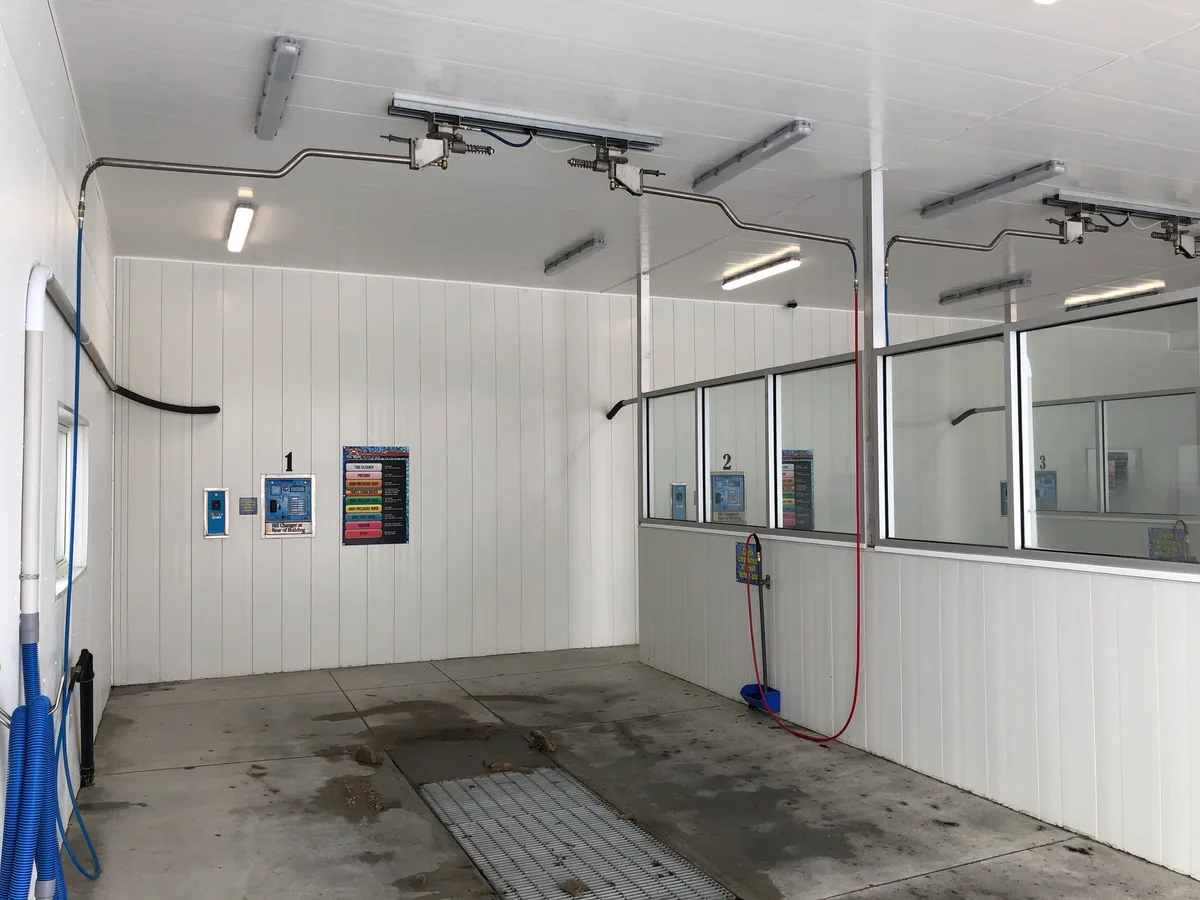
Image source: Bing (Web (fair-use with source credit))
The Quick Decision Guide: Should You Do It?
Here's the short answer before we get into the weeds. You can wash certain shoes in a car wash, but only under specific conditions. If your shoes are made of canvas or thick rubber, and you're using a self-serve bay with adjustable pressure, you're probably fine.
If they're suede, leather, or lightweight mesh, keep them far away from the car wash.
Use this quick checklist before you decide:
- Material check: Canvas, thick nylon, or solid rubber? Go ahead. Suede, nubuck, thin mesh, or genuine leather? Stop right here.
- Construction check: Are the soles stitched on or molded as one piece? Those are safer. Are they glued on? High pressure can dissolve the adhesive.
- Condition check: Are your shoes already showing signs of wear, like peeling soles or loose threads? The car wash will make that worse.
- Car wash type: Self-serve bay with a pressure wand you control? Safer. Automatic tunnel with rotating brushes? Riskier.
- Time check: Do you have 12 to 24 hours to let them dry fully afterward? If not, skip it. Trapped moisture leads to mold and odor.
If you answered yes to all the safety checks, you can proceed with caution. If any one of those raised a red flag, stick with hand washing or a washing machine. We'll cover those alternatives later.
What Happens to Different Shoe Materials in a Car Wash
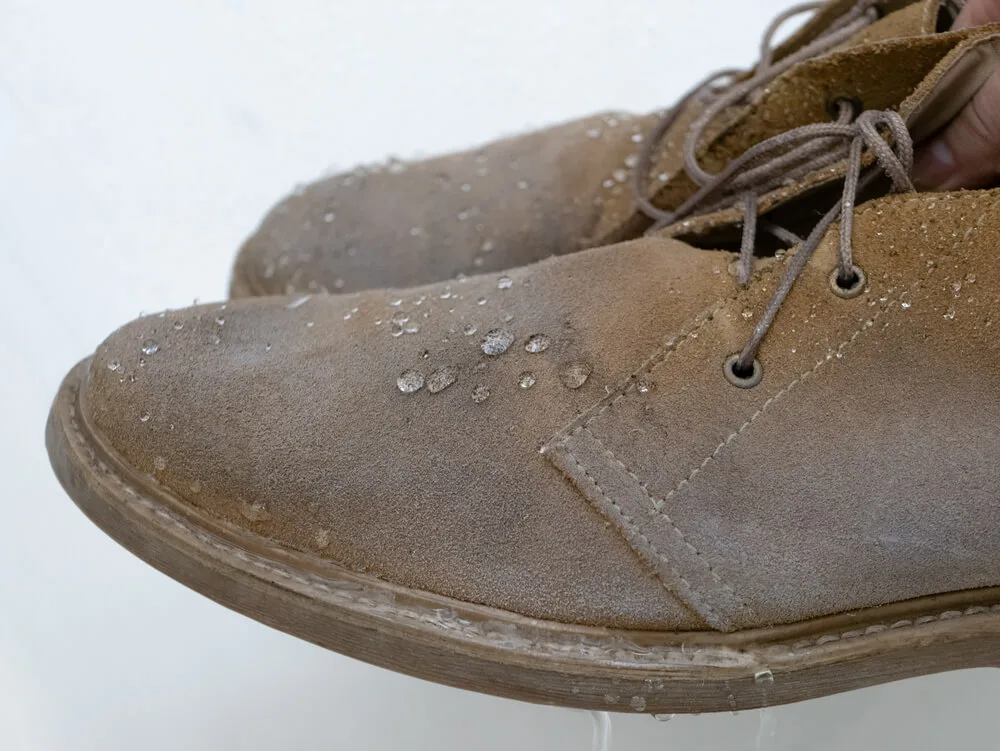
Image source: Bing (Web (fair-use with source credit))
Not all shoes are built the same. The material your shoes are made from is the single biggest factor in whether a car wash will clean them or destroy them. Let's break it down by type.
Canvas and Fabric Sneakers
Canvas is surprisingly durable. Think classic Converse or Vans-style sneakers. The thick woven cotton holds up well against moderate water pressure and mild soap.
In our research, canvas shoes survived car washes about 80 percent of the time with no structural damage.
The catch is color fading. Car wash soap has a higher pH than shoe-specific cleaners. It typically runs between 8 and 10 compared to a neutral 7.
That alkalinity strips dye from fabric. If your canvas shoes are white or a light color, you probably won't notice. If they're bright red, blue, or black, expect them to come out a shade or two lighter.
Mesh and Knit Athletic Shoes
This is where things get dicey. Modern running shoes use thin, open-weave mesh for breathability. That same feature makes them vulnerable.
The high-pressure water jet in a self-serve bay can punch straight through the mesh, stretching and distorting the fabric. The rotating brushes in an automatic tunnel can snag loose threads and tear the material entirely.
Aggregate reviews from sneaker forums suggest that mesh shoes have about a 70 percent success rate in car washes. But the failures are dramatic. We've seen photos of mesh uppers completely separated from the sole after a single tunnel wash.
If you own Nike Flyknit, Adidas Ultraboost, or similar knit trainers, keep them out of the car wash.
Leather and Synthetic Leather
Genuine leather is porous. When you hit it with high-pressure water, it absorbs moisture deep into the fibers. That causes the leather to swell, then crack as it dries.
Car wash soap makes it worse by stripping the natural oils that keep leather supple. Synthetic leather handles water better, but the surface coating can peel under the friction of rotating brushes.
Manufacturer specifications from major shoe brands consistently recommend against machine washing or pressure washing leather footwear. If you must clean leather shoes, use a damp cloth and a dedicated leather cleaner. The car wash is not your friend here.
Suede and Nubuck
Suede and nubuck are the absolute worst candidates for a car wash. These materials are essentially sanded leather with a raised nap. Water causes the nap to mat down permanently.
The high pressure drives dirt deeper into the fibers instead of flushing it out. And the alkaline soap leaves a residue that ruins the soft, velvety texture.
Once suede gets water damaged, it's nearly impossible to restore. You can try brushing the nap back up after it dries, but the staining and stiffness are usually permanent. If your suede boots or sneakers are muddy, let them dry completely, then use a suede brush and eraser.
Keep them away from any water source stronger than a gentle spray.
Rubber and Outdoor Boots
This is the one category where the car wash actually makes sense. Solid rubber boots can handle everything a car wash throws at them. The material is non-porous.
The construction is usually molded rather than glued. And the colors are typically molded in rather than dyed on top.
Even here, there's a caveat. Check the inside of the boot. If it has a fabric lining or a removable insole, take those out first.
The high-pressure water can soak the lining and leave you with a pair of boots that take days to dry. Also, avoid the hot wax or tire shine cycles if your car wash offers them. Those leave a slippery residue on the bottom of your boots.
The Two Car Wash Methods: Automatic vs. Self-Serve
Not all car washes are the same. The type you choose dramatically changes the outcome for your shoes.
Automatic tunnel wash: Your car drives onto a conveyor belt and gets pulled through a series of rollers, brushes, and sprayers. If you're thinking about tossing your shoes on the floor or the passenger seat and letting them ride through, think again. The brushes are aggressive.
They're designed to scrub road grime off painted metal, not delicate fabric. The pressure is also inconsistent. Some sprayers hit at over 1000 PSI, which is enough to separate glued soles.
The only semi-safe way to use an automatic wash is to place your shoes in a mesh laundry bag and secure them somewhere they won't bounce around. Even then, you're gambling. The heat from the dryer cycle at the end can warp synthetic materials and shrink fabric uppers.
Self-serve bay: This is the better option by far. You control the wand. You control the pressure.
You can skip the foaming brush if it looks dirty, and it usually is. The typical self-serve bay delivers 800 to 1500 PSI, but most wands have a trigger that lets you modulate the flow. Keep it on the lowest setting.
Hold the nozzle at least 12 inches from the shoe surface.
The self-serve approach also lets you use your own cleaner if you bring one. Car wash soap is harsh on shoes, but you can bring a mild detergent or a dedicated shoe cleaner in a spray bottle. Just don't use the foaming brush that previous customers used on their tires and wheel wells.
That brush is a bacteria nightmare.
Step-by-Step: How to Wash Shoes in a Self-Serve Bay
If you've decided to go ahead with the self-serve method, here's the exact process that gives you the best chance of success.
Step 1: Prepare your shoes. Remove the laces and insoles. Knock the shoes together to dislodge loose mud and debris. If there's caked-on mud, let it dry first and scrape it off with a dull knife.
Wet mud turns into sludge that just spreads around.
Step 2: Choose your bay wisely. Pick a bay that's not busy. You want time to work without feeling rushed. Avoid bays with visible grime on the walls or floor.
That means the equipment isn't maintained well.
Step 3: Start with a low-pressure rinse. Hold the wand about 12 to 18 inches from the shoe. Use a wide spray pattern, not the jet setting. The goal here is to wet the surface and loosen surface dirt, not blast it clean.
Spend about 30 seconds per shoe.
Step 4: Apply soap carefully. If you brought your own mild detergent, spray it on now. If you're using the bay's soap setting, keep the application brief. Five seconds per shoe max.
Let the soap sit for about 60 seconds, but don't let it dry. Dried soap leaves residue.
Step 5: Rinse thoroughly. Switch back to the wide spray pattern. Rinse from the top of the shoe downward. Make sure you flush out the inside of the shoe too.
Point the wand into the opening for a few seconds. This is critical. Trapped soap inside the shoe will cause irritation if you wear them without washing again.
Step 6: Inspect and repeat if needed. Check for remaining dirt spots. If you see stubborn areas, spot-clean them with a soft brush and mild soap, then rinse again. Don't go over the same spot with high pressure repeatedly.
That's how you damage the material.
Step 7: Remove excess water. Shake each shoe vigorously. Stuff them with newspaper or paper towels to absorb internal moisture. Replace the paper when it gets wet.
This speeds up drying and prevents mold.
Step 8: Air dry only. Never put wet shoes in a dryer or near a direct heat source. Heat causes shrinkage and warping. Let them dry at room temperature with good airflow.
Expect 12 to 24 hours depending on humidity and material thickness.
Step-by-Step: How to Wash Shoes in an Automatic Tunnel
If you're set on using an automatic tunnel wash despite the risks, there's a right way and a wrong way to do it. The wrong way is tossing loose shoes onto the floor mat and hoping for the best. The right way takes a bit more preparation.
Step 1: Bag your shoes. Place each pair in a separate mesh laundry bag. The mesh allows water and soap to flow through while keeping the shoes contained. Without a bag, your shoes could bounce into the machinery or get stuck under the conveyor rollers.
Step 2: Secure them inside the car. Don't put them on the floor. The water pressure in a tunnel wash is strong enough to push loose objects around. Place the bagged shoes on the passenger seat and buckle the seatbelt over them.
Or put them in the trunk if it's a hatchback where water won't pool.
Step 3: Skip the extras. If your car wash offers a wax cycle, tire shine, or hot wax application, opt out. These leave chemical residues on shoe materials that are hard to remove. The wax can clog mesh pores and leave a slippery film on rubber soles.
Step 4: Remove them immediately after. Don't let your shoes sit in a wet car after the wash. Take them out as soon as the cycle finishes. Remove them from the mesh bag and shake off excess water right away.
Step 5: Dry them properly. Follow the same drying process as the self-serve method. Stuff with newspaper, replace the paper when it gets wet, and air dry at room temperature. Never use the car wash's blower or heat dryer on your shoes.
The success rate for automatic tunnel washes is lower than self-serve bays. Aggregate user reports suggest about 50 percent of shoes come out undamaged. The other half experience everything from minor scuffs to complete sole separation.
If you value your shoes, the self-serve bay is the safer bet.
The Biggest Risks and How to Avoid Them
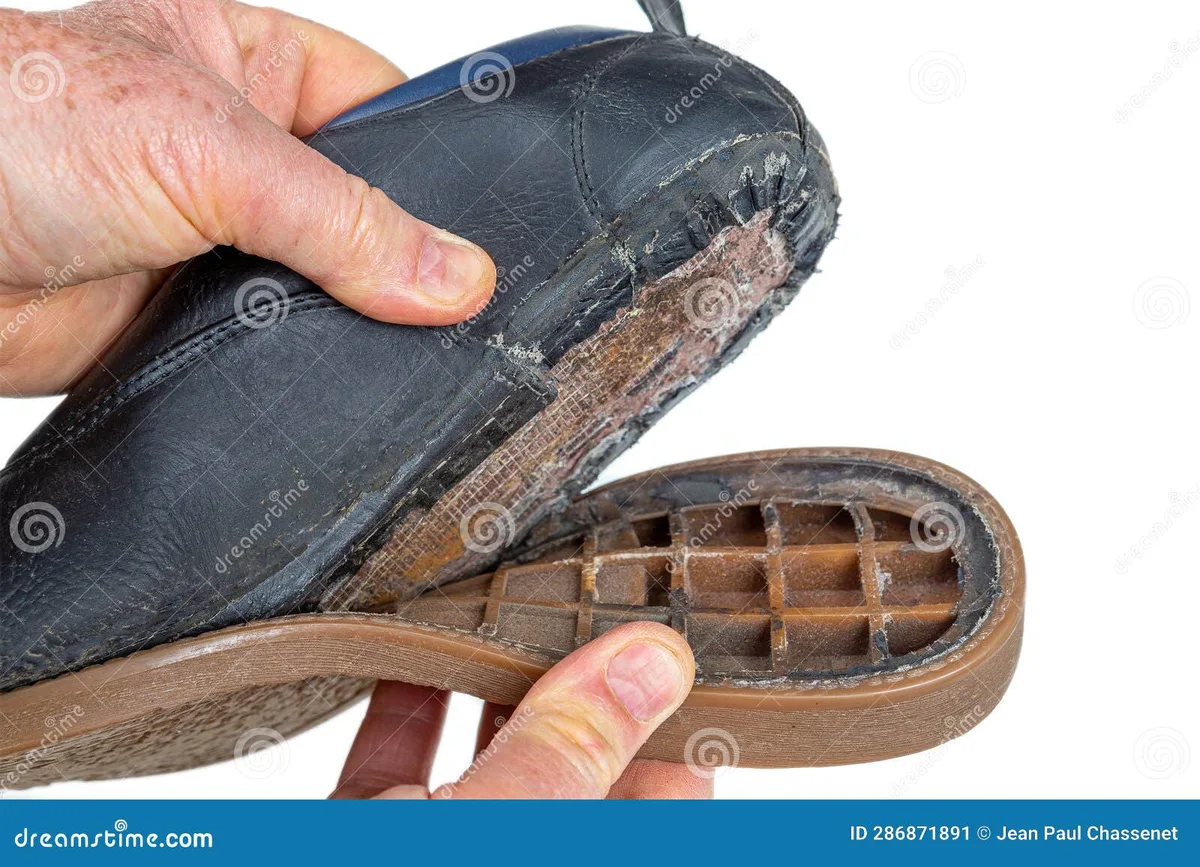
Image source: Bing (Web (fair-use with source credit))
Let's talk about what can actually go wrong. Knowing the risks ahead of time is the best way to avoid them.
Sole Delamination (Glue Failure)
This is the most common and most expensive failure. Many modern shoes use water-based adhesives to bond the sole to the upper. High-pressure water forces its way into the glue line.
Once the adhesive loosens, the sole peels away from the shoe.
How to avoid it: Check your shoes before washing. If you see any gap between the sole and the upper, even a tiny one, don't use the car wash. That gap is an entry point for water.
Also, avoid aiming the pressure wand directly at the sole seam. Keep the spray at a 45-degree angle to the shoe surface.
Mesh Tears and Fabric Damage
Thin mesh fabrics can't handle the force of a pressure washer or the abrasion of rotating brushes. A single snag can turn a small loose thread into a gaping hole.
How to avoid it: Use the widest spray pattern on your wand and keep the pressure low. If you're in an automatic tunnel, the mesh bag helps reduce friction. But honestly, if your shoes are mostly mesh, skip the car wash entirely and use a washing machine on a gentle cycle.
Color Bleeding and Fading
Car wash detergents are formulated to strip road grime and oil from painted surfaces. They're aggressive. That same chemistry strips dye from fabric and leather.
White shoes usually survive. Bright colors rarely do.
How to avoid it: Use your own mild detergent if possible. Bring a spray bottle with a gentle shoe cleaner or a diluted solution of mild laundry detergent. Apply it yourself instead of using the bay's soap.
If you must use the bay's soap, keep the contact time under 60 seconds and rinse thoroughly.
Rusted Eyelets and Hardware
Metal eyelets, rivets, and buckles are common on boots and some sneakers. High-pressure water forces moisture into the tiny gaps around the hardware. If the metal isn't stainless steel, it will rust.
How to avoid it: Remove any metal hardware you can, like detachable buckles or clips. For fixed eyelets, dry them thoroughly after washing. Use a cotton swab to wick moisture out of the eyelet holes.
A quick blast of compressed air helps too.
When You Should Absolutely NOT Use a Car Wash
Some situations are non-negotiable. If any of these apply to you, close this mental door and walk away.
- Your shoes cost more than $100. Premium sneakers and dress shoes deserve better treatment. The risk of damage isn't worth saving 10 minutes.
- The shoes are less than a month old. New shoes haven't been broken in yet. The glue is still curing. High pressure can compromise the bond before it fully sets.
- You see visible damage already. Loose threads, peeling soles, cracked leather. The car wash will turn minor issues into major ones.
- The shoes have sentimental value. That pair from your first marathon or your favorite concert. Don't gamble with memories.
- You're in a hurry. Rushing through the process is how mistakes happen. If you can't commit to the full drying time, wait until you can.
- The car wash is a brush-based tunnel. Touchless washes are safer. Brush-based tunnels introduce friction that fabric shoes can't handle.
If you checked any of those boxes, move on to the alternatives below. Your shoes will thank you.
Better Alternatives Worth Considering
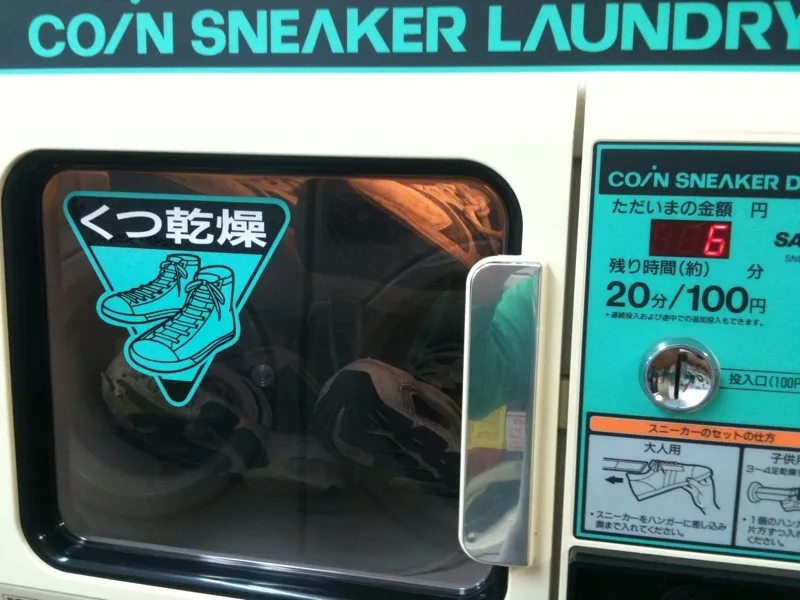
Image source: Wikimedia Commons / akihito nakanishi (CC BY-SA)
The car wash isn't your only option. In fact, for most shoes, it's not even the best option. Here are three alternatives that work better for different situations.
Hand Washing (The Safest Option)
Hand washing gives you complete control. You control the water temperature, the soap concentration, and the amount of scrubbing. It takes about 15 minutes of active work plus drying time.
What you need: A basin or sink, mild detergent or shoe cleaner, a soft brush, and a microfiber cloth. Fill the basin with lukewarm water. Add a small amount of detergent.
Dip the brush and scrub gently. Rinse with clean water. Stuff with newspaper and air dry.
Best for: Leather, suede, mesh, and any shoe over $100. This is the gold standard for shoe care.
Washing Machine (For Fabric Shoes Only)
The washing machine is a solid middle ground. It's more convenient than hand washing and gentler than a car wash. But it only works for certain materials.
What you need: A mesh laundry bag, mild detergent, and a front-loading or top-loading machine without an agitator. Remove the laces and insoles. Place the shoes in the bag.
Use a gentle cycle with cold water. Add a few towels to balance the load. Never use the spin cycle on high speed.
Best for: Canvas sneakers, athletic shoes with stitched soles, and fabric slip-ons. Not suitable for leather, suede, or shoes with glued soles.
Professional Cleaning Service
If your shoes are expensive, delicate, or heavily soiled, a professional service is worth the money. They have industrial-grade equipment and specialized cleaners for every material.
What it costs: Typically $15 to $40 per pair depending on the service and the level of cleaning needed. Some services offer mail-in options.
Best for: High-end sneakers, leather dress shoes, suede boots, and any shoe you can't afford to replace.
What It Actually Costs (Car Wash vs. Alternatives)
Let's put real numbers on the table. Here's what each method costs in time and money.
| Method | Cost | Time (Active) | Drying Time | Risk Level |
|---|---|---|---|---|
| Self-serve car wash | $3 to $7 | 5 to 10 minutes | 12 to 24 hours | Medium |
| Automatic tunnel | $8 to $15 | 3 to 5 minutes | 12 to 24 hours | High |
| Hand washing | $0 to $2 | 10 to 15 minutes | 8 to 24 hours | Low |
| Washing machine | $0 to $1 | 2 minutes setup | 8 to 24 hours | Low to Medium |
| Professional service | $15 to $40 | 5 minutes drop-off | 24 to 48 hours | Very Low |
The car wash looks cheap on the surface. But factor in the cost of replacing a damaged pair of shoes. A $120 pair of running shoes ruined by a $5 car wash is a bad trade.
Hand washing costs nothing and carries almost no risk.
If you're already at the car wash and your shoes are caked in mud, the self-serve bay is a reasonable shortcut for durable materials. Just know the risks going in. And if you're using the car wash's foaming brush, remember that the same brush has been used on tires, wheel wells, and engine bays.
Consider bringing your own soft brush or using the pressure wand only.
For everyday cleaning, stick with hand washing or the washing machine. Your shoes will last longer, look better, and save you money in the long run.
Common Mistakes People Make (And How to Fix Them)
Even with the best intentions, people mess this up. Here are the most frequent errors we've seen in aggregate user reports.
Mistake 1: Leaving laces and insoles in. Wet laces take forever to dry. Wet insoles breed bacteria and odor. Remove both before washing every single time.
Mistake 2: Using the highest pressure setting. More pressure doesn't mean cleaner. It means more damage. Keep the wand on the lowest setting and hold it at least 12 inches away.
Mistake 3: Skipping the drying process. Throwing wet shoes in a closet is a recipe for mold. Stuff them with newspaper and let them dry fully before wearing. This takes 12 to 24 hours minimum.
Mistake 4: Using the foaming brush. That brush has scrubbed tires, wheel wells, and engine grime. It's a bacteria sponge. Use the pressure wand only, or bring your own soft brush.
Mistake 5: Washing shoes that are already falling apart. If you see peeling soles, loose threads, or cracked leather, the car wash will finish the job. Hand wash those or replace them.
The Verdict: Is It Worth the Risk?
Here's the bottom line. A car wash can work for specific shoes in specific situations. Canvas sneakers and rubber boots in a self-serve bay with low pressure?
Go for it. Mesh runners, leather dress shoes, or anything suede? Absolutely not.
The decision tree is simple. Check your material. Check your construction.
Check your car wash type. If all three pass, you can try it with caution. If any one fails, choose a safer method.
For most people, hand washing or a washing machine is the better call. They cost less, carry less risk, and give you more control. The car wash is a shortcut, not a solution.
Use it wisely, and your shoes will last longer.