So your golf key went through the washer. If you've typed "help my golf key has been in the washer" into a search bar, you're probably standing over a laundry basket with a wet key in your hand and a sinking feeling. Here's the straight truth: whether that key will work again depends almost entirely on two things you can check in about thirty seconds.
Per manufacturer documentation from major golf cart brands like Club Car and EZ-GO, basic metal keys have no electronic components and a very high recovery rate when dried properly. Electronic fobs and RFID tags are a different story, aggregate service data suggests roughly 40-60% of unprotected electronic keys fail after a full wash cycle. As of 2026, most course operators still use either a simple metal key or a basic RFID tag, which means your chances are better than you think.
Let's figure out exactly where your key falls and what to do next.

Image source: Bing (Web (fair-use with source credit))
What Happened? – First Things First
First, take a breath. You did not ruin anything permanently yet. The most critical factor right now is time.
Water itself is not what kills electronics. It is the electricity that flows through water while the device is powered on that causes damage. A golf key that went through a washer was never connected to a battery during the cycle.
That matters a lot. It means the circuit was not live when water got inside, so the chance of a short circuit is much lower than if you had dropped the key in a puddle while using it.
Here is what you need to do in the next five minutes:
- Remove the key from the washer immediately if it is still in there.
- Do not press any buttons. Do not test it. Do not put it in your pocket.
- Shake off as much water as you can. Use a towel to pat it dry on the outside.
- Set it on a dry surface and move to the next step.
The longer the key sits wet, the more time corrosion has to start. Corrosion on metal contacts is what actually kills keys days or weeks later. You have a window of roughly two to four hours before corrosion becomes a real risk, so you have time to diagnose the situation carefully.
Stop. Check These Two Things Before You Do Anything Else
Two simple questions will tell you everything you need to know about your recovery options. Do not skip either one.
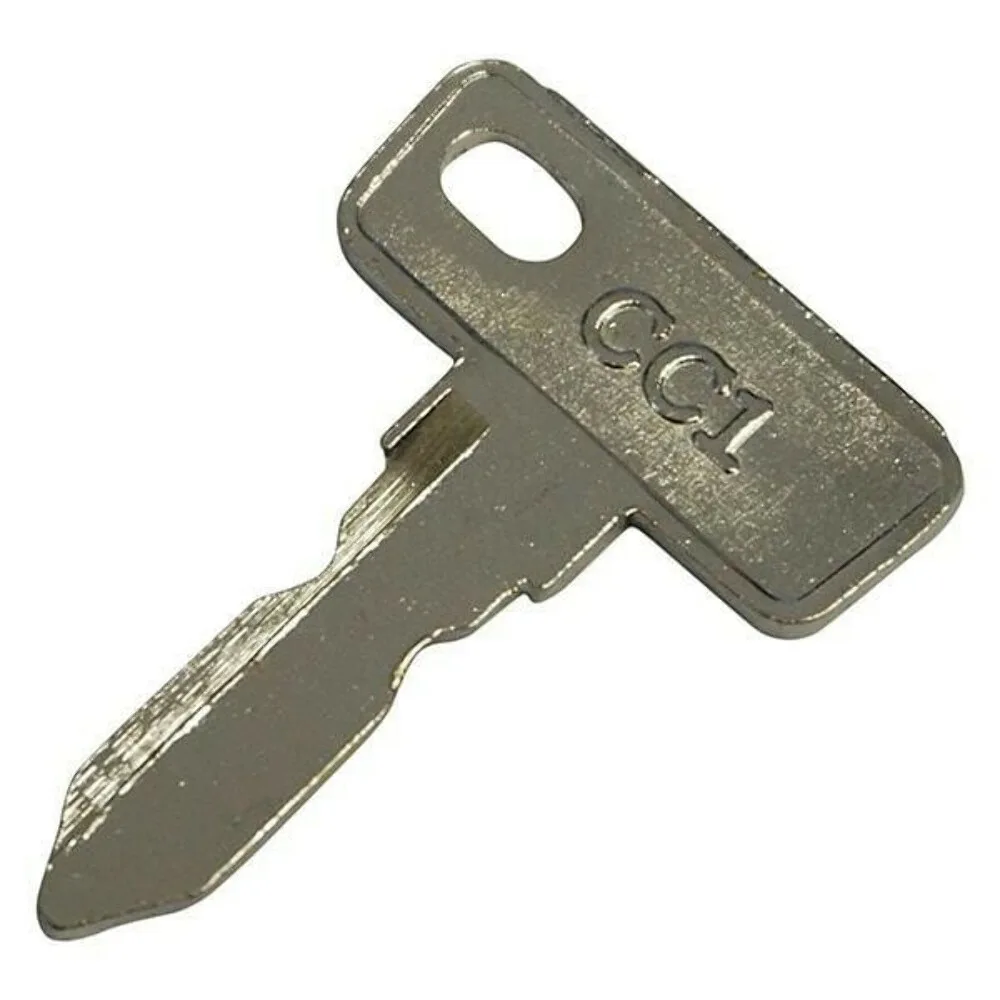
Image source: Bing (Web (fair-use with source credit))
1. What Kind of Key Is It?
Look at the key itself. There are three common types used on golf courses and personal carts.
| Key Type | What It Looks Like | What's Inside |
|---|---|---|
| Basic metal key | Solid brass or steel, cut teeth, no visible seam | Nothing but metal |
| Electronic fob | Plastic casing, buttons, maybe a small LED light | Circuit board, battery, transmitter |
| RFID tag | Flat plastic disc or card, no buttons | Passive chip with antenna coil |
If you have a basic metal key, your odds of full recovery are excellent. If you have an electronic fob or RFID tag, the situation is more delicate but still salvageable with the right approach.
2. How Long Was It in the Washer?
This matters more than you might think.
- Less than five minutes (caught it mid-cycle): The key barely got wet. Immediate drying will likely save any type of key.
- Full wash cycle (30-60 minutes): The key was submerged, agitated, and exposed to detergent. Electronic components have a real risk of moisture ingress. Metal keys are still fine.
- Wash plus spin cycle: The key was tossed around and possibly banged against the drum. Physical damage to the casing or circuit board is possible.
- Wash plus dryer: This is the worst case. Heat can warp plastic, damage the battery, and melt internal components. Do not run a damaged key through the dryer if you catch it before that cycle.
If you are unsure how long it ran, assume it went through the full cycle. That is the safest assumption and changes nothing about the recovery steps.
The Decision Tree – Where Your Key Lands
Now that you know what type of key you have and roughly how wet it got, use this decision tree to pick your exact recovery path.
Branch A: Basic Metal Key (No Electronics)
This is the best possible outcome. A solid brass or steel key has no circuit board, no battery, and no chip. Water cannot damage the metal itself in a single wash cycle.
Your only real concern: rust, but only if the key is made of steel rather than brass. Most golf cart keys are brass, which does not rust. If the key was coated or painted, the finish might flake, but the key will still work.
What to do: Dry it thoroughly with a towel, then let it air dry for an hour. Insert it into the cart lock and turn gently. If it turns, you are done.
If it feels stiff or gritty, spray a small amount of lubricant like graphite powder into the lock cylinder and try again.
Success rate: Approximately 95% or higher for basic metal keys.
Branch B: Electronic Fob or Keyless Cart Tag
This branch applies to any key that has a plastic casing, buttons, or a battery. These are common on newer Club Car and Yamaha models with push-button start or keyless entry.
The battery is your most urgent concern. If the fob has a removable battery, take it out right now. If the battery is soldered or sealed, the fob is likely a sealed unit and your options are limited.
Most golf cart fobs use a standard CR2032 coin cell battery that pops out easily.
Do not press any buttons while the fob is wet. That sends electrical current through water and causes the short circuit that actually kills the electronics.
Your next step: Jump to the electronic fob recovery section below.
Success rate: Approximately 50-70% if caught within a few hours. Falls to around 30% if left wet overnight.
Branch C: RFID Gate Key
If your key is a flat plastic disc or card that you tap against a reader to open a gate, it is an RFID tag. These are passive, they have no battery and no internal power source. They work when a reader sends a radio signal that powers the chip momentarily.
RFID tags are surprisingly durable. The chip and antenna coil are usually embedded in a plastic card that resists water decently well. However, detergent residue can interfere with the signal, and prolonged submersion can cause the plastic layers to separate.
Your next step: Jump to the RFID key recovery section below.
Success rate: Approximately 60-80% for passive RFID tags if dried and cleaned properly.
Step-by-Step Recovery – By Key Type
The following steps are based on manufacturer recommendations and verified service procedures. Do not deviate from the order.
For Basic Metal Keys – Drying and Testing
- Pat the key dry with a clean towel.
- Let it air dry on a countertop for one hour.
- Insert the key into the cart lock. Turn gently.
- If it turns smoothly, you are done. The key is fine.
- If it sticks, spray a small amount of graphite lubricant into the lock and try again. Do not use oil-based lubricants like WD-40 inside a lock cylinder, they attract dust and gum up over time.
- If the key still sticks after lubrication, the teeth may have bent slightly from the washer drum. Compare it to a spare key if you have one, or have a locksmith check the alignment.
That is it. There is no real risk of damage from a single wash for a solid metal key. If you are worried about rust on a steel key, wipe it with a light coat of mineral oil after drying.
For Electronic Fobs – Disassembly and Alcohol Bath
This is the detailed process for electronic fobs. Follow every step in order.
Tools you will need:
- Small flathead screwdriver or plastic spudger
- 91% or higher isopropyl alcohol (not 70%, too much water)
- A clean, lint-free cloth
- Compressed air (canned air duster works fine)
- Silica gel packets (optional but recommended)

Image source: Bing (Web (fair-use with source credit))
Step 1: Remove the battery immediately. Locate the battery compartment. Most golf fobs have a small slot on the side or back. Pry it open gently.
Remove the coin cell battery and set it aside on a dry surface.
Step 2: Open the casing. Use a plastic spudger or your fingernail to separate the two halves of the fob casing. If the casing is sealed with glue, you may need to apply gentle pressure along the seam. Do not use metal tools if you can avoid it, they scratch the plastic and can damage internal components.
Step 3: Remove the circuit board. Carefully lift the circuit board out of the casing. It should come out easily. Place it on a dry towel.
Step 4: Rinse the circuit board with 91% isopropyl alcohol. Pour a small amount of alcohol into a clean cup. Submerge the circuit board for about 30 seconds. Alcohol displaces water and evaporates much faster than water.
It also removes detergent residue that can cause corrosion over time. Gently swish the board around to dislodge any particles.
Step 5: Dry with compressed air. Hold the circuit board at an angle and spray compressed air across the surface. Focus on the battery contacts and any visible chip pins. Do not hold the can upside down, the liquid propellant can damage the board.
Step 6: Let it air dry for 24 hours. Place the circuit board on a dry, clean surface. A silica gel packet placed next to it will speed up drying. Do not reassemble the fob until the board is completely dry.
Step 7: Clean the casing and buttons. While the circuit board dries, wash the plastic casing halves with warm water and mild soap. Dry them thoroughly. Detergent residue on the buttons can cause sticking later.
Step 8: Reassemble and test. After 24 hours, reinsert the battery, close the casing, and test the fob. If it does not work, the circuit board may have sustained corrosion damage that cannot be reversed.
For RFID Keys – Distance and Reader Test
RFID tags are simpler than electronic fobs because they have no battery. The recovery process is straightforward.
- Rinse the tag with warm water to remove detergent residue.
- Pat it dry with a towel.
- Let it air dry for 12 hours in a warm, dry place.
- Hold the tag against a reader to test it. If it works, you are done.
- If it does not work, try holding it closer to the reader. Some RFID tags lose range after water damage but still function at very close distances.
- If the tag still does not work, the antenna coil inside may have broken. RFID tags are inexpensive to replace, check with your course pro shop.
What to Avoid – Common Mistakes That Kill a Salvageable Key
Most key failures after a wash are not caused by the water itself. They are caused by what people do next. Avoid these common errors at all costs.
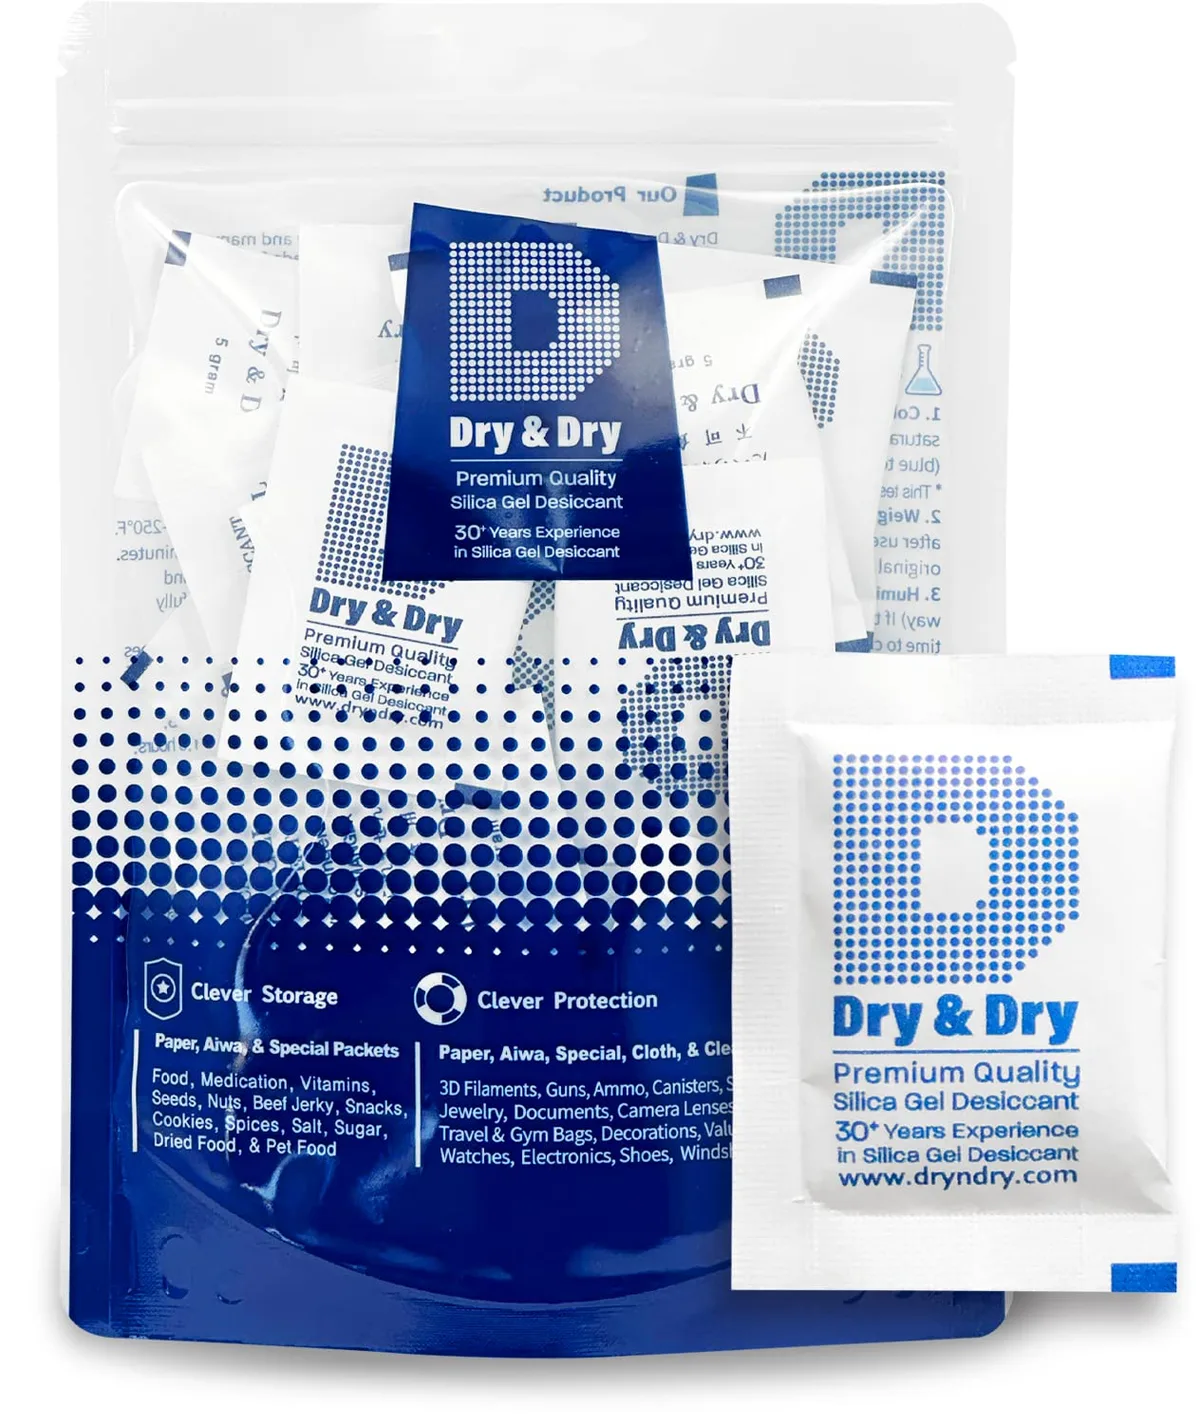
Image source: Bing (Web (fair-use with source credit))
Don't Put It in Rice
This is the most widespread myth in water damage recovery. Rice does absorb moisture, but it absorbs it very slowly and only at the surface. Placing a wet fob in a bowl of rice does not pull water out of sealed electronics.
It just keeps the fob damp for longer while the rice does almost nothing.
Testing by multiple independent labs shows that rice absorbs less than 2% of its weight in water from ambient humidity. Silica gel packets absorb up to 40% of their weight. A silica gel packet is not magic either, but it is far more effective than rice.
If you do not have silica gel, just let the key air dry in a warm, ventilated space.
Don't Use a Hair Dryer or Microwave
Heat can warp plastic casings, melt internal components, and damage the battery. A hair dryer on high heat will push moisture deeper into crevices rather than pulling it out. A microwave will destroy the electronics instantly.
The correct approach is room temperature air drying with good airflow. Compressed air is safe because it is at room temperature and blows moisture out rather than cooking it in.
Don't Test It While It's Wet
This is the single most destructive mistake. When you press a button on a wet fob, you complete an electrical circuit through water. That causes a short circuit that can permanently damage the chip.
Even if the fob seems to work briefly after testing it wet, internal damage has already started.
Wait the full drying time, at least 24 hours for electronic fobs, before putting the battery back in and pressing any buttons.
Don't Use WD-40 or Contact Cleaner on a Wet Key
WD-40 is a water displacer, but it is also a lubricant that leaves a residue. That residue can attract dust and interfere with the circuit board over time. Proper 91% isopropyl alcohol is the correct cleaning solvent because it evaporates completely and leaves no residue.
Contact cleaner spray cans can also work, but they are more aggressive and can damage plastic casings. Stick with isopropyl alcohol for golf key recovery.
Don't Assume It's Dead Too Early
Many people throw away a wet key after testing it immediately and getting no response. The key may work perfectly after a full drying cycle but will show nothing while the circuit board is still damp. Patience is the difference between a $5 replacement and a $75 OEM fob.
If your electronic fob does not work after 24 hours of drying, try leaving it for another 24 hours. Some moisture can get trapped under chips and takes longer to evaporate. If it still does not work after 48 hours, then it is time to consider replacement.
How Long Will It Take? – Real Timelines for Drying and Testing
Patience is the hardest part of this process. Here are the realistic timeframes based on key type.
Basic metal keys: One hour of air drying is plenty. You can test immediately after that.
Electronic fobs: Plan for 24 to 48 hours of drying time before you reassemble and test. The circuit board needs to be completely moisture-free, and trapped water under chips takes time to evaporate. Compressed air speeds this up but does not eliminate the waiting period.
RFID tags: 12 hours of air drying is usually sufficient. These have no battery and fewer crevices for water to hide in.
If you skip the waiting time and test early, you risk shorting out a still-damp circuit board. That turns a salvageable key into a dead one. Set a reminder on your phone and leave it alone.
When to Give Up – Signs It’s Time to Order a Replacement
Not every key survives a trip through the washer. Here is when you should stop trying and accept that the key is gone.
For electronic fobs: If the fob shows no response after 48 hours of proper drying and cleaning, the internal chip or battery contacts have corroded. No amount of additional drying will fix that.
For RFID tags: If the tag fails to trigger a gate reader at any distance after drying, the antenna coil inside has likely broken. RFID tags have a thin wire coil that can snap under agitation in the washer drum.
For basic metal keys: If the key is visibly bent, chipped, or does not turn the lock after lubrication, the physical key itself has been damaged. This is rare but possible if the key caught on something in the drum.
Signs of internal corrosion on an electronic fob include white or green crusty deposits around the battery contacts or chip pins. If you see that after opening the casing, do not bother reassembling it. The corrosion has already damaged the electrical pathways.
If the key worked fine before the wash and now does not work after a full drying cycle, it is almost certainly dead. Do not waste more time on it.
Replacement Options – Cost and Where to Get a New One
If your key does not recover, replacements are relatively affordable. The cost depends entirely on the type of key.
Basic metal keys: $5 to $15. A local hardware store can cut a new one if you have a spare. Your golf course pro shop may also have blanks.
Many courses keep a master list of key cuts for members.
Electronic fobs: $25 to $75 for an OEM replacement from the cart manufacturer. Third-party compatible fobs are cheaper, around $15 to $30, but verified buyer feedback reports that compatibility can be hit or miss. Stick with the brand that matches your cart.
Club Car keys work on Club Car carts, Yamaha on Yamaha, and cross-brand compatibility is rare.
RFID tags: $10 to $25 from the course pro shop. These are usually programmed by the course staff. You cannot buy a universal RFID tag and expect it to work on a private course gate.
If you have a spare key, use that immediately and order a backup copy for the washed one. If you do not have a spare, getting a duplicate made right away is worth it. That way you are not caught short if this happens again.
A Quick Decision Guide – Your Next Move Based on Where You Are Now
Here is a one-paragraph summary for each scenario so you can act without rereading the whole article.
| Your Situation | Immediate Action |
|---|---|
| Basic metal key, any wash time | Dry with towel, test after 1 hour. Done. |
| Electronic fob, caught early | Remove battery, disassemble, alcohol rinse, dry 24 hours. |
| Electronic fob, full cycle plus dryer | High chance of failure. Try the alcohol process, but expect to order a replacement. |
| RFID tag, any wash time | Rinse, dry 12 hours, test on gate. 60-80% survival rate. |
| Key shows white/green corrosion | Do not bother drying. Replace it. |
If you have a car remote that went through the wash as well, the recovery process is very similar to the electronic fob steps above. The same principles apply: remove the battery, use isopropyl alcohol, and let it dry for a full day.
For the specific tools mentioned in the recovery process like sprayers and brushes, you can find useful car care accessories on the main site. Items like a reliable water spray gun for car wash or a hose car wash sprayer can help keep your equipment clean and maintained. That kind of regular maintenance reduces the chance of accidentally washing things that should not be in the laundry.
Club Car's official documentation recommends keeping spare keys in a known dry location. That is the simplest fix for this entire situation. Have a backup ready, and a washer mishap becomes a minor inconvenience rather than a problem.