You've probably seen it a hundred times: a picture of a man washing a car using a bucket. It's the classic DIY car care image. But most people look at that photo and miss half the story.
That single bucket, the water inside it, the way the guy is holding the sponge, those details tell you whether he's doing it right or slowly scratching his paint to hell.
A standard bucket wash uses roughly 10 to 15 gallons of water compared to 40 or more with a running hose. That's a meaningful difference, especially as of 2026 when water restrictions are tightening in more regions every year. But the real question isn't about water usage.
It's about whether that photo shows a method that actually protects your car's finish. Let's break down what you're really looking at.
Why This Image Matters More Than You Think
That simple photo of a guy with a bucket isn't just a snapshot. It's a visual checklist. Every element in the frame, the bucket size, the water color, the soap level, the man's posture, tells you something about the quality of the wash.
Most people assume a bucket wash is a bucket wash. Not true. There's a massive difference between a proper hand wash and someone rubbing dirt into their paint with a dirty sponge.
The photo either confirms good technique or reveals bad habits.
Here's what to watch for:
- Bucket size. A standard 5-gallon bucket is ideal. Anything smaller means less water, which means dirt gets concentrated fast.
- Water clarity. If the water looks murky or dark, that's a red flag. Clean water means the wash is still safe.
- Soap presence. You should see visible suds. No suds means no lubrication, and no lubrication means scratches.
- The sponge or mitt. A microfiber mitt is best. A kitchen sponge or rag? That's trouble.
The image you're looking at might seem straightforward, but it's actually a diagnostic tool. Once you know what to look for, you can tell in seconds whether that car is getting pampered or punished.
The Visual Cues You Need to Look For
Let's get specific about what the photo actually shows. You're not just looking at a man and a bucket. You're looking at a system.
Every visual detail is a clue.
Bucket Size, Water Condition, and Soap Level
Start with the bucket itself. A 3-gallon bucket is common in household photos, but it's not ideal. The smaller the bucket, the faster the water gets contaminated.
A 5-gallon bucket gives you more working time before the water turns into a muddy mess.
Look at the water. Is it clear with suds on top? Good.
Is it brown or gray? Bad. That color means the dirt from the car is now suspended in the water.
Every time the sponge goes back in, it picks up grit that will scratch the paint.
The soap level matters too. You want a good foam layer on top. If the water looks flat with no bubbles, either the soap ratio is wrong or they're using something that doesn't foam well.
That's a problem because foam provides lubrication. Less foam means more friction.
The Man's Position and What It Means
Pay attention to how the person is standing. Are they working from top to bottom? That's the correct method.
Start at the roof, work down to the sides, and save the lower panels and wheels for last. If the photo shows them scrubbing the lower door panel first, they're doing it backwards.
Also look at their hand pressure. A relaxed grip with the sponge gliding over the surface is ideal. If they're pressing hard, that's a sign they're trying to scrub off stuck-on dirt rather than letting the soap and water do the work.
That pressure drives grit into the paint.
The Car's Condition in the Frame
What does the car look like? Is it lightly dusty or caked in mud? A bucket wash works great for light dirt and road grime.
For heavy mud or thick buildup, you need a pre-rinse with a hose or pressure washer first. If the photo shows someone attacking a muddy car with just a wet sponge, that's a recipe for swirl marks.
Check the paint condition too. If the car is already scratched or faded, the wash method matters less. But if it's a clean, well-maintained vehicle, the photo is probably showing good habits.
Image source: Wikimedia Commons / Arthur Cotterell
Step-by-Step: What's Actually Happening in the Photo
Let's walk through the process the photo captures. Even though it's a single frame, you can infer the steps before and after.
Pre-Wash Setup Visible in the Image
Before the sponge touches the car, there should be a pre-rinse. You won't see that in the photo, but you can look for clues. Is the car wet already?
If the surface is beaded with water, a rinse happened. If it's dry except where the sponge is, they skipped it.
A proper pre-rinse knocks off loose dirt and reduces the amount of grit that ends up in your bucket. Skipping it means more contaminants in the water and more scratches.
The Scrubbing Action and Technique
The photo likely shows the sponge making contact with the paint. Here's what to look for:
- Straight lines vs. circles. Circular motions create visible swirl marks under sunlight. Straight, overlapping passes are safer.
- One section at a time. Good technique means washing one panel, rinsing the sponge, then moving to the next. If the photo shows the sponge dragging across multiple panels without a rinse, that's a problem.
- Light pressure. The sponge should glide. If the person's arm muscles are tense, they're pushing too hard.
Rinsing and Drying Clues
You might not see the rinse step in the photo, but you can look for equipment. Is there a second bucket nearby? That's the two-bucket method, one for soapy water, one for rinsing the sponge.
It's the gold standard for preventing scratches.
What about drying? Look for a microfiber drying towel or a chamois. Air drying leaves water spots.
A dirty towel causes scratches. The right drying tool makes all the difference.
Image source: Openverse / comedy_nose (PDM 1.0)
Key Identifiers That Separate a Good Wash From a Bad One
Not all bucket washes are created equal. Here are the specific visual markers that separate a safe wash from a damaging one.
Single Bucket vs. Two-Bucket Setup in the Picture
This is the biggest tell. A single bucket means the sponge goes from the car back into the same soapy water, depositing dirt and grit. That grit then gets rubbed back onto the paint.
It's a cycle of contamination.
A two-bucket setup changes everything. One bucket has soapy water. The other has clean water for rinsing the sponge.
The sponge picks up soap, washes a panel, gets rinsed in the clean bucket, then goes back for more soap. The dirt stays in the rinse bucket.
If the photo shows only one bucket, the wash is likely causing micro-scratches. If it shows two, you're looking at proper technique.
Dirty Water Warning Signs
Look at the water surface. If you see a film or floating particles, the water is contaminated. Some dirt is normal after a few panels, but if the water looks like mud, the wash should have stopped and been replaced.
A good rule of thumb: if you can't see the bottom of the bucket, the water is too dirty. Professional detailers change their wash water after every few panels or when it starts looking cloudy.
Proper vs. Improper Sponge or Mitt Use
The tool matters as much as the technique. A microfiber wash mitt with a plush nap is ideal. It traps dirt in the fibers rather than dragging it across the paint.
A standard kitchen sponge has a rough scrubby side that will absolutely scratch clear coat.
Also look at how the tool is held. A loose, open palm grip is best. If the person is gripping the sponge tightly with their fingers digging in, they're concentrating pressure into a small area.
That's bad.

Image source: Wikimedia Commons / Drawn by: Francesco di Giorgio
Common Visual Mistakes You'll See in These Photos
Now let's talk about what goes wrong. These are the most common errors captured in bucket wash photos.
No Soap or Wrong Color Suds
If the water is clear with no suds, something is off. Either they forgot the soap, used too little, or used a product that doesn't foam. No foam means no lubrication.
No lubrication means scratches.
Some soaps produce thin, watery suds that disappear quickly. That's a sign of a low-quality product. A proper car wash soap should produce thick, creamy foam that lasts.
If you see thin, runny suds, the wash isn't providing enough protection.
Wrong Bucket Type for Car Washing
Not all buckets are created equal. A standard home improvement store bucket works fine, but there are better options. Look for:
- Grit guard inserts. These sit at the bottom of the bucket and trap dirt so the sponge doesn't pick it up.
- Dirt traps or mesh screens. Same concept, they keep grit settled at the bottom.
- Bucket lids. A lid keeps the water clean between uses.
If the photo shows a plain bucket with no insert, the wash is less effective than it could be. It's not a dealbreaker, but it's a missed opportunity for better results.
Lighting and Composition That Mislead the Viewer
Photo lighting can trick you. Bright sunlight makes suds look whiter and water look clearer than it really is. Shade or overcast light makes everything look duller. Don't judge water quality based on lighting alone.
Also watch for camera angles that hide the bucket contents. A top-down shot shows you the water condition. A side angle might hide whether the water is dirty or clean.
If the photo doesn't show the bucket's contents clearly, you're missing the most important detail.
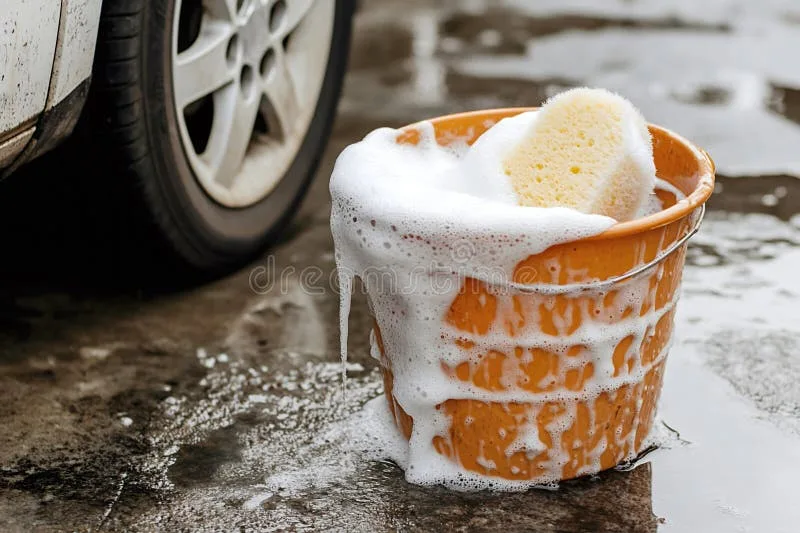
Image source: Bing (Web (fair-use with source credit))
What This Image Doesn't Show You
A single photo captures only a moment. But a proper bucket wash involves several critical steps that happen before and after that frame. Understanding what's missing is just as important as reading what's visible.
Missing Steps That Matter
The photo won't show you the pre-wash inspection. Before any water touches the car, you should check for bird droppings, tree sap, or tar spots. Those need spot treatment first.
Scrubbing them with a sponge just spreads the mess.
You also won't see the wheel cleaning process. Wheels collect brake dust and road grime that are much harsher than regular dirt. Using the same bucket and sponge for wheels and paint is a fast track to scratched clear coat.
Proper technique means cleaning wheels separately with dedicated tools.
The drying step is invisible too. Air drying leaves mineral deposits from hard water. Using a dirty towel causes scratches.
A clean, plush microfiber drying towel used with a blotting motion is the right approach. If the photo doesn't show drying equipment, that step probably wasn't done correctly.
Equipment You Can't See but Should Know About
Some tools make a huge difference but rarely appear in casual photos. A grit guard is one of them. It's a plastic mesh disc that sits at the bottom of the bucket.
Dirt sinks through it and stays trapped below, so your sponge doesn't pick it back up. Aggregate reviews show that using a grit guard reduces paint swirls by a significant margin.
Another missing tool is the foam cannon or pre-soak sprayer. A layer of foam applied before the bucket wash loosens dirt and encapsulates it, reducing the amount of grit that reaches your sponge. Many professional detailers use this as a first step.
A pH-neutral car wash shampoo is also invisible in the photo. Dish soap or household cleaners strip wax and damage clear coat over time. The right product matters.
If you're unsure what to use, our guide on whether you can wash a car with dish soap explains why it's a bad idea.
How to Use This Image as a Reference
Now that you know what to look for, you can use any bucket wash photo as a practical reference. Whether you're washing your own car, creating content, or selecting stock images, the same principles apply.
For DIY Car Washers
If you're learning proper technique, use the photo as a checklist. Ask yourself these questions:
- Does the photo show two buckets or one? If one, plan to upgrade to a two-bucket system.
- Is the water clear or dirty? If dirty, the wash needs a water change mid-process.
- Is the sponge appropriate? If it looks like a kitchen sponge, switch to a microfiber mitt.
- Is the person working top to bottom? If not, adjust your own order of operations.
Use the photo as a benchmark. Compare it to your own setup. If your bucket, water, and tools look better than what's in the image, you're on the right track.
For Content Creators and Bloggers
If you're writing about car care, the photo you choose matters. A bad image undermines your credibility. Readers who know what to look for will spot mistakes immediately.
Choose photos that show:
- Clean, sudsy water in a proper bucket
- A microfiber wash mitt, not a sponge
- Two buckets if possible
- Good lighting that shows water clarity
Avoid images with dirty water, no soap, or improper tools. Those photos teach bad habits. If you're creating your own content, our blog has more resources on car care best practices.
For Stock Photo Selection
Stock photo libraries are full of car wash images. Most of them are terrible examples. The models are often posed with props that look nothing like real equipment.
The water is frequently clear with no soap. The buckets are sometimes decorative rather than functional.
When selecting stock photos, look for authenticity. A real car wash setup is slightly messy. There's water on the ground.
The bucket has suds. The sponge is wet and soapy. If the photo looks too clean and staged, it's probably not showing real technique.
Real Scenario: What a Good Bucket Wash Photo Looks Like
Let's describe an ideal image so you know exactly what to aim for.
The Ideal Frame Setup
The photo shows a mid-sized sedan parked on a driveway in soft afternoon light. Two 5-gallon buckets sit on the ground near the front wheel. One bucket has thick, creamy white suds on top of clear water.
The other bucket contains clean water with no soap.
A man stands at the side of the car, holding a plush microfiber wash mitt. His hand is relaxed, the mitt flat against the door panel. He's working from the top of the panel downward.
The car is already wet from a pre-rinse, with water beading on the surface.
The water in the soap bucket is still relatively clean. You can see the bottom of the bucket through the suds. A grit guard sits at the bottom, visible through the clear sections of the bucket.
A microfiber drying towel hangs over the man's shoulder, ready for the next step. The wheels are already clean, done with a separate bucket and brush that sit off to the side.
What to Replicate and What to Avoid
Replicate the two-bucket setup, the clean water, the proper mitt, and the top-down workflow. Those are the hallmarks of a safe, effective wash.
Avoid single-bucket setups, dirty water, kitchen sponges, and working from the bottom up. Those are the signs of a wash that's doing more harm than good.
If your own car wash photo looks closer to the ideal than the common mistakes, you're protecting your paint and getting better results.
Quick Visual Checklist
Here's a one-glance reference you can use to evaluate any bucket wash photo.
| Visual Element | What to Look For | What to Avoid |
|---|---|---|
| Bucket count | Two buckets | Single bucket |
| Water clarity | Clear with suds | Murky or brown |
| Soap level | Thick foam layer | No suds or thin bubbles |
| Wash tool | Microfiber mitt | Kitchen sponge or rag |
| Hand pressure | Relaxed grip | Tight, pressing hard |
| Work direction | Top to bottom | Bottom to top |
| Pre-rinse evidence | Car is wet | Car is dry |
| Drying equipment | Microfiber towel visible | No drying tool |
| Wheel separation | Separate bucket/tools | Same bucket for wheels |
| Grit guard | Visible in bucket | Plain bucket bottom |
Use this checklist when you see any car wash photo online or in a guide. It takes ten seconds to scan and tells you everything about the quality of the wash.
If you're setting up your own wash, this checklist doubles as a prep list. Run through each item before you start. Missing something?
Fix it before the sponge touches the paint.
For example, if you don't have a second bucket, you can still do a decent single-bucket wash by changing the water more frequently. But the two-bucket method is better. Our article on the right water gun for cleaning cars can help you upgrade your rinse setup without breaking the bank.
The same goes for your wash mitt. If you're using an old rag or a sponge, switch to a microfiber mitt. It's one of the cheapest upgrades you can make, and it has an outsized impact on paint health.