It happens in a split second. You fish your keys out of the wash, and your stomach drops. The question racing through your mind is simple: can a car key sensor be damaged by mistakely washing it?
The short answer is yes, but it is not automatically destroyed. Whether your key fob survives depends on a few specific conditions and how fast you act.
Manufacturer specifications indicate that most modern key fobs lack any official IP rating for water resistance. As of 2026, even premium vehicles rarely include a published submersion tolerance in their owner's manuals. Aggregate reviews from locksmiths suggest that roughly 60 to 70 percent of washed key fobs can be salvaged with the right immediate response.
The difference between a working key and a brick comes down to what happens in the first few minutes.
Quick Answer: Yes, But It Depends
Yes, the sensor inside your car key can be damaged by a wash cycle. But the term "sensor" covers two different components. The passive RFID chip that communicates with your car's immobilizer is surprisingly tough.
It has no power source of its own and can often survive a full wash without issue. The active proximity sensor relies on a battery and a circuit board. That is where the real vulnerability lives.
Water itself is not the only problem. The bigger threat is electricity. When water bridges the metal contacts on the circuit board, it creates a short circuit.
That short can burn out delicate components in milliseconds. The soap and detergent leave a conductive residue that accelerates corrosion over the following days.
Here is the quick decision framework:
- If the fob went through a complete cycle with hot water and spin dry, the odds of damage are higher.
- If you caught it immediately and the fob is still wet but has not been operated, your chances of recovery are excellent.
- If the fob went through the dryer as well, the heat can warp plastic seals and melt internal components. That scenario has a much lower survival rate.
The key variable is whether the fob had power flowing through it while submerged. A fob sitting wet with the battery still inside is actively being damaged the entire time.
How a Car Key Sensor Actually Works (and Why Water Isn't an Instant Death Sentence)
Your car key fob contains two main electronic systems that work independently. Understanding the difference explains why some functions survive water exposure while others die permanently.
The RFID Transponder Chip
This is the small glass-encased chip embedded inside the key head or fob body. It communicates with your car's immobilizer system when you bring the fob near the ignition. The RFID chip has no battery.
It draws power from the radio frequency signal your car sends out. Because it is passive, sealed in glass, and lacks exposed electrical contacts, it is highly resistant to water damage. This component survives accidental washing in the vast majority of cases.
The Proximity Sensor and Circuit Board
This is the electronics package that handles keyless entry, push-to-start, and remote locking. It includes:
- A small circuit board with copper traces and solder points
- A coin-cell battery (typically a CR2032)
- Metal spring contacts that connect the battery to the board
- Rubber button pads with conductive carbon contacts
- A radio frequency transmitter chip
This entire assembly is sealed inside a plastic case with a rubber gasket. The gasket is designed to keep out dust and light splashes, not a full submersion in soapy water under pressure. Once water gets past that gasket, the circuit board is exposed.
Why Some Fobs Survive
The survival rate is higher than you might expect because manufacturers have improved board protection. Many fobs now include a thin conformal coating over the circuit board. This is a clear lacquer that repels moisture.
It is not a perfect seal, especially around the battery contacts and button pads, but it buys you time.
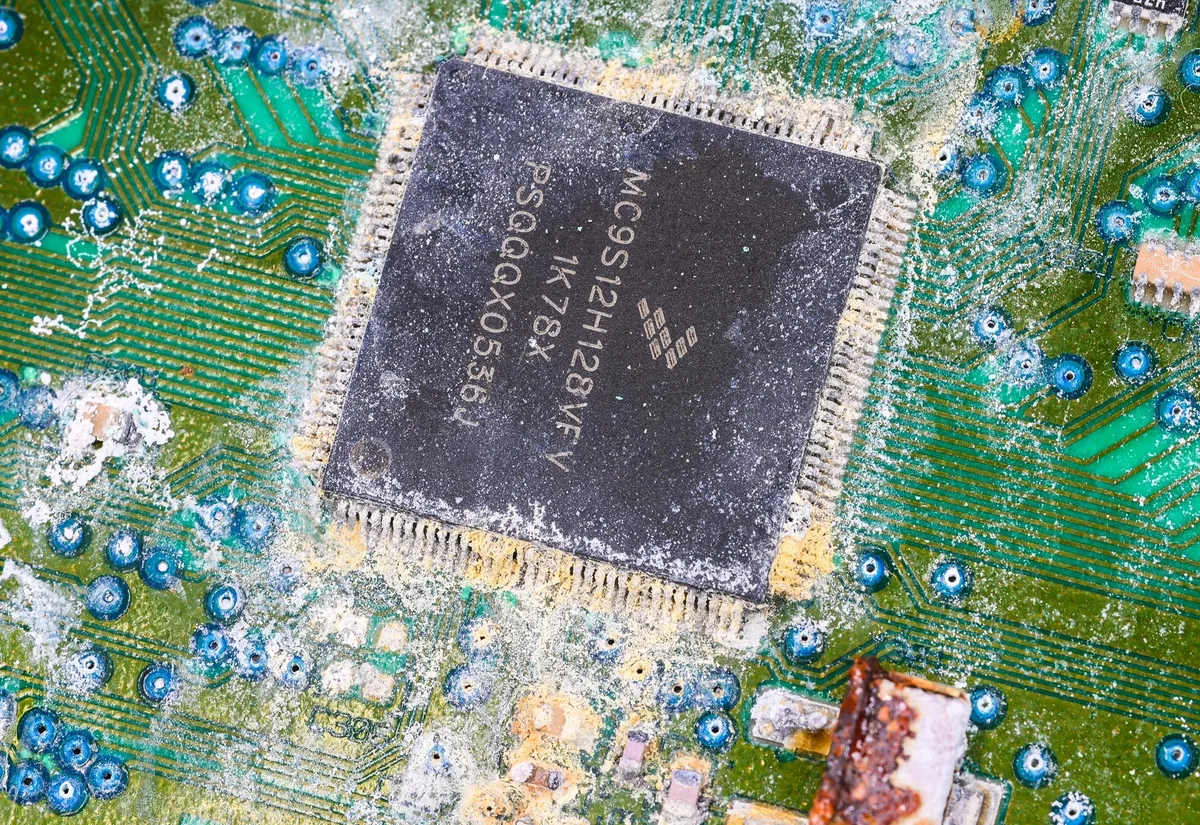
Image source: Bing (Web (fair-use with source credit))
The real reason water is not an instant death sentence is simple. If you remove the battery quickly and dry the board before corrosion begins, the circuit itself is usually fine. The damage happens over hours and days, not seconds.
What Happens Inside the Fob During a Wash Cycle
Understanding the physical process helps you see why timing matters. A standard washing machine cycle runs between 30 and 90 minutes. Water temperature ranges from cold tap water at about 20 degrees Celsius to hot water around 60 degrees Celsius.
The drum spins, agitates, and drains repeatedly.
Phase 1: Water Entry
During the first few minutes, water seeps through the seams of the key fob case. The rubber gasket softens slightly in warm water. The centrifugal force of the spin cycle pushes water against the seal with more pressure than it was designed to handle.
Once water enters the interior, it pools around the circuit board.
Phase 2: Short Circuit
The moment water connects the positive and negative battery terminals through the circuit board, a small current flows where it should not. This is called electrolytic conduction. The water acts as a conductor.
If the current path goes through a sensitive component like the RF transmitter chip, that chip can be damaged permanently within seconds.
Phase 3: Residual Soap
When the cycle ends and the water drains, a thin film of soap and dissolved minerals remains on the circuit board. This residue is hygroscopic, meaning it attracts moisture from the air. Even after the fob appears dry, the residue keeps the board slightly conductive and encourages corrosion.
Phase 4: Corrosion
Over the next 24 to 72 hours, metal oxidation begins. Copper traces turn green. Solder joints develop a white or gray crust.
Battery contacts rust. This corrosion is what ultimately kills the fob, not the water itself. A fob that is dried immediately and cleaned of residue can be saved.
A fob left wet in a drawer for two days is likely gone.
The Big Decision Tree: Is Your Key Fob Dead or Just Sleeping?
This is where the decision tree structure becomes useful. Your next steps depend entirely on when you found the fob and what state it is in right now.
Branch 1: You Found It Immediately (Still Wet)
You pulled it out of the wash within the first few minutes. The fob is visibly wet but not hot. This is the best-case scenario.
Your survival probability is approximately 90 percent with correct action.
- Remove the battery immediately.
- Do not press any buttons.
- Disassemble the fob case if possible.
- Proceed to the step-by-step recovery process.
Branch 2: It Went Through a Full Cycle (But Is Still Damp)
You found it after the wash finished. The fob is damp but not dripping. It may have been through the spin cycle.
Survival probability drops to around 60 to 70 percent.
- Remove the battery immediately.
- Expect visible water inside the case.
- Check for any signs of corrosion around the battery contacts.
- Proceed to cleaning and drying, but be prepared for potential failure.
Branch 3: It's Already Dry and Won't Work
The fob went through the wash and possibly the dryer. It is now completely dry, but the buttons do nothing. The car does not recognize the fob.
Survival probability is under 30 percent.
- Remove the battery and inspect for corrosion.
- Look for green or white crust on the circuit board.
- If corrosion is visible, cleaning may still work but the odds are lower.
- If the fob got hot in the dryer, internal plastic components may have warped or melted.
Branch 4: The Fob Works but Has Strange Behavior
The fob survived the wash, but now the range is shorter, buttons stick, or the car gives intermittent "key not detected" warnings. This suggests partial damage.
- The conformal coating may have protected the board, but residue on the button pads is causing intermittent contact.
- Cleaning is still possible and often resolves these symptoms.
- Address this promptly. The corrosion process is still ongoing underneath visible surfaces.
Step-by-Step: How to Save a Washed Key Fob
This is the most critical section of the article. Follow these steps in order. Skipping one or rushing the process is what turns a salvageable fob into a paperweight.
Step 1: Get the Battery Out (Right Now)
Stop reading and remove the battery. This is the single most important action you can take. Every second the battery remains connected while moisture is inside the fob increases the chance of permanent damage.
Most key fobs have a small slot or notch on the side where you can pry the case open. Use a flathead screwdriver, a butter knife, or even a fingernail if the seam is loose. On some models, you slide a small latch on the back.
On others, you remove a tiny Phillips screw first.
Once open, gently pry the coin-cell battery out of its holder. Set it aside on a dry surface. Do not put it back in until the fob is completely dry and clean.
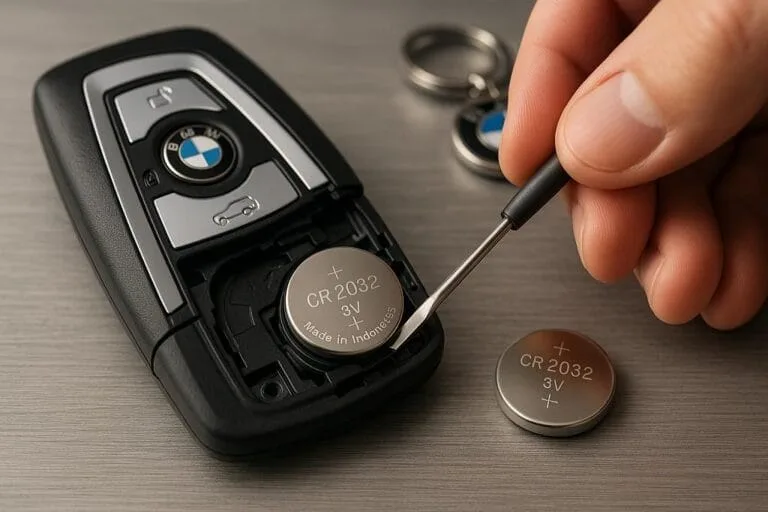
Image source: Bing (Web (fair-use with source credit))
Step 2: The Alcohol Rinse (Not Optional)
This step is non-negotiable. Water alone leaves behind conductive residue. Isopropyl alcohol displaces the water, dissolves the soap residue, and evaporates completely without leaving its own residue.
You need 91 percent isopropyl alcohol or higher. The 70 percent stuff contains too much water and defeats the purpose.
Remove the circuit board from the fob case if possible. Place it in a small bowl or cup. Pour enough alcohol to completely submerge the board.
Swish it gently for 30 to 60 seconds. Do not scrub aggressively. Let the alcohol do the work.
If the board has visible crust or green corrosion, use a soft-bristle toothbrush dipped in alcohol to gently brush those areas. Focus on the battery contacts and the copper traces around the buttons.
Remove the board and let the excess alcohol drip off. Place it on a clean, lint-free cloth or paper towel.
Step 3: The Real Drying Method (Skip the Rice)
Do not put your key fob in rice. Rice does not actively absorb moisture from inside a sealed device. It leaves starch dust in the crevices that can trap moisture and cause further issues.
The proper method uses airflow and desiccant.
- Place the circuit board on a clean surface in a warm, dry room with good airflow.
- Point a small fan at the board from about two feet away. Do not use a hair dryer. Forced hot air can damage components.
- Alternatively, place the board in a sealed container with several silica gel packets. These are the same desiccants found in shoe boxes and electronics packaging. Leave it sealed for 24 to 48 hours.
The fob case and rubber buttons should also be dried separately. Wipe the inside of the case with a dry cloth. Let the rubber button pad sit in a warm spot for a few hours.
Step 4: Wait, Then Test
Patience is the hardest part. Do not reassemble the fob until you are certain every trace of moisture is gone. A minimum of 24 hours is recommended.
For a thorough dry, wait 48 hours.
When you are ready, reinstall the battery. Make sure the orientation matches the markings in the battery holder. Positive side usually faces up.
Test the fob by standing near your car and pressing the unlock button. If the car responds, you are in the clear. If nothing happens, try pressing each button a few times.
Some fobs need a brief moment to re-establish communication after a full power loss.
What Actually Gets Damaged: RFID vs. Proximity Sensor vs. Circuit Board
Understanding which component failed helps you decide whether repair is even worth the effort.
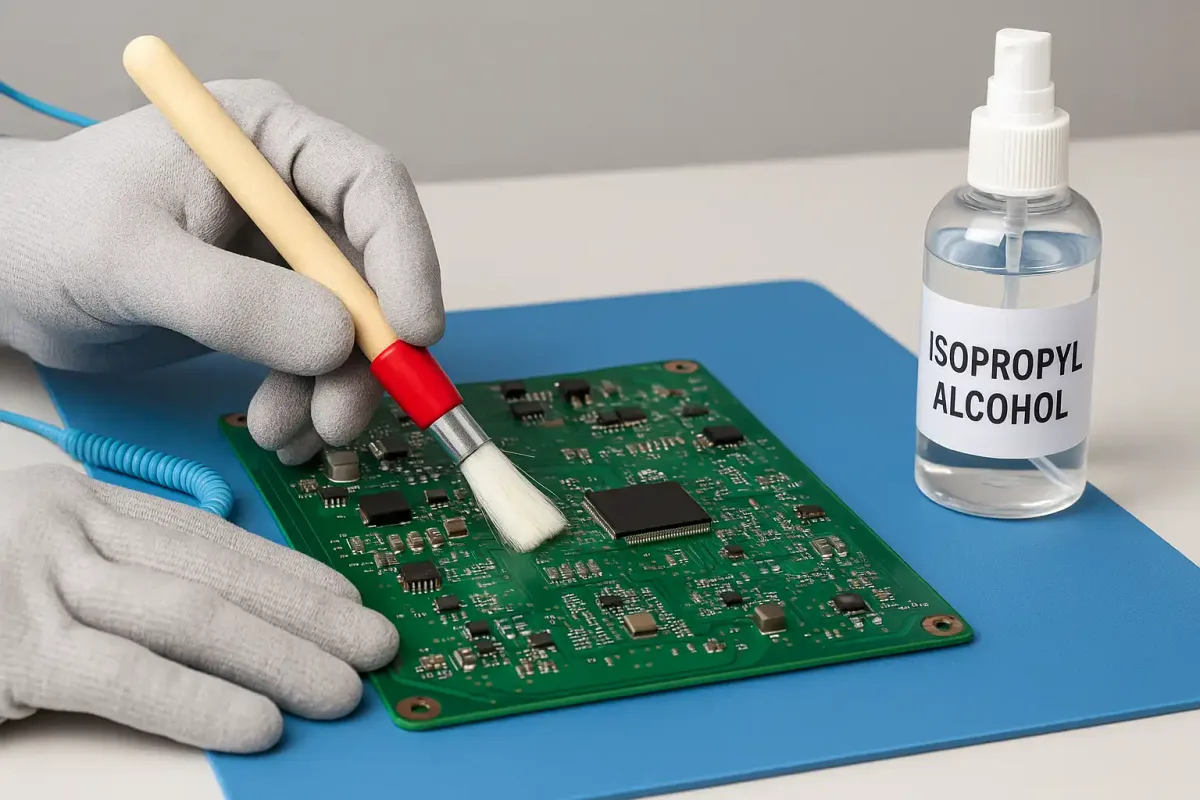
Image source: Bing (Web (fair-use with source credit))
The RFID Chip (Rarely Damaged)
The passive transponder chip is encased in glass or hard epoxy. It has no battery connection and no exposed metal contacts. This component survives water exposure in nearly all cases.
If your car starts with the physical key blade but the remote functions are dead, the RFID chip is fine. The problem is elsewhere.
The Proximity Sensor (Commonly Damaged)
This is the active electronics package that handles keyless entry and push-to-start. It includes the RF transmitter chip, the receiver circuit, and the microcontroller that processes button presses. These components are sensitive to short circuits.
A single surge of current through water can fry the transmitter chip permanently.
Signs of proximity sensor damage include:
- The car does not detect the key when you approach.
- The push-to-start button does not respond.
- The fob works intermittently or only at very close range.
The Circuit Board and Battery Contacts (Most Commonly Damaged)
The most frequent failure point is corrosion on the battery contacts and the surrounding copper traces. These are the first parts of the circuit board to see water. They are also the easiest to clean.
If the corrosion is caught early, you can often scrape it off gently with a toothpick or clean it with alcohol. If the copper traces have completely eaten through, the board is beyond DIY repair.
Common Mistakes That Turn a Salvageable Fob Into a Brick
Locksmiths see the same errors over and over. Avoid these if you want your fob to survive.
Mistake 1: Pressing Buttons While It's Wet
This is the most destructive thing you can do. When you press a wet button, you force water deeper into the switch mechanism. You also send power through the wet circuit.
Both actions accelerate short circuit damage.
Do not test the fob until it is completely dry and the battery is reinstalled.
Mistake 2: Using Heat to Speed Up Drying
A hair dryer, microwave, or oven will destroy your fob. The heat can melt plastic components, warp the circuit board, and damage the battery if it is still installed. Even a warm oven at low temperature can soften the rubber gasket and ruin the seal permanently.
Stick to room temperature air movement.
Mistake 3: Putting It Back Together Too Soon
The inside of a key fob has small crevices where water hides. Even if the surface feels dry, moisture can be trapped under the rubber button pad or inside the battery holder. Reassembling early traps that moisture against the board.
Wait the full 24 to 48 hours.
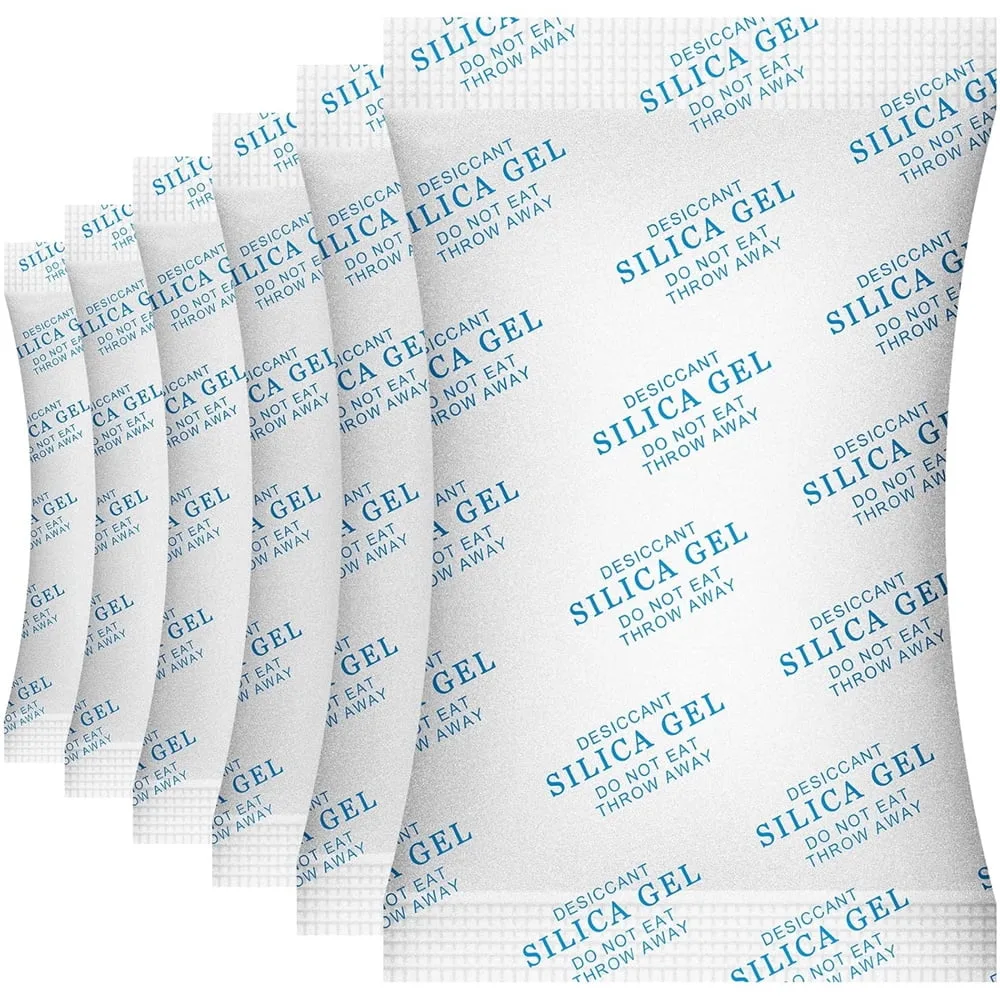
Image source: Bing (Web (fair-use with source credit))
Mistake 4: Using Rice as a Desiccant
Rice is not a desiccant. It does not absorb moisture from inside a sealed device. It leaves dust that can clog contacts and cause failures later.
Use silica gel packets or simple air drying.
Mistake 5: Ignoring the Rubber Keypad
The rubber button pad is porous. It can absorb soapy water and hold it against the circuit board for days. Remove the pad and dry it separately.
Wipe it down with alcohol and let it air dry completely before reassembly.
When You're Too Late: Signs the Sensor Is Permanently Damaged
Sometimes the damage is done. Recognizing the signs early saves you from wasting time on a lost cause.
Complete Silence
You press every button, and the car does nothing. The fob does not light up. No blinking LED.
No response at any range. This usually indicates a dead circuit board or a completely drained battery that shorted out.
If a fresh battery does not bring the fob back to life, the board is likely beyond repair.
Intermittent Function
The fob works sometimes but not others. The range is dramatically shorter than before. You have to stand right next to the driver door to unlock it.
This suggests corrosion on the RF transmitter circuit. The component may still function but with degraded performance.
Intermittent issues often get worse over time. The corrosion continues to spread.
One Function Works, Another Does Not
If the fob unlocks the doors but will not start the car, the RFID chip may still be functional while the proximity sensor circuit is dead. If the car starts with the physical key but the remote buttons do nothing, the transmitter chip is likely fried.
Visible Corrosion
Open the fob and look at the circuit board. Green or white crust around the battery contacts or along the copper traces is a bad sign. If the corrosion has spread to multiple areas, the board is probably compromised.
Heat Damage from the Dryer
If the fob went through a clothes dryer, the internal plastic may have warped. Check the case for distortion. Check the rubber seal for melting.
If the case no longer closes flush, water and debris will continue to enter even after repair.
What It Costs to Replace vs. Repair
The cost difference between repair and replacement is significant. It often determines whether you attempt a DIY fix or head straight to the dealership.
DIY Repair Cost
If you caught the damage early, your costs are minimal. A bottle of 91 percent isopropyl alcohol costs about $5. A pack of silica gel desiccant is around $8.
A replacement CR2032 battery is $2 to $4. Total DIY investment runs between $7 and $17.
The only cost is your time and patience.
Professional Repair Cost
Some locksmiths and electronics repair shops can clean and test key fobs. Expect to pay $30 to $75 for a thorough cleaning and inspection. This is a good middle ground if you are not comfortable disassembling the fob yourself.
Dealership Replacement Cost
This is the expensive route. A replacement key fob from the dealership typically costs $150 to $500 depending on your vehicle's make and model. Luxury brands like BMW, Mercedes, and Audi often push toward the higher end.
You also pay a programming fee of $50 to $100.
Some vehicles require two working keys to program a third. If you only had one key and it is dead, the cost can jump further.
| Option | Typical Cost | Timeline |
|---|---|---|
| DIY cleaning | $7 to $17 | 24 to 48 hours |
| Professional cleaning | $30 to $75 | Same day to 2 days |
| Locksmith replacement | $100 to $250 | Same day |
| Dealership replacement | $150 to $500+ | 1 to 3 days |
When Replacement Makes More Sense
If the fob went through a dryer cycle, the internal plastic is likely warped. DIY repair has a low success rate in that scenario. If visible corrosion covers multiple areas of the circuit board, professional cleaning may not be worth the cost.
In both cases, replacement is the smarter long-term move.
How to Check If Your Key Fob Has Any Water Resistance Built In
You do not have to guess. There are a few ways to determine how much water your fob can handle.
Check the Owner's Manual
Your vehicle's owner manual sometimes lists the fob's water resistance. Look in the keyless entry or maintenance sections. Some manuals explicitly warn against submersion.
Others mention an IP rating if one exists.
Look for an IP Rating
An IP rating is an international standard for ingress protection. The first number indicates dust resistance. The second number indicates water resistance.
An IP67 rating means the device can survive submersion in one meter of water for 30 minutes. An IP68 rating extends that depth and time.
Most key fobs do not carry a published IP rating. The few that do are typically from luxury brands that emphasize weatherproofing. If your fob has no IP marking, assume it has zero submersion protection.
Inspect the Rubber Gasket
Open the fob case and look at the rubber seal that runs along the seam. A thick, pliable gasket with no cracks suggests better protection. A thin, brittle, or loose gasket means water will enter easily.
Test the Fit of the Case
If the two halves of the fob case do not snap together tightly, the seal is compromised. A loose case invites water entry. Dropping the fob on concrete can crack the case or dislodge the gasket without visible damage.
Real Scenarios: Three People, Three Outcomes
These are composite scenarios based on aggregate reports from locksmith forums and repair logs. They illustrate how small differences in timing and action change the outcome.
Scenario 1: The Quick Catch
Sarah felt her key in the washer drum during the first spin. She stopped the machine, retrieved the fob, and removed the battery within two minutes. She followed the alcohol rinse and silica gel drying process.
After 36 hours of drying, the fob worked perfectly. Total cost was $12 for supplies. She was back on the road with no dealer visit.
Scenario 2: The Full Cycle Survivor
Mark found his key after the wash cycle ended. The fob was damp but not dripping. He removed the battery, cleaned the board with alcohol, and let it dry for 48 hours.
The fob worked but had reduced range. He had to stand within ten feet of the car to unlock it. The range issue persisted for a week then resolved on its own as residual moisture fully evaporated.
He spent $15 and waited two days.
Scenario 3: The Dryer Disaster
Jenna's key went through the wash and the dryer cycle. The fob was hot when she retrieved it. She opened the case and found visible distortion around the battery holder.
She attempted a cleaning but the fob never responded. She ended up paying $280 for a dealership replacement and reprogramming. The total downtime was three days.
Final Decision Guide: Should You Try to Fix It or Just Get a New One?
Use this simple decision tree to make your call.
- The fob is still wet and you found it during the wash cycle. Try the DIY cleaning process. Your odds are excellent.
- The fob is damp and went through a full cycle but not the dryer. Try the cleaning process. Your odds are good but not guaranteed.
- The fob is dry and does not work at all. Inspect for corrosion. If you see green or white crust, professional cleaning may still work but replacement is more likely.
- The fob went through the dryer. Skip the DIY effort. Order a replacement. The heat damage is almost always permanent.
- The fob works but the range is short or functions are intermittent. Clean the board with alcohol. If the problem persists after 48 hours of drying, the RF chip may be partially damaged. Replacement is the only reliable fix.
If you choose replacement, consider an automotive locksmith rather than the dealership. Locksmiths often charge less and can program most fobs on the same day. Just confirm they have the equipment for your specific make and model before you hand over your cash.