Alaska's highways are nothing like the Lower 48. You can drive 200 miles without seeing a gas station. When the temperature drops to 40 below, your fuel choices can mean the difference between a safe trip and a life-threatening situation.
That is why understanding remote corridor fuel management is essential for anyone driving Alaska's long stretches of road.
Our research into Alaska's unique driving conditions shows that most corridor travelers underestimate their fuel needs by at least 20 to 30 percent. Winter temperatures shrink that margin even further. Per ASTM D975, diesel fuel's cold-weather performance varies dramatically depending on its blend grade.
Let's walk through what you need to know before your next trip up the Dalton or across the Richardson.
Quick Answer
Remote corridor fuel management means planning every gallon you will burn before you leave. Calculate your vehicle's range. Pre-position fuel caches at strategic intervals.
Choose the right winterized fuel for the temperatures you will face. Build a safety margin of at least 25 percent above your calculated consumption. In Alaska's extreme cold, that margin can save your life.
Why Alaska's Remote Corridors Demand Your Full Attention
The Dalton Highway stretches 414 miles from Fairbanks to Deadhorse with only a handful of fuel stops. The Parks Highway runs 323 miles between Anchorage and Fairbanks with more stations but still long gaps. In winter, those stations may close early or run out of winterized fuel entirely.

Image source: iNaturalist / Bonnie Ott
Here is what makes Alaska different from driving anywhere else in the United States:
- Temperature extremes. Fuel that works at 20 degrees Fahrenheit can turn to gel at 40 below. You cannot just fill up and hope for the best.
- Limited station hours. Many rural fuel stations close by 6 PM. Some are only open during daylight hours in winter.
- Supply chain gaps. Barge deliveries to remote communities happen seasonally. A station might be out of winterized diesel for weeks.
- No cell service. You cannot call for help on most corridor stretches. If you run out, you walk or wait for another vehicle.
For more Alaska driving topics, check out our Blog for region-specific guidance.
The Core Facts: What Works and What Doesn't at 40 Below
Cold weather changes how fuel behaves. Ignoring those changes is the fastest way to get stuck.
Diesel Fuel in Extreme Cold
Diesel contains paraffin wax. At low temperatures, that wax crystallizes and turns the fuel into a gel. Two numbers matter:
- Cloud point. The temperature where wax crystals first appear and begin clogging fuel filters.
- Pour point. The temperature where the fuel stops flowing entirely.
Standard No. 2 diesel has a cloud point around 14 degrees Fahrenheit. Additives can push that down to about minus 20. For Alaska's interior winter, you need No. 1 diesel or a winterized blend with a cloud point at or below minus 40.
Gasoline in Extreme Cold
Gasoline does not gel like diesel, but it brings its own problems. The biggest issue is ethanol. Many gasolines in Alaska contain up to 10 percent ethanol.
That has two major downsides:
- Ethanol attracts water. Condensation forms inside your tank during temperature swings. Ethanol absorbs that water, which can lead to phase separation and engine damage.
- Ethanol lowers vapor pressure. In extreme cold, gasoline with ethanol may not vaporize properly, making cold starts difficult.
The safest bet for winter travel is ethanol-free gasoline. Several rural stations carry it, but you need to call ahead and confirm.
Winter road grime and salt can damage your exterior. Our article on Does Ceramic Coating Protect Against Salt explains how to protect your vehicle through the harsh season.
Diesel vs. Gasoline: Choosing the Right Fuel for Your Alaska Corridor
This decision depends on your vehicle, your route, and the season.
| Factor | Diesel | Gasoline |
|---|---|---|
| Cold tolerance | Needs winterized blend below 20°F | Starts easier but needs ethanol-free for extreme cold |
| Fuel economy | 20-30% better mpg than gasoline | Lower mpg, more caches needed |
| Storage stability | Lasts 12+ months with stabilizer | Lasts 6-9 months, loses volatility faster |
| Weight per gallon | ~7 lbs | ~6 lbs |
| Gelling risk | High if wrong blend | None, but vaporization issues |
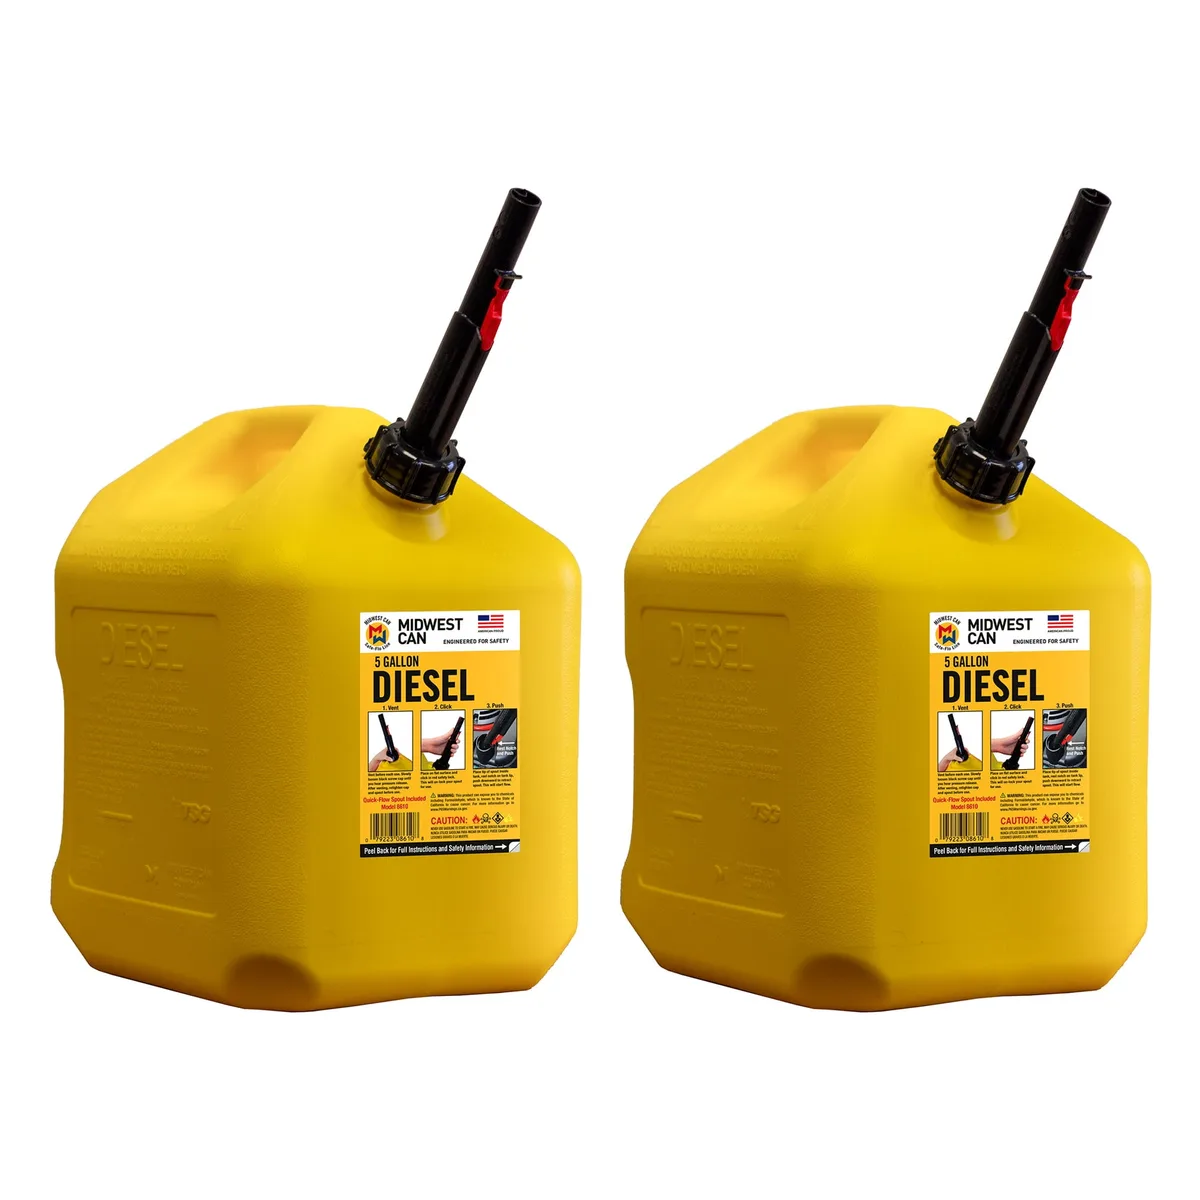
Image source: Bing (Web (fair-use with source credit))
When Diesel Wins
Diesel is the clear choice for long corridor trips in any season. Better fuel economy means less weight in fuel caches and longer range between stops. A diesel pickup with a 35-gallon tank can cover roughly 700 miles on a single fill at 20 mpg.
That is enough for a one-way trip on the Dalton with a healthy reserve.
The catch is getting the right winterized blend. In Fairbanks and northern communities, fuel stations switch to winterized No. 1 diesel around October. In Anchorage, the switch happens later.
If you fill up in Anchorage and drive north into interior cold, you risk gelling.
When Gasoline Makes Sense
Gasoline works well for shorter corridor trips and for vehicles that sit outside in extreme cold. Gasoline engines start more reliably at minus 40 than diesel engines, even with block heaters. If you are running a gasoline truck or SUV, plan for more frequent cache points because of lower fuel economy.
The Bottom Line
Diesel with a confirmed winterized blend is the superior choice for any corridor trip longer than 200 miles between November and March. For summer travel, either fuel works fine. The decision comes down to your vehicle and how far north you are heading.
Pre-Positioning Fuel Caches: Where, When, and How
Pre-positioning fuel means storing drums or tanks along your planned corridor before your trip. This is standard practice for remote lodge owners, miners, and serious overland travelers. It takes planning, but it beats carrying 500 extra pounds of fuel in your truck bed.
Where to Place Caches
The standard rule is one cache every 100 to 150 miles for trucks and every 50 to 75 miles for snowmachines. Your specific spacing depends on your vehicle's range and the terrain. Steep climbs burn more fuel.
Soft snow or mud cuts mileage by 30 percent or more.
Cache sites should meet these criteria:
- Accessible from the corridor. You need to pull off safely without getting stuck.
- Level and dry. Uneven ground can stress drum seals and cause leaks.
- Hidden from plain view. Fuel theft is a real problem on remote Alaska corridors.
- Wind protected. This reduces evaporation and keeps your cache stable.
When to Place Caches
For summer travel, place caches in late spring after the snow melts. For winter travel, place caches before the ground freezes solid or after the ice roads form. October is the sweet spot for winter cache placement in most of Interior Alaska.
Container Choices
| Container Type | Best For | Capacity | Durability |
|---|---|---|---|
| Steel 55-gallon drum | Truck caches | 55 gal | Very durable, rust risk |
| HDPE plastic drum | All-purpose | 15-55 gal | No rust, UV sensitive |
| NATO-style jerry cans | Snowmachine caches | 5 gal each | Extremely durable |
| Fuel bladders | Temporary caches | 50-500 gal | Puncture risk, portable |
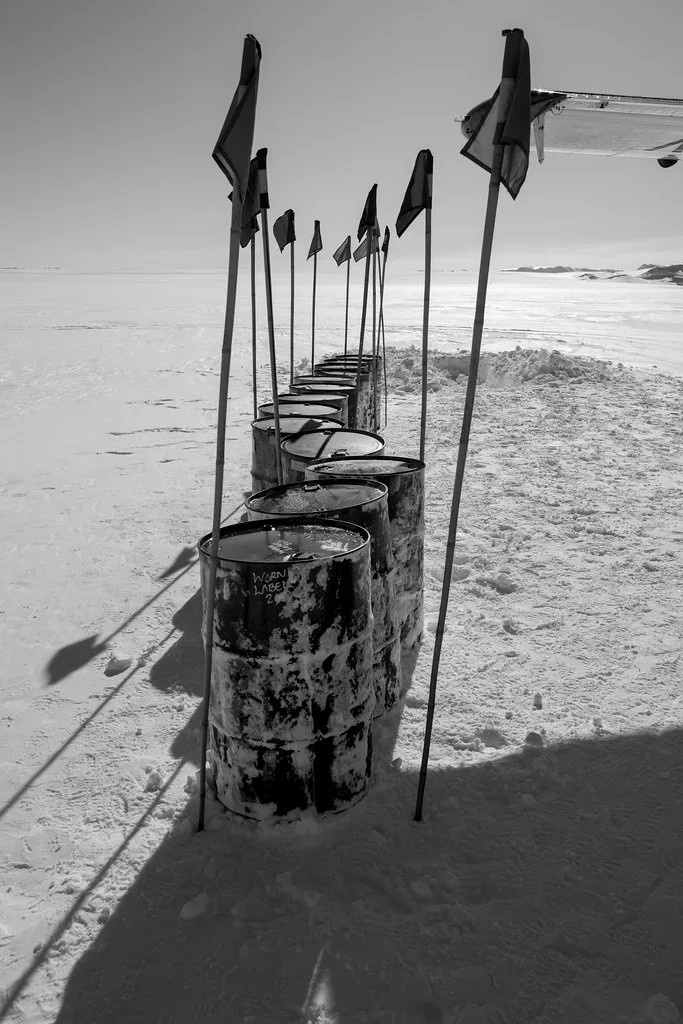
Image source: Openverse / Daniel Weber
Label Everything
Every container needs a label with:
- Fuel type and octane or cetane rating
- Date of filling
- Whether it contains stabilizer
- Intended use
Use a permanent marker or metal tag. Paper stickers will fall off in the weather.
The Fuel Cache Setup Step by Step
Setting up a cache correctly takes about an hour per drum.
Step 1: Prepare the site. Clear the ground of sharp rocks and debris. Place a ground sheet or pallet underneath to keep the drum off the permafrost.
Step 2: Inspect the drum. Check for dents, rust, or damage to the seal ring. A damaged drum will leak during freeze-thaw cycles.
Step 3: Fill the drum. Leave about 5 percent headspace for expansion. Overfilling causes pressure buildup that can blow the seal.
Step 4: Add stabilizer. For fuel that will sit longer than three months, add a fuel stabilizer at the manufacturer's recommended rate. Stir or shake thoroughly.
Step 5: Seal and secure. Tighten the bung with a wrench. Strap the drum to a tree or stake if theft is a concern. Conceal it with natural materials if needed.
Step 6: Record the GPS coordinates. Write down the latitude and longitude. Take a photo of the cache site from the corridor so you can recognize it later.
Step 7: Plan your rotation. Use the oldest fuel first. Write the rotation date on the drum with a paint marker.
If you are bringing fuel transfer equipment back from a trip, keeping it clean matters. Our guide on Manual Cleaning Equipment Using In Car Wash has tips that apply to fuel handling tools.
Transferring Fuel Safely in Extreme Cold
Transferring fuel at 40 below is not the same as doing it in a warm garage. Everything stiffens. Plastic becomes brittle.
Static electricity builds up faster in dry winter air.
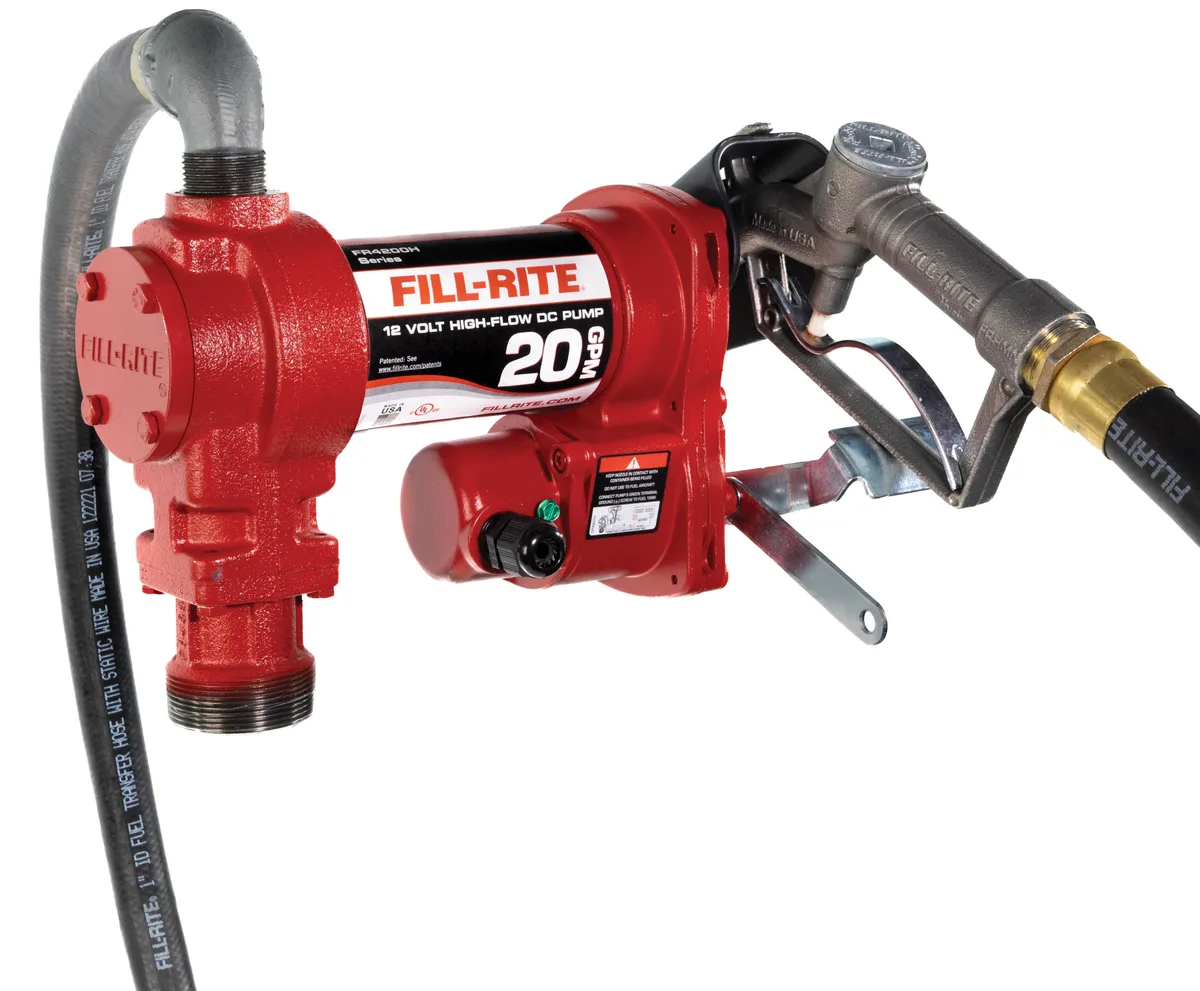
Image source: Bing (Web (fair-use with source credit))
The Right Equipment
You need a 12-volt DC fuel transfer pump rated for cold weather. Hand pumps work but take forever when the fuel is thick and you are wearing thick gloves. Make sure your pump hose is rated for subzero temperatures.
Standard rubber hose cracks below zero.
The Transfer Procedure
- Ground everything. Connect a grounding wire from the drum to your vehicle's chassis. This prevents static discharge that can ignite fuel vapors.
- Bond the nozzle. Use a bonding wire from the nozzle to the fill port before you start pumping.
- Pump slowly. High flow rates create static electricity. Keep the nozzle submerged in the tank's fuel to prevent splashing.
- Wipe up spills immediately. Fuel on snow melts it and can contaminate the water below. Use absorbent pads.
- Cap both containers. Leave nothing open. Open fuel draws moisture from the air, which freezes and causes problems later.
What Not to Do
- Never use a plastic funnel. Static discharge can ignite fuel vapors.
- Never transfer fuel inside a closed vehicle. Fumes accumulate and can reach explosive concentrations.
- Never leave a pump unattended. Overfilling is easy when you are cold and distracted.
Skipping these steps is how people end up with fires, fuel contamination, or environmental fines from the Alaska Department of Environmental Conservation.
Common Mistakes That Leave Alaska Drivers Stranded
After reviewing incident reports and talking to experienced corridor travelers, a few mistakes come up repeatedly.
Mistake 1: Guessing Your Fuel Consumption
Most people assume their vehicle's highway mpg rating holds true on Alaska corridors. It does not. Headwinds, gravel roads, cold engines, and idling for warmth all cut mileage.
A diesel pickup rated at 22 mpg highway often gets 15 to 17 mpg on the Dalton in winter. Plan for the lower number.
Mistake 2: Using Summer Fuel in Winter
This happens every year. A driver fills up in Anchorage with summer-blend diesel and drives north. By Glennallen, the fuel is starting to cloud.
By Fairbanks, it has gelled. The fix requires towing the vehicle to a warm shop, draining the tank, and replacing the fuel filter. That costs hundreds of dollars and a full day.
Mistake 3: Forgetting About Filter Clogging
Even with winterized fuel, cold temperatures cause wax crystals to form slowly. They accumulate on your fuel filter over time. Carry at least two spare fuel filters and a filter wrench.
Change the filter when you notice a power loss at cruising speed.
Mistake 4: Storing Fuel Without Stabilizer
Fuel degrades over time. Gasoline loses its volatile compounds within six months. Diesel develops microbial growth if water gets in.
A good stabilizer extends fuel life to 12 to 18 months for both fuel types. It is cheap insurance.
Mistake 5: Ignoring the Weather Forecast
A storm can close a corridor for days. If you are traveling with exactly enough fuel to reach your destination, a one-day delay means you are stranded. Build in at least two days of reserve fuel for winter travel.
Alaska Fuel Regulations You Need to Know
Fuel management in Alaska is not just about practical know-how. There are real legal requirements to follow.
Spill Reporting
Under Alaska law, any fuel spill that reaches water or permafrost must be reported to the Alaska Department of Environmental Conservation. The reporting threshold is one gallon if it reaches a waterway. Fines for unreported spills can reach $10,000 per day.
Secondary Containment
If you store more than 55 gallons of fuel at a cache site, you need secondary containment. That means a berm, drip pan, or double-walled tank capable of holding 110 percent of the container's volume. This applies to stationary caches on public land.
Transport Restrictions
Transporting fuel on public highways triggers hazmat regulations when you carry more than 119 gallons. You need placards on your vehicle and a commercial driver's license with a hazmat endorsement. Most private travelers do not hit this limit, but commercial operators and guides need to comply.
Public Land Permits
If you place a fuel cache on BLM or Forest Service land, you may need a temporary storage permit. The rules vary by district. Contact the local BLM field office before setting up your cache.
Unauthorized caches can be confiscated and the fuel disposed of at your expense.
What to Do When You Run Out Mid-Corridor
Even with perfect planning, things go wrong. A headwind cuts your mileage. A storm delays you.
A leak drains a cache. Here is the protocol to follow.
Step 1: Stay with Your Vehicle
Do not walk for help in winter unless you can see a building within a quarter mile. Alaska winter temperatures can cause frostbite in minutes. Your vehicle is your shelter.
Run the engine for 10 minutes every hour to stay warm while conserving fuel.
Step 2: Conserve What You Have
Turn off all non-essential electrical loads. Reduce cabin heat. If you have extra clothing, put it on.
Use your fuel sparingly to keep the engine running just enough to maintain battery charge.
Step 3: Signal for Help
If you have a satellite messenger or InReach, send your location and fuel status. If you have cell service at a high point, call for help. Do not wait until you are hypothermic to make the call.
Step 4: Ration Any Cache Fuel
If you have a cache nearby, calculate how much fuel you need to reach the next cache or a station. Do not take more than you need. Leave a note with your intended destination and estimated arrival time.
The Cost of Getting It Wrong (and Right)
A 55-gallon drum of fuel delivered to a remote cache runs $6 to $12 per gallon in Alaska. That is $330 to $660 per drum. For a 400-mile corridor trip in a diesel pickup, you might need two drums at $200 to $300 each for the fuel itself plus delivery fees.
Now compare that to the cost of getting stranded. An emergency helicopter fuel delivery runs $500 to $1,500 per hour of flight time plus the fuel itself. A tow truck from Coldfoot to Fairbanks costs $1,500 to $3,000.
A night in emergency shelter or a rescue operation on the Dalton can run into the tens of thousands.
Spending $600 on proper fuel caching is cheaper than one emergency tow.
Pro Tips from Experienced Alaska Corridor Travelers
Here are the insights that come from years of driving Alaska's remote roads.
- Call fuel stations ahead. Before you leave, call every station on your route. Ask what fuel blends they carry and what hours they keep.
- Carry a fuel polishing kit. This small pump and filter setup removes water and debris from stored fuel. It turns questionable fuel into usable fuel.
- Use a fuel heater. In-dash or in-line fuel heaters keep diesel above its cloud point even in extreme cold. Aftermarket units start around $200 and pay for themselves the first time they prevent gelling.
- Learn to listen to your engine. A slight miss or loss of power at cruising speed often means a clogging fuel filter. Change it before you lose power entirely.
- Tell someone your plan. File a travel plan with a friend or family member. Include your route, cache locations, and expected return time. If you do not check in, they know where to send help.
Taking care of your vehicle after a long corridor trip matters too. Our article on Prepare Touchless Washing explains how to wash effectively without damaging paint.
Your Decision Guide: Plan Your Fuel Strategy Before You Go
If you are driving 200 miles or fewer: Fill up at the last station before the corridor. Carry two extra 5-gallon jerry cans. You likely do not need a pre-positioned cache.
If you are driving 200 to 400 miles: Pre-position one cache at the midpoint. Use winterized diesel between November and March. Carry spare fuel filters.
If you are driving more than 400 miles: Pre-position caches every 100 to 150 miles. Use winterized diesel only. Carry a fuel polishing kit and at least three spare filters.
File a travel plan.
If you are traveling in winter with any distance over 100 miles: Use winterized fuel. Carry extra filters. Pre-heat your vehicle before departure.
Plan for delays.
Frequently Asked Questions
What is the best fuel for remote corridors in Alaska?
Winterized No. 1 diesel is the best choice for cold-weather corridor travel. It resists gelling down to minus 40 degrees Fahrenheit. For gasoline travel, use ethanol-free fuel to avoid water absorption and cold-start problems.
How much extra fuel should I carry in Alaska?
Carry at least 25 percent more fuel than you calculate for the trip. If your route requires 80 gallons, bring 100 gallons. That extra 20 percent covers headwinds, delays, and detours.
Can I store fuel in plastic drums in cold weather?
Yes, but use HDPE drums rated for fuel storage. Plastic becomes brittle at extreme cold temperatures. Keep drums out of direct sunlight to slow UV degradation.
Do I need a permit for a fuel cache in Alaska?
On BLM or Forest Service land, you may need a temporary storage permit for caches over 55 gallons. Contact the local field office before placing your cache. On private land, no permit is needed.
How long does diesel fuel last in storage with stabilizer?
Diesel stored in a sealed, clean container with a quality stabilizer lasts 12 to 18 months. Without stabilizer, microbial growth and oxidation degrade the fuel within 6 to 9 months.
What should I do if my diesel gels in the fuel tank?
Do not try to start the engine. This can damage the fuel injection system. Warm the vehicle in a heated garage or use an engine block heater and fuel heater to bring the fuel temperature above the cloud point.
Then drain the tank and replace the fuel filter.