You've seen it. That thick crust of grime, oil, and road dust layered over your engine block. Maybe it's been building for years, or maybe you just bought a used car and popped the hood for the first time.
Either way, you're wondering if vehicles motor cleaning is a smart move or a fast track to a check-engine light.
Here's the truth: a clean engine bay helps you spot leaks early, keeps heat dissipation efficient, and can boost resale value by hundreds of dollars. Do it wrong, and you're looking at misfires, corroded connectors, and a repair bill that stings. Per manufacturer service manuals and aggregate tech reports from 2026, roughly 1 in 4 engine electrical issues trace back to moisture intrusion from improper cleaning.
The trick is knowing which method fits your specific vehicle.
Why Cleaning Your Motor Matters (and When It Goes Wrong)
A dirty engine isn't just an eyesore. That greasy film acts like a blanket, trapping heat around the block and making your cooling system work harder. Over time, caked-on grime hides oil weeps, coolant drips, and cracked hoses you'd catch early on a clean surface.
There's also the fire risk factor. Dry leaves, oil-soaked rags, or a fuel line drip on a hot exhaust manifold can get ugly fast. Per NHTSA data, engine bay fires caused by accumulated debris and fluid leaks account for a small but meaningful percentage of vehicle fires each year.
But here's where it goes wrong. Hosing down a hot engine with cold water can crack aluminum heads or warp plastic intake manifolds. Blasting a pressure washer directly at a 20-year-old distributor cap floods the ignition system instantly.
And using a heavy solvent degreaser on modern plastic wiring looms can leave brittle, cracked insulation a year down the road.
The takeaway? Cleaning your engine is worth doing. But the "how" depends entirely on what you're driving, how old it is, and how much risk you're willing to manage.
The First Fork in the Road: Should You Even Clean Your Engine Bay?
Not every vehicle needs this treatment. Before you grab a bottle of degreaser, ask yourself these questions.
Is there visible oil sludge or fluid residue? If you just have light dust and pollen, leave it alone. A dry microfiber wipe is plenty.
Are you selling the car soon? A clean engine bay is one of the fastest ways to add perceived value. Buyer feedback consistently shows a spotless under-hood area can add $500 to $2,000 to a private sale price.
Do you have a known leak you're trying to find? Then cleaning is essential. You can't track a drip back to its source if everything is coated in black goo.
Is your engine compartment packed with modern electronics? Some newer cars have exposed ECU boxes, fuse panels, and module connectors sitting right on top of the engine. If yours looks like a circuit board under there, you need a gentler approach.
If you answered no to all of these, save your time and chemicals. If you answered yes to at least one, let's figure out the right path.
How a Modern Engine Bay Is Different from a Classic One (Your Decision Branch)
This is the decision point most DIY guides miss. The cleaning method that works perfectly on a 1995 Ford F-150 will wreck a 2023 BMW X5. Here's how to tell which branch you're on.
Branch A: Modern Vehicles (2010 and newer)
These engines are packed with sensors, plastic intake manifolds, and sensitive electronic modules. The alternator, starter, and fuse box are often low-mounted and exposed. Water intrusion into connectors here causes intermittent electrical gremlins that are a nightmare to trace.
Branch B: Classic or Older Vehicles (pre-2005)
Older engines have less sensitive electronics. Distributors, carburetors, and older ignition systems still need protection, but they're more robust and easier to dry out afterward. The main risk is water getting into the distributor cap or carburetor throat.
Branch C: Hybrids and High-Voltage Vehicles
This is its own category entirely. Orange high-voltage cables and inverter modules are not something you spray water near. Manufacturer guidelines for hybrids like the Toyota Prius explicitly warn against pressure washing the engine bay.
Stick to a damp cloth wipe-down only, or take it to a hybrid-certified technician.
If you're on Branch A, your safe route is low-pressure rinse with water-based degreaser. Branch B? You have more flexibility but still need to cover the distributor and carb.
Branch C? Hands off the pressure washer entirely.
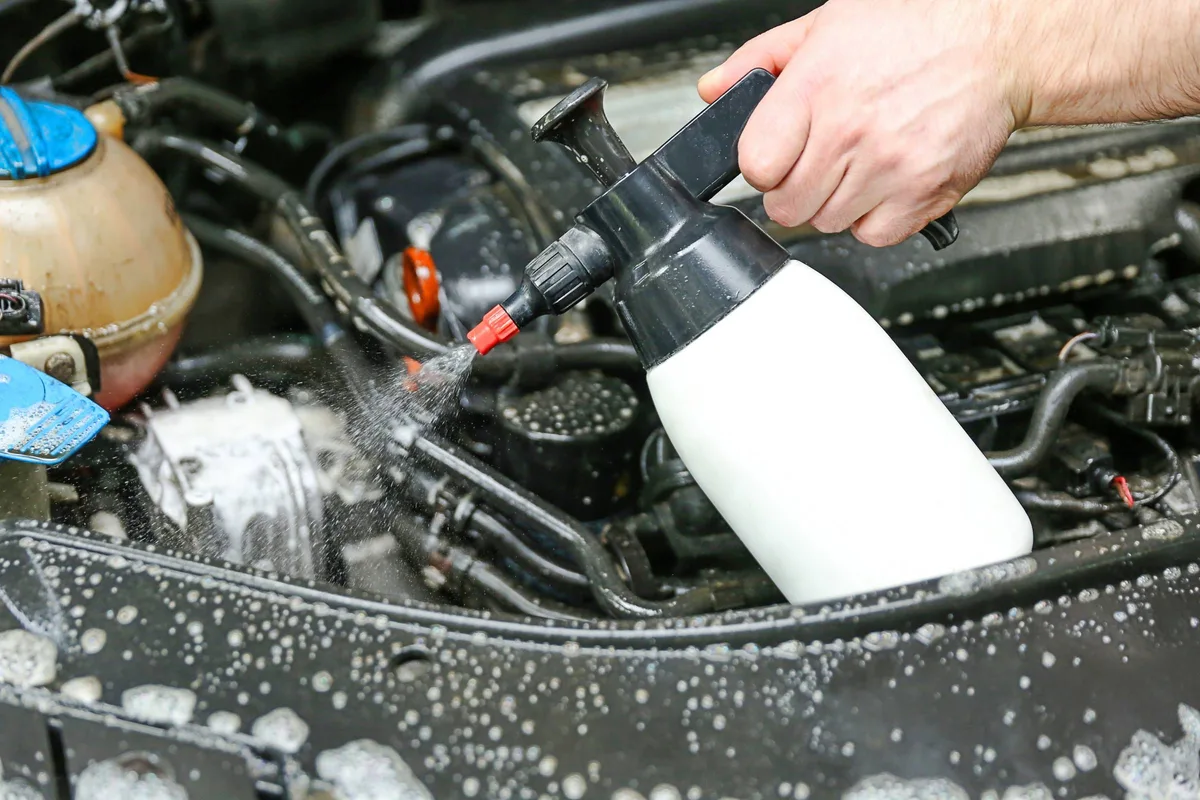
Image source: Bing (Web (fair-use with source credit))
The Safe Route: Low-Pressure Rinse with Water-Based Degreaser
This is the method we recommend for 90 percent of modern vehicles. It's thorough, safe, and doesn't require expensive equipment.
What you'll need:
- A garden hose with an adjustable spray nozzle (the "shower" or "cone" setting, not "jet")
- A water-based degreaser (look for "biodegradable" and "safe on plastics" on the label)
- One or two detail brushes (soft for plastic, stiff for metal)
- Microfiber towels
- Plastic bags and rubber bands or aluminum foil to cover electronics
- A leaf blower or compressed air can for drying
The workflow:
- Let the engine cool to warm (roughly 100°F / 38°C). If you can hold your hand on the valve cover, it's ready.
- Cover the alternator, fuse box, air intake opening, and any exposed ECU or sensor connectors. Use plastic bags and rubber bands. Don't skip this step.
- Rinse the entire engine bay with low-pressure water. The goal is to knock off loose dirt, not blast it.
- Apply the water-based degreaser. Start at the top (valve cover area) and work your way down. Let it sit for 3 to 5 minutes. Do not let it dry.
- Agitate with your brushes. Use gentle pressure on plastic components and wiring looms. Use the stiffer brush on metal surfaces like the engine block and inner fenders.
- Rinse thoroughly with low pressure. Keep the nozzle 12 to 18 inches away from sensitive parts. Rinse from top to bottom.
- Air-blow everything dry. A leaf blower is ideal because it pushes water out of crevices and connector housings. Compressed air works too.
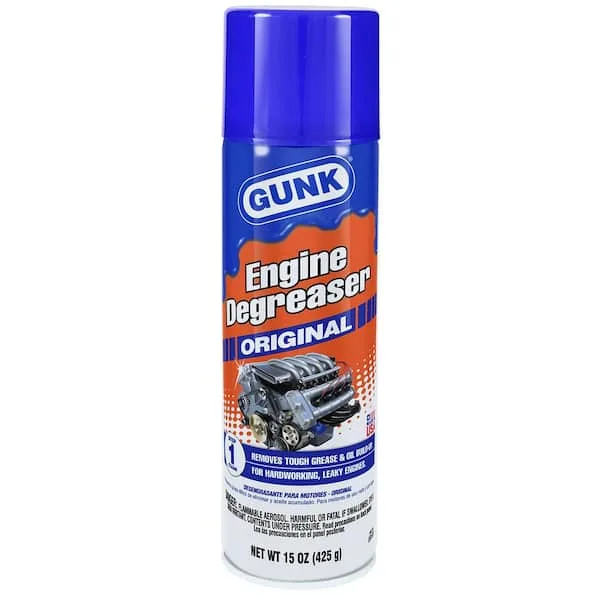
Image source: Bing (Web (fair-use with source credit))
Who this is best for: Daily drivers, modern sedans and SUVs, anyone who wants a thorough clean without disassembling the entire bay.
Key spec: As of 2026, most manufacturer service bulletins recommend keeping pressure below 1,200 PSI and maintaining a minimum distance of 12 inches. If you're using a pressure washer, pair it with a wide-angle nozzle (40 degrees or higher) for the safest spray pattern. For more on pressure settings, check our guide on the recommended PSI for washing cars.
The Gentle Route: Steam Cleaning for Sensitive Electronics and Classic Cars
Steam cleaning sits between a water rinse and a dry wipe-down. It uses high-temperature vapor (typically 212°F to 300°F / 100°C to 150°C) with very low moisture content. The steam evaporates quickly, leaving less standing water behind.
Why choose steam:
- Less water intrusion risk than pressure washing
- Heat helps dissolve oil and grease faster
- No chemical residue to worry about
- Safe for most sensors and connectors when done carefully
The trade-offs:
- You need a steam cleaner (consumer units run $80 to $250; commercial units are $500 and up)
- It's slower than a pressure wash
- It won't remove heavy caked-on sludge as effectively as chemical degreasers
Who this is best for: Classic car restorations, collector vehicles, engines with visible wiring looms you don't want to soak, and anyone who plans to clean the engine bay more than once a year.
The workflow:
- Same prep (cool engine, cover sensitive electronics).
- Apply steam directly to greasy areas. Work in small sections.
- Wipe away dissolved grime immediately with a microfiber cloth. If you let it cool, it re-adheres.
- For stubborn deposits, pre-treat with a gentle water-based degreaser, then steam over it.
- Final wipe-down with a dry microfiber.
Keep the steam nozzle away from plastic trim and rubber seals for more than a few seconds. Direct, prolonged heat can warp thin plastic and dry out rubber gaskets.
The Hands-Off Route: Wipe-Down Only for High-Voltage Hybrids and Collectors
Some vehicles simply don't need a wash. And some shouldn't get one at all.
Hybrid and full-electric vehicles with visible high-voltage components in the engine bay fall into this category. The orange cables are insulated, but the connectors are not designed to be sprayed with water or steam. Water ingress into a high-voltage junction box creates a safety hazard and a very expensive repair.
Toyota's official service information for the Prius states: "Do not use high-pressure water or steam to clean the engine compartment."
What to do instead:
- Use a damp microfiber cloth to wipe accessible surfaces.
- For light dust, a dry microfiber or a detailing duster works fine.
- If there's oil residue, use a water-based degreaser on a cloth, not sprayed directly.
- Leave the deep crevices alone unless you can see a specific leak.
Rare or concours-level collector cars also fall under this route. If the engine is numbers-matching and original, any cleaning method that involves water or chemicals can remove factory-applied finishes, decals, or inspection marks. A careful wipe-down with a slightly damp cloth and a gentle protectant is usually all that's needed.
Who this is best for: Hybrid owners, EV owners (some have front trunks where the engine would be), and anyone with a low-mileage original collector car.
Step by Step: The Complete Engine Bay Cleaning Workflow
This is the universal process that works across all three routes. Use it as your checklist.
Step 1: Prep before you touch anything
- Ensure the engine is cool to the touch.
- Remove any loose debris by hand (leaves, twigs, dead bugs).
- Cover the alternator, fuse box, battery terminals, air intake opening, and any exposed electrical connectors. Plastic bags and rubber bands are the standard solution. For extra protection, wrap aluminum foil over bagged items to reflect heat and water.
- If your car has a visible distributor or coil pack, cover those too.
Step 2: Choose your cleaning agent
- Water-based degreaser for general use.
- All-purpose cleaner (diluted) for light grime.
- Engine-specific cleaner for heavy sludge.
Step 3: Apply and agitate
- Spray from top to bottom, always working downhill.
- Let the chemical dwell for the time on the label (typically 3 to 5 minutes).
- Use your detail brushes to agitate in tight spots.
- Pay special attention to the valve cover seams, oil filter area, and the bottom of the engine where grime collects.
Step 4: Rinse safely
- Low pressure. Wide spray pattern. 12 or more inches away.
- Rinse from top to bottom.
- Avoid direct spray into the alternator, even if covered.
Step 5: Dry thoroughly
- Leaf blower, compressed air, or a clean microfiber.
- Run the engine for 10 to 15 minutes with the hood open. The heat helps evaporate trapped moisture.
- Check your covers afterward. If you bagged something, remove the bag and inspect for water inside the connector housing.
Step 6: Post-clean check
- Start the engine and listen for rough idle or misfires.
- If you get a check-engine light, it's almost always moisture in a connector. Shut off the engine, dry the affected connector with compressed air, and try again.
- Apply a water-based engine dressing to plastic and rubber components if you want a factory-fresh look. Avoid solvent-based dressings. They leave a greasy film that attracts more dust.
The Five Mistakes That Kill Alternators, Coils, and Spark Plugs
Even experienced DIYers make these errors. Let's call them out so you don't learn the hard way.
Mistake 1: Cleaning a hot engine
Cold water hitting a hot aluminum block or exhaust manifold can cause thermal shock. At best, you get a steam cloud. At worst, you get a cracked head or a warped intake manifold.
Always let the engine cool to warm (roughly 100°F).
Mistake 2: Using a jet nozzle at close range
That concentrated stream from a pressure washer's turbo nozzle or a garden hose set to "jet" forces water past seals and into connector housings. Alternator bearings hate this. Spark plug wells really hate this.
Use a wide spray pattern and keep your distance.
Mistake 3: Ignoring the alternator
The alternator is the most commonly damaged component during engine cleaning. Even "sealed" alternators have vents. A direct blast can force water into the windings.
Cover it. Every time.
Mistake 4: Letting degreaser dry on plastic trim
Water-based degreasers are generally safe, but if you let them dry on exposed plastic, they can leave a white, chalky residue. Rinse completely before it dries. If you notice residue after the fact, a quick re-rinse fixes it.
Mistake 5: Skipping the drying step
The number one cause of post-cleaning issues isn't getting water in. It's leaving water in. Connectors with trapped moisture cause intermittent faults that may not show up for days.
Spend the extra five minutes with compressed air or a leaf blower.
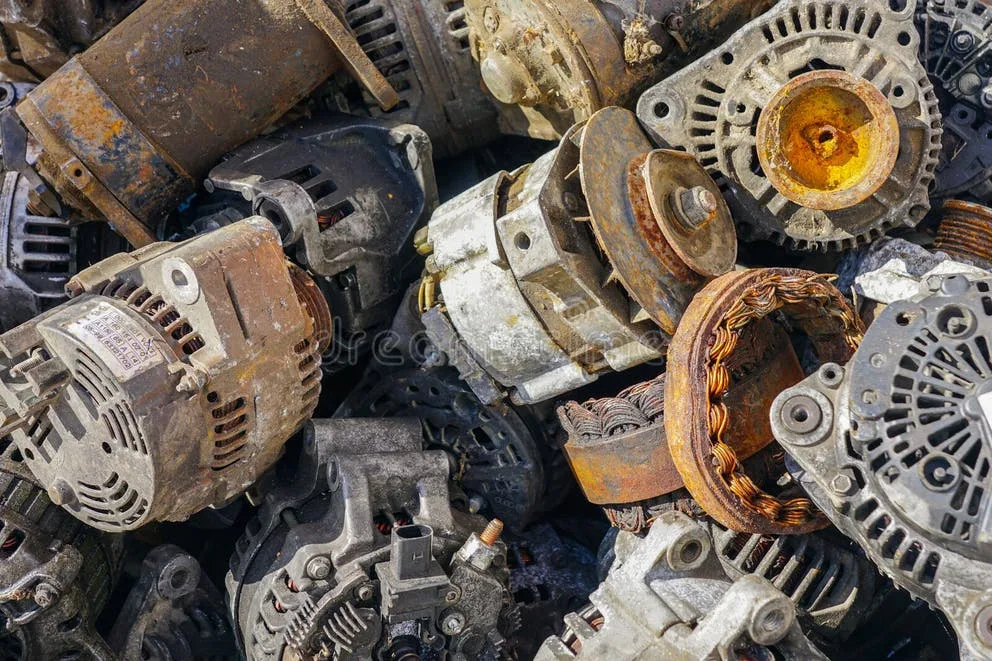
Image source: Bing (Web (fair-use with source credit))
For extra caution, there's a dedicated guide on what to remove before washing the engine that covers component removal and deeper prep.
What You Actually Need: Tools, Chemicals, and Cover-Ups
You don't need a garage full of detailing products. Here's the short list.
Essential tools:
- Garden hose with adjustable nozzle or a low-pressure pressure washer
- Stiff detail brush (for metal and block)
- Soft detail brush (for plastic, wiring, and sensors)
- Microfiber towels (at least 3 to 4)
- Plastic bags and rubber bands
- Leaf blower or compressed air
Chemicals:
- Water-based degreaser (look for "biodegradable" and "safe on painted surfaces")
- All-purpose cleaner for light dirt
Nice to have:
- Foam cannon for even degreaser application
- Steam cleaner for the gentle route
- Dielectric grease for re-sealing connectors after cleaning
- Engine dressing (water-based, matte finish)

Image source: Bing (Web (fair-use with source credit))
What not to use:
- Brake cleaner as a degreaser (too aggressive, damages plastic)
- Dish soap (can strip protective coatings and leave residue)
- Solvent-based degreasers on modern engines (can embrittle plastic over time)
- A wire brush on any surface you don't want scratched
If you're looking to expand your car wash toolkit, a quality car wash attachment for garden hose can help with the exterior rinse step before you even open the hood.
DIY Cost vs. Professional Detailer Pricing
Let's talk numbers. What you'll spend depends entirely on the route you choose.
DIY cost breakdown:
- Water-based degreaser: $8 to $15 per bottle
- Detail brush set: $10 to $25
- Microfiber towels (pack): $10 to $15
- Leaf blower: $40 to $80 (one-time cost if you don't already own one)
- Total DIY, one-time: roughly $50 to $135 assuming you own a hose and basic tools
- Recurring cost per clean: $8 to $15 for degreaser
Professional detailer pricing (as of 2026):
- Basic engine bay wipe-down: $50 to $80
- Full degrease and rinse: $100 to $150
- Steam clean with dressing: $150 to $250
- Concours-level engine bay restoration (removing components, cleaning individually): $300 to $500
Which makes more sense?
If you plan to clean your engine bay once a year or less, a professional detailer is a reasonable expense. If you detail multiple vehicles, maintain a fleet, or enjoy weekend projects, the DIY route pays for itself after two or three cleans.
If you're paying someone else, confirm they cover sensitive electronics. Not all detailers follow the same protocol. Ask specifically if they bag the alternator and fuse box before spraying.
Dressing, Drying, and Long-Term Maintenance After the Wash
The cleaning is done. The engine bay is spotless. Now, how do you keep it that way?
Dressing: yes or no?
Yes, if you want a clean, factory-fresh appearance. Use a water-based dressing, not a solvent-based one. Solvent-based dressings leave a greasy film that attracts dust and can degrade rubber hoses over time.
Apply sparingly to plastic trim, hoses, and the inner fender liners. Avoid the belts, pulleys, and alternator. Matte finishes look more natural than high-gloss.
Long-term maintenance:
- After every oil change, give the engine bay a quick visual check. Wipe down any new drips before they bake into the next layer of grime.
- If you live in a northern climate where road salt is a factor, an early-spring clean can prevent corrosion from building up over the winter.
- For desert or dusty areas, a dry microfiber wipe every few months keeps dust from turning into mud the next time you get caught in rain.
How often should you do a full clean?
- Once a year for most daily drivers.
- Twice a year if you drive on unpaved roads, in heavy construction zones, or live in a snowbelt area.
- Before selling, obviously.
When You Should Absolutely Skip Engine Bay Cleaning
There are real situations where the smartest move is to close the hood and walk away.
Your car has an active oil leak. Cleaning a leaking engine just hides the problem for a short time. The oil will return, and now you can't see where it's coming from. Fix the leak first.
Then clean.
The engine is very old and brittle. Think 1970s with original wiring harnesses. Decades of heat cycling makes insulation brittle. Even gentle handling can crack it.
A professional with experience in vintage cars is safer than a DIY approach.
You have a check-engine light on. If there's an active fault, don't introduce water until you've diagnosed and resolved it. A misfire that could have been a simple sensor might become a whole headache if you flood a connector.
The vehicle has known electrical issues. If your car already has intermittent electrical problems (flickering lights, random stalling, sensor faults), cleaning the engine bay might make those problems worse before it makes them better. Sort the electrical system first.
You're not comfortable doing it. That's okay. Not every job needs to be DIY. A reputable detailer can handle it for a reasonable price, and you get the benefit of their experience without the anxiety.
Troubleshooting: What to Do If Something Goes Wrong
Your engine misfires right after cleaning. This is almost always moisture in the spark plug wells or a connector housing. Shut the engine off immediately. Remove the coil packs or spark plug wires.
Blow compressed air into each spark plug well. Wipe any visible water from the connector pins. Reassemble and try again.
The check-engine light comes on. Retrieve the code with an OBD-II scanner. P0300 through P0304 (misfire codes) point to moisture. P0685 (ECM power relay) or P0615 (starter relay) suggest water in a fuse box or relay center.
Dry the affected area and clear the code. If it returns, you may have corrosion inside a connector that needs replacement.
The alternator stops charging. You likely forced water into the bearing housing or voltage regulator. Stop driving the vehicle. Remove the alternator and let it dry in a warm space for 24 to 48 hours.
If charging doesn't resume, the voltage regulator or diode pack is damaged. Replacement is the only fix.
The engine runs rough for the first minute, then smooths out. That's normal. A small amount of steam in the exhaust system or moisture on the O2 sensor temporarily affects the air-fuel ratio. Let it idle for a few minutes.
If it smooths out, you're fine. If it doesn't, check the spark plug wells again.
Battery or electrical system shows intermittent faults. Check every connector you covered (or should have covered). Dielectric grease on clean, dry pins prevents future issues. If you find green or white corrosion, clean it with a contact cleaner and a soft brush before reapplying grease.
Regional Considerations: Adapting to Your Climate
Northern snowbelt states. Road salt collects on the engine block, frame, and exposed metal. Spring cleaning is critical. Focus on rinsing the underside of the hood and the inner fenders where salt accumulates.
A water-based degreaser helps dissolve the salt film.
Desert and arid regions. Dust is the main enemy here. A dry microfiber wipe every two months prevents dust from turning into mud when humidity spikes during monsoon season. Skip degreaser unless you have visible oil residue.
The dust alone won't hurt anything.
Humid coastal regions. Moisture in the air means water evaporates slowly. Drying becomes more important. Use a leaf blower aggressively.
Run the engine longer after cleaning (15 to 20 minutes). Consider a silicone-based dielectric grease on every connector you uncovered to seal out humidity.
Heavy urban stop-and-go. Brake dust, road grime, and traffic film build up faster. Clean twice a year. Pay special attention to the radiator and condenser fins.
Dirt between the fins reduces cooling efficiency and makes your AC work harder.
Your Decision Guide: Pick the Right Method for Your Car
Here's the simplified version. Match your situation and go.
| Your Vehicle Type | Best Method | Key Precautions |
|---|---|---|
| Modern daily driver (2010+) | Low-pressure rinse + water-based degreaser | Cover alternator, fuse box, air intake |
| Older car (pre-2005) | Same, or steam clean | Cover distributor, carburetor throat |
| Hybrid / EV | Wipe-down only, no sprays | Avoid high-voltage cables entirely |
| Classic / collector | Steam clean or damp cloth wipe | No pressure washer, no solvent degreasers |
| Active oil leak | Fix leak first, clean after | Do not attempt to clean while leaking |
If you still aren't sure, follow this rule: When in doubt, use less water. A thorough wipe-down with a damp microfiber is always safer than a rinse. You can always repeat the wipe-down.
Fixing a water-damaged alternator or ECU is a different scale of problem entirely.
Quick Reference Checklist (Print This)
Use this every time you clean your engine bay. It takes two minutes to run through and saves hours of troubleshooting later.
- Engine cool to the touch (roughly 100°F / 38°C)
- Alternator covered with plastic bag and rubber band
- Fuse box covered
- Air intake opening covered
- Distributor or coil pack covered (if applicable)
- Degreaser applied from top to bottom
- Dwell time respected (3 to 5 minutes, no drying)
- Rinsed with low pressure, wide spray pattern
- Engine bay blown dry with leaf blower or compressed air
- Engine run for 10 to 15 minutes with hood open
- Coverings removed and connectors inspected for moisture
- Dressing applied sparingly (water-based only)
- Visual check for any missed leaks or drips
Final Thoughts
Cleaning your engine bay is one of those jobs that feels intimidating until you've done it once. After that, it becomes a straightforward maintenance task that pays off in multiple ways. You catch leaks earlier.
You keep heat where it belongs. And you get that small but real satisfaction every time you pop the hood.
Just remember the golden rule: less water is always safer than more. Protect the electronics. Dry thoroughly.
And if something feels off, stop and ask a professional. A clean engine is a happy engine. But a dry, protected engine is even happier.