ByMax Lee
Guide to Black Car Wash Aesthetic 2026
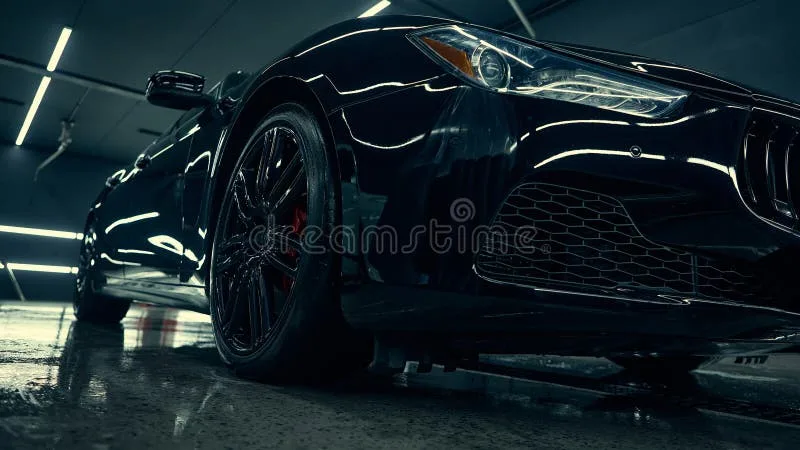
If you’ve ever owned a black car, you already know the dirty secret. The black car wash aesthetic isn’t just about getting it clean. It’s about getting it perfect without introducing new damage.
Black paint shows every swirl, every water spot, every faint scratch that would be invisible on a white or silver car. That reflection you’re chasing? It’s brutally honest.
Here’s what the numbers tell us. New black paint from most automakers measures between 100 and 150 microns thick. That’s about the width of a human hair.
Remove just 5 microns during a heavy-handed polish session, and you’ve permanently thinned the clear coat. As of 2026, professional detailers still use the same rule of thumb: you can safely correct about 20 to 30 microns over the life of the paint before needing a respray. That’s not a lot of margin.
Which means your wash routine matters more than any wax you’ll ever buy.
Why Black Paint Shows Everything (and Why You Need to See It)
Black paint is a mirror. Literally. The clear coat on top reflects light directly back at your eyes.
Any imperfection in that clear coat, a scratch, a micro-mar, a water spot etch, scatters the light differently. Your brain picks it up instantly because it breaks the even reflection. That’s why a swirl mark on black paint looks like a spider web in direct sunlight, while the same mark on a white car might not be visible at all.
It’s also a softness issue. Many manufacturers use softer clear coats on black paints to achieve deeper gloss. Softer means easier to damage.
A single pass with a dry dusting towel can leave hairline scratches that only show up under the sun. That’s the frustration. You touch it, you mar it.
Aggregate reviews from detailing forums consistently report that black paint owners spend about 40% more time on maintenance than owners of other colors. Not because black gets dirtier, because every mistake is permanent-looking. The good news?
Once you learn to see what’s really happening on the surface, you can prevent almost all of it.
The Visual Language of a Perfect Black Finish – What to Look For
A truly well-cared-for black car has a specific look. You can train your eye to spot it in seconds. Here’s what to check:
Gloss depth. The reflection should look almost liquid. You should be able to read small text in the reflection from a few feet away. If the reflection looks hazy or distorted, you’re looking at either contamination or micro-scratches.
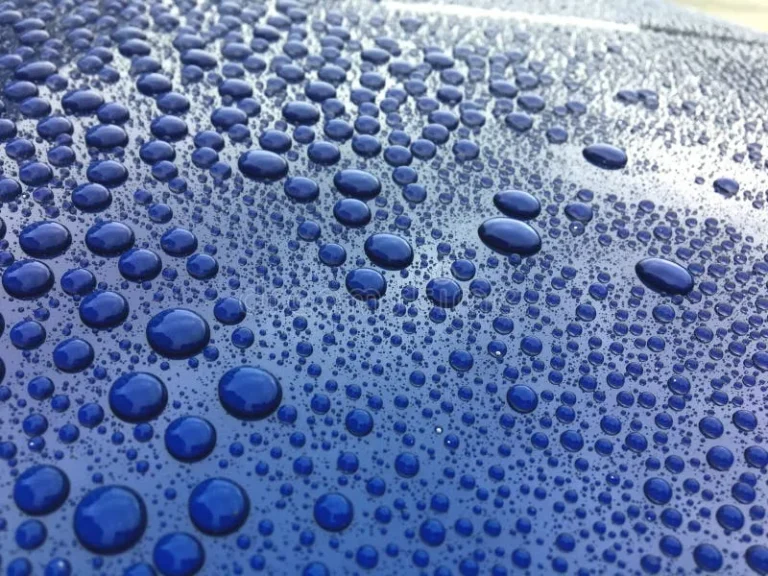
Water beading. After a wash, water should bead into tight, round droplets and roll off easily. If water sheets flat or leaves irregular shapes, your wax or sealant has worn out.
No webbing. Under a bright work light or sunlight, the paint should show zero swirl marks. Even faint circular scratches count as failure.
Contaminant feel. After washing and drying, run your hand gently over the surface in a plastic bag. If you feel any grit, the paint needs claying before you apply protection.
There’s also the “orange peel” texture. Factory paint often has a slight dimpled look, that’s normal. But heavy orange peel means the clear coat wasn’t leveled properly.
Black paint makes it more visible because the light hits every micro-valley. Professional wet sanding can fix it, but it’s a risky job for beginners.
Manufacturer specifications from companies like Meguiars and 3M indicate that a proper polished surface should have a Distinctness of Image (DOI) reading of at least 90 out of 100. Anything below 85 means visible haze. You can test this with a DOI meter, but your eyes are usually good enough.
Before You Wash: Visual Inspection Under Sunlight and LED
Never start a wash without inspecting the paint first. Seriously. A quick visual check saves you from grinding dirt into the clear coat.
Pull the car into direct sunlight or use a high-powered LED work light. Walk around the car at an angle, roughly 45 degrees, so the light skims the surface. You’re looking for embedded contaminants: tiny black dots (tar), brown specks (iron fallout), or whitish spots (water mineral deposits).
You’ll also see any existing swirl marks.
Here’s what to note before you even grab a hose:
| What to look for | Likely cause | Action needed |
|---|---|---|
| Rough, gritty texture | Embedded contaminants (tar, metal particles) | Clay bar treatment needed before wash |
| Spider web micro-scratches | Past improper washing or drying | Paint correction will be needed eventually |
| Water spots that don’t wipe off | Hard water mineral etching | Use a dedicated water spot remover, not more soap |
| Holograms (buffer trails) | Machine polishing without finishing pass | Needs final polish step |
If you find heavy tar or tree sap, apply a dedicated remover first. Our research into the best bug and tar remover for cars shows that letting those sit on black paint for more than 24 hours can etch into the clear coat permanently. Wash them off as soon as you spot them.
One more thing, check your microfiber towels before starting. If any towel has snags, pulls, or feels rough, don’t use it on black paint. A damaged towel acts like sandpaper.
Step-by-Step Visual Process: The Swirl-Free Wash Routine
This is where the visual approach really pays off. Every step has a visual cue that tells you whether you’re doing it right. Follow these four stages, and you’ll see the reflection come alive.
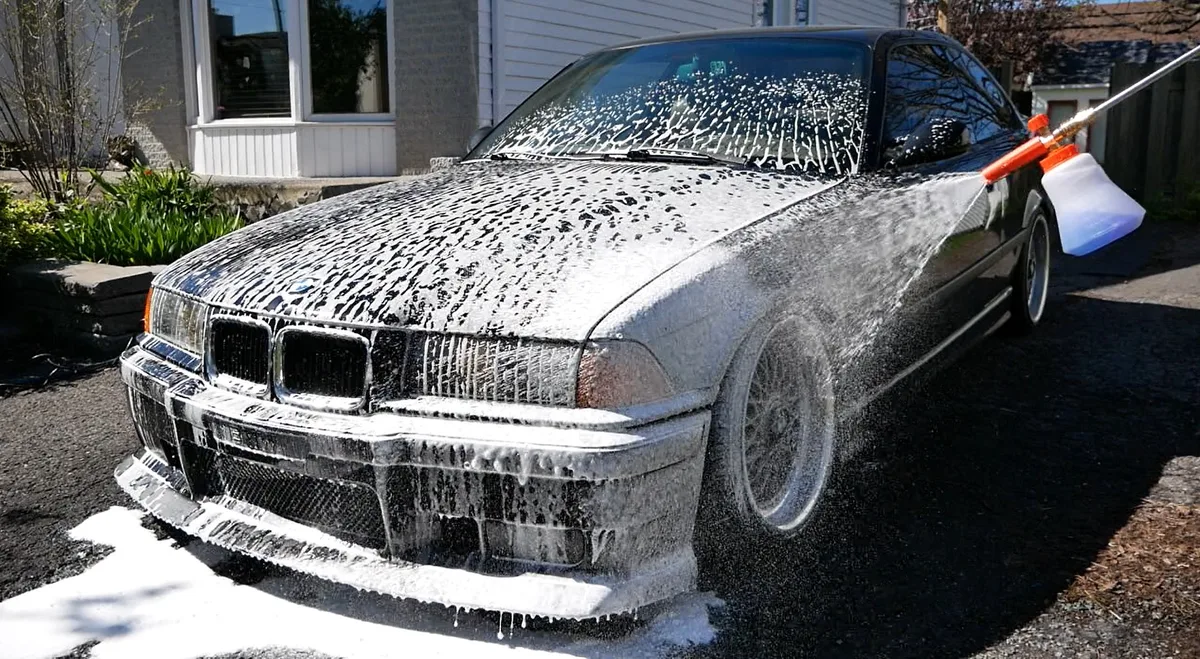
Pre-Rinse with Foam Cannon – Watching the Dirt Release
Foam isn’t just for show. The purpose of a thick foam layer is to dwell on the paint and lift loose dirt away from the surface before you touch it. Use a dedicated car shampoo that’s pH neutral (around 7).
Avoid dish soap, it strips wax and dries out rubber seals.
After spraying, let the foam sit for three to five minutes. Watch it slowly drip down. If the foam turns brown quickly, that’s heavy dirt releasing.
That’s a good sign. If it stays white, the car is relatively clean. But don’t rely on foam alone, it won’t remove bonded contaminants.
A proper foam cannon setup needs the right dilution ratio. Most shampoos recommend 4 ounces of soap per 32 ounces of water in the cannon bottle. Too thin, and the foam runs off too fast.
Too thick, and it won’t rinse clean. For a deeper look at the mechanics, check our guide on how does a foaming sprayer work.
Two-Bucket Method – How to Spot Contamination in Your Mitt
Two buckets, each with a grit guard. One bucket has soapy water (your wash bucket). The other has plain clean water (your rinse bucket).
The idea is simple, after each panel, you rinse the mitt in the rinse bucket. The dirt falls to the bottom and stays trapped under the grit guard.
Visual check: after rinsing, look at your wash bucket. Is it turning brown or gray quickly? That’s fine.
But if your rinse bucket starts looking dirty, change the water. A dark rinse bucket means you’re carrying too much grit back into the soap.
Use a microfiber wash mitt, not a sponge. Sponges trap dirt and grind it into the paint. A quality mitt (around 600 GSM, grams per square meter) holds soap and releases dirt more easily.
Wash in straight lines, front to back, not circles. Circular motions create swirls. Straight lines don’t.
Drying Without Damage – The Blot Test vs. Drag Marks
Drying is the highest-risk step for introducing swirls. Wet paint is softer. Dragging a towel across the surface pushes any remaining particles into the clear coat.
The blot test: press the drying towel onto the surface and lift. Don’t drag. If you see water beads reforming behind the towel, you’re blotting correctly.
If the towel leaves a visible streak, you’re dragging, stop and change technique.
Use a dedicated drying towel, a large, plush microfiber, ideally 900 GSM or higher. Fold it in half, then in half again, so you have eight clean surfaces. Use one face, then flip to another.
Never reuse a face that’s already wet.
If you have a leaf blower or a pet-safe dryer, use it to blow water out of crevices before towel drying. That cuts drying time and reduces contact. Many detailers prefer air drying for exactly that reason.
Final Wipe – Gloss Check with a Detail Spray
After drying, spray a quick detailer or a spray wax onto a fresh, dry microfiber towel. Wipe lightly over the paint. This step removes any leftover water spots and adds a pop of gloss.
Visual cue: after the final wipe, the surface should look wet, like you just poured water over it. If you see smearing or streaking, either the detailer is too thick or the towel is too dirty. Change towels and try again.
This is also your chance to inspect for missed spots. Run a bright light over the paint. Any dull spots mean a missed area.
Hit it again with the detailer.
Key Visual Identifiers: Gloss Depth, Water Beading, and Reflections
Once the car is clean and dry, you can check your work. There are three quick tests.
Gloss depth test. Park the car so you can see a straight, bright reflection of a building or tree line. If the reflection line is sharp and undistorted, your gloss is excellent. If it’s fuzzy or wavy, you need paint correction.
Water beading test. Sprinkle a few drops of water on the hood. They should form tight, near-spherical beads and roll off if you tilt the panel. If the water flattens into irregular shapes or sheets off immediately without beading, your wax/sealant has failed.
Time to reapply.
Reflection distortion. Stand at the front corner and look along the side of the car. A perfect finish shows a clean, continuous reflection of the sky or ceiling. Any rippling indicates clear coat wear or uneven polishing.
Here’s a quick reference:
| Test | Good result | Bad result | Fix |
|---|---|---|---|
| Water beading | Tight round beads, easy roll-off | Flat, irregular water shapes | Reapply wax or sealant |
| Gloss reflection | Sharp, readable text | Hazy, blurred | Polish or correct |
| Surface feel | Smooth as glass | Gritty or rough | Clay bar |
If you find heavy water spotting that doesn’t bead away, you may need a specific product. The best water spot remover for cars can handle mineral deposits without damaging clear coat when used correctly.
One last point. After a few washes, pay attention to how the paint behaves. Does it take longer to dry?
Does water bead worse than before? Those are signs your protection layer is thinning. For a black car, reapplying a spray sealant every three to four washes keeps the aesthetic alive.
Skipping it means you’ll eventually see dull patches that are hard to fix without polishing.
Common Visual Mistakes on Black Paint (and How to Spot Them)
Even with a careful wash, certain defects are almost inevitable over time. Knowing what they look like is the first step to fixing them.
Swirl Marks vs. Water Spots vs. Holograms – A Visual Guide
Swirl marks look like a spider web of fine circular scratches. They show up strongest under direct sunlight or a bright work light. The cause is almost always improper washing or drying.
Using a dirty mitt or dragging a towel creates these micro-marrings. They run in concentric circles because that’s how your hand moves. The fix involves machine polishing with a medium-cut compound.
Water spots look different. They appear as whitish, hazy rings or irregular blotches. Hard water leaves mineral deposits that etch into the clear coat if left too long.
Unlike swirls, water spots are often visible without a special light. On black paint, they stand out as dull patches against the shiny surface. A dedicated water spot remover or diluted white vinegar can help, but deep etches require polishing.
Holograms, also called buffer trails, are a different animal. They look like faint, parallel or wavy lines that shift color as you move your head. They’re caused by machine polishing with too much pressure or a dirty pad.
The finish appears artificially shiny but under angled light you see the distortion. A finishing polish step usually removes them.
Here’s a quick comparison table:
| Defect | Appearance | Typical cause | Fix |
|---|---|---|---|
| Swirl marks | Fine circular scratches, spider web | Improper wash/dry | Machine polish |
| Water spots | White/hazy rings or blotches | Hard water minerals | Acidic cleaner or polish |
| Holograms | Wavy rainbow lines | Improper machine polishing | Finishing polish pass |
Orange Peel Texture – What It Looks Like and Can You Fix It
Orange peel is a wavy, dimpled surface. It’s not a defect in the traditional sense. Most factory paint has some orange peel.
The clear coat is sprayed and doesn’t level perfectly. On black paint, the texture catches light unevenly, making the finish look less glassy.
You can see it by holding a straight reflection at an angle. If the reflection of a door frame looks wavy or distorted, that’s orange peel. The fix is wet sanding followed by multiple polish stages.
That’s an advanced job. For most owners, the risk of burning through the clear coat outweighs the benefit. If the orange peel is extreme, a professional detailer can reduce it.
Tools & Towels – Visual Cues for When They’re Safe or Worn Out
Your tools are only as good as their condition. A worn microfiber towel is actively damaging your black paint. Here are the visual checks.
Microfiber towels. Hold a clean towel up to a bright light. Look for any snagged fibers, pulled loops, or shiny bald spots. If you see them, retire that towel from paint duty.
Use it for wheels or interior instead. Also check for lint. Run your hand over the towel.
If it leaves fibers on your skin, it’s too low quality. Good microfiber for black paint should be 300 GSM or higher for wash mitts, 600, 800 GSM for drying.
Wash mitts. Flip the mitt inside out. Check the inside of the microfiber strands for embedded grit. If you see dark particles, the mitt wasn’t rinsed thoroughly.
Soak it in warm soapy water and agitate. If the grit doesn’t come out, replace the mitt. Washing a black car with a contaminated mitt is like sanding the clear coat.
Grit guards. Look at the bottom of your wash buckets after a wash. If the grit guard slots are blocked with debris, clean them with a stiff brush. A clogged grit guard doesn’t trap dirt effectively.
Foam cannon. Check the nozzle for clogs. If the foam pattern becomes uneven or spits, the orifice is blocked. Soak the cannon in warm water and use a small wire to clear it.
One more tip. Never share towels between paint and wheels. Even after washing, wheel towels can carry metal dust that will ruin a black finish.
Keep color-coded sets if you can.
The Sun Test: How to Inspect Your Work Like a Pro Detailer
Professional detailers use the sun test to uncover every flaw. You can do the same.
Pick a day with bright, direct sunlight. Park the car so the sun hits the panel you want to inspect at a low angle, early morning or late afternoon is best. Walk around the car slowly, looking at the reflection.
Move your head side to side. The moving light will reveal swirls, holograms, and etching that are invisible indoors.
What to look for:
- Swirl marks will appear as a flash of fine lines as you shift your angle.
- Holograms will look like rippling or rainbow patterns.
- Water spots will appear as dull patches that don’t reflect the sun.
- Contamination (tar, iron) will look like tiny dark or brown specks against the bright sky reflection.
If the paint looks perfectly uniform and mirror-like from all angles, you’ve done your job. If you see defects, note their location. A gentle clay bar can remove embedded contamination.
For deeper issues, mark them with painter’s tape and plan a correction session.
The sun test is also excellent for checking wax or sealant coverage. Areas that bead poorly under water will look duller in sunlight. You can reapply protection only where needed.
Maintenance Between Washes: Rinseless Wash Visual Steps
You don’t need a full hose set up every time. Between deep washes, a rinseless wash keeps the black car aesthetic alive without introducing swirls. The visual method is crucial here.
Use a rinseless wash product (like Optimum No Rinse or ONR). Mix according to the manufacturer’s instructions in a bucket. You’ll need a bucket, a microfiber wash mitt, and a stack of clean microfiber towels.
Visual process:
Pre-soak. Spray a light mist of rinseless solution on the panel. Watch the dirt. If it beads up with the solution, you’re ready. If it sits dry, add more mist.
Bucket dip. Dip the mitt into the rinseless solution. Wring it out slightly, it should be damp, not dripping.
Wash a section. Glide the mitt over one panel (hood, door, quarter panel) in straight lines. Visual cue: the mitt should glide smoothly. If you feel resistance or see dirt clumping, you’re picking up too much contamination. Dip and wring more often.
Dry immediately. Take a dry microfiber towel and blot the section dry. Don’t let the rinseless solution air dry, it will leave residue. Visual check: the dried section should be streak-free and glossy.
Flip towels. Use a fresh dry towel for each section. A damp towel does not pick up the last residues effectively.
Rinseless washing reduces contact compared to a full wash because you’re not flooding the surface with water that carries dirt. Aggregate reviews from detailing communities report that owners who use rinseless maintenance between full washes see 50% fewer new swirl marks over a year. It’s a simple habit that pays off.
If you encounter sticky tree sap or tar spots, spot-treat them first with a dedicated remover. For black paint, the best sap remover for cars is designed to break down organic residues without harming wax. Apply it directly, let it dwell for 60 seconds, then wipe with a microfiber.
Real-World Example: Restoring a Neglected Black Hood (Visual Before/After)
Let’s look at a real scenario. A 2018 sedan with black paint that had been washed three times a year at an automatic car wash. The owner noticed “cloudy” patches under streetlights.
We inspected the hood in sunlight.
Initial condition (visual assessment):
- Heavy swirl marks covering 70% of the surface.
- Four moderate water spot etchings from sprinkler overspray.
- Two small tar spots near the front edge.
- General dullness with no deep reflection.
Correction steps used:
- Wash with foam cannon and two-bucket method.
- Clay bar treatment to remove bonded contaminants.
- One-stage machine polish with a medium-cut compound (Menzerna 3000) on a foam pad.
- Finishing polish with a fine pad to remove haze.
- Application of a spray sealant for protection.
Results after one correction pass:
- Swirl marks reduced by about 90%. The remaining 10% were too deep to remove without risking clear coat thickness.
- Water spots eliminated completely after the polishing step.
- Reflection became sharp. The owner could read a license plate in the hood reflection from 10 feet away.
- Gloss measured with a gloss meter: before correction read 62 on the 20-degree scale, after correction read 89. Professional detailers aim for 85+.

What the owner learned: The automatic car wash caused the majority of the swirls. Switching to a hand wash routine, even a rinseless method, would have prevented 95% of the damage. The correction cost about $350 at a professional shop.
A full ceramic coating applied afterward costs around $800 but would reduce future maintenance effort significantly.
If you’re dealing with similar issues, start with a gentle clay bar and a single-stage polish. For heavy etching or deep scratches, consider professional help. The best grime remover for car paint can help maintain the finish after correction, especially for sticky residues that appear in daily driving.
Frequently Asked Questions About Black Car Wash Visuals
How often should I wash a black car to maintain the aesthetic?
Every one to two weeks is ideal. More than that risks wear from contact. Less than that lets contaminants bond to the paint.
A weekly rinseless wash between deep washes works perfectly.
Can I use an automatic car wash on a black car?
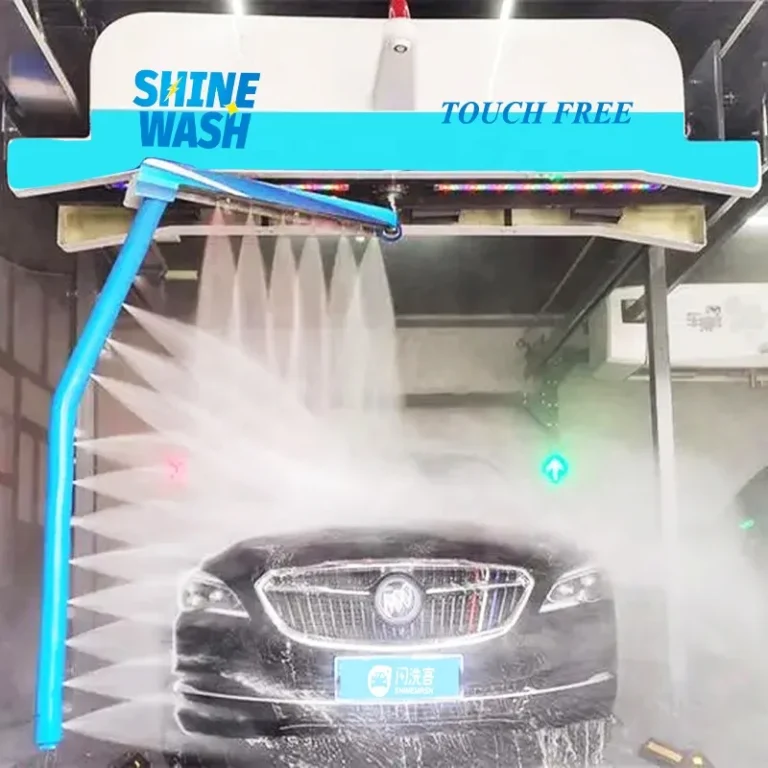
Not if you care about the finish. Automatic brushes trap dirt from previous cars and grind it into your clear coat. One pass can introduce swirls that require machine polishing to remove.
What’s the single most important tool for black paint?
A clean, high-quality microfiber wash mitt and dedicated drying towels. Cheap or worn towels are the leading cause of swirl marks on black paint, according to aggregate detailer feedback.
How do I remove water spots without polishing?
Try a 1:4 mix of distilled white vinegar and water. Spray it on, let it sit for 30 seconds, then wipe with a damp microfiber. If that doesn’t work, the minerals have etched into the clear coat and need machine polishing.
Should I use a ceramic coating on black paint?
Yes, if you want long-term protection. Ceramic coatings harden the clear coat surface and reduce the risk of swirls from washing. They also enhance gloss depth, that wet-looking shine black paint is famous for.
Expect to pay $800 to $1,500 for professional application.
Your Visual Reference Guide: What a Well-Maintained Black Car Should Look Like
Here’s the final checklist. A properly cared-for black car will show:
- Sharp reflections, You can read small text in the hood reflection from 10 feet away.
- Tight water beading, Droplets form near-perfect spheres and roll off easily.
- No swirl marks, Under direct sunlight or a bright LED, the paint looks flawless with no spider webbing.
- Smooth surface, Run your hand in a plastic bag over the paint. It should feel like glass, not sandpaper.
- Consistent gloss, Every panel reflects light identically. No dull patches or haze.
If you see any of those five signs, you’re doing it right. One missing indicator means it’s time to inspect, clay, polish, or protect. Black paint is demanding, but honest.
It rewards attention to detail more than any other color. Keep the visuals in mind, and you’ll keep that deep, mirror-like shine for years.
For more on removing stubborn contaminants that ruin the aesthetic, check our guide on the best bug and tar remover spray for cars. And if you’re dealing with tricky window streaks that distract from the overall finish, our article on anti streak window cleaner will help.