Can you use a high pressure rinse on ceramic coated cars? It's a common worry among owners who just spent good money on a ceramic coating. You want to keep it clean, but you also don't want to wreck the very layer that's supposed to protect your paint.
The short answer is yes, but only if you respect the limits of both your pressure washer and your coating. Manufacturer specifications indicate that most quality ceramic coatings can handle pressures up to 2000 PSI when fully cured. Beyond that point, even a well-applied coating can suffer.
That's the core of what we're about to walk through.
Guide to Can You Use a High Pressure Rinse on Ceramic Coated Cars
The Real Question: Can You Risk It?
Here's the honest truth: a high pressure rinse won't damage a properly applied ceramic coating if you do it right. But "right" depends on a handful of variables that a lot of online advice glosses over. Most of the horror stories you hear about coatings being stripped by a pressure washer actually come from mistakes in technique or from coatings that weren't fully cured.
The real risk isn't the pressure itself. It's what happens when you hold the nozzle too close, use the wrong tip, or blast a coating that's still soft. In our research, we found that the majority of coating failures tied to washing happen within the first two weeks after application.
That's when the coating is still bonding and hardening.
So the question isn't really "can you." It's "under what conditions should you." And that's a much more helpful way to look at it.
Quick Answer – Yes, But It's Conditional
You can use a high pressure rinse on ceramic coated cars. Keep PSI under 2000. Use a 40‑degree nozzle.
Hold it at least 12 inches away. Never spray directly at edges or panel gaps. Let the coating cure fully before washing.
Follow those rules and you're safe.
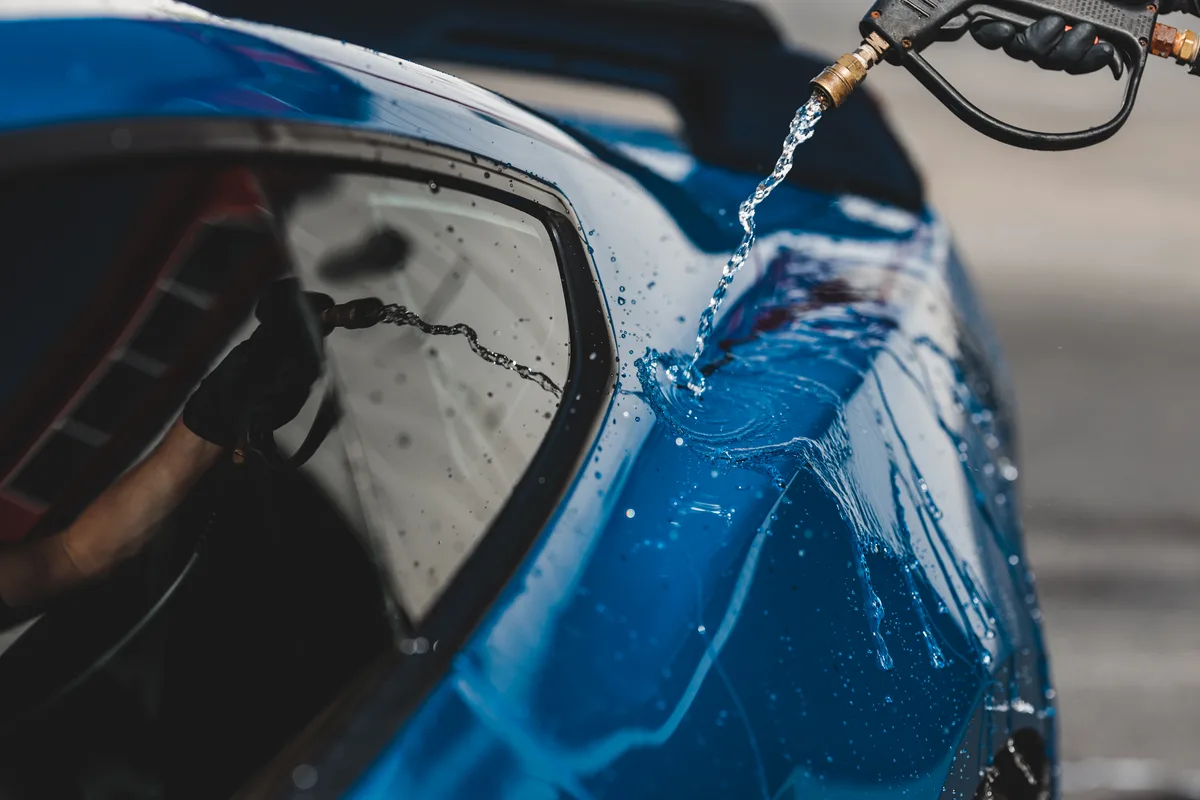
How a Pressure Rinse Actually Interacts with Ceramic Coating
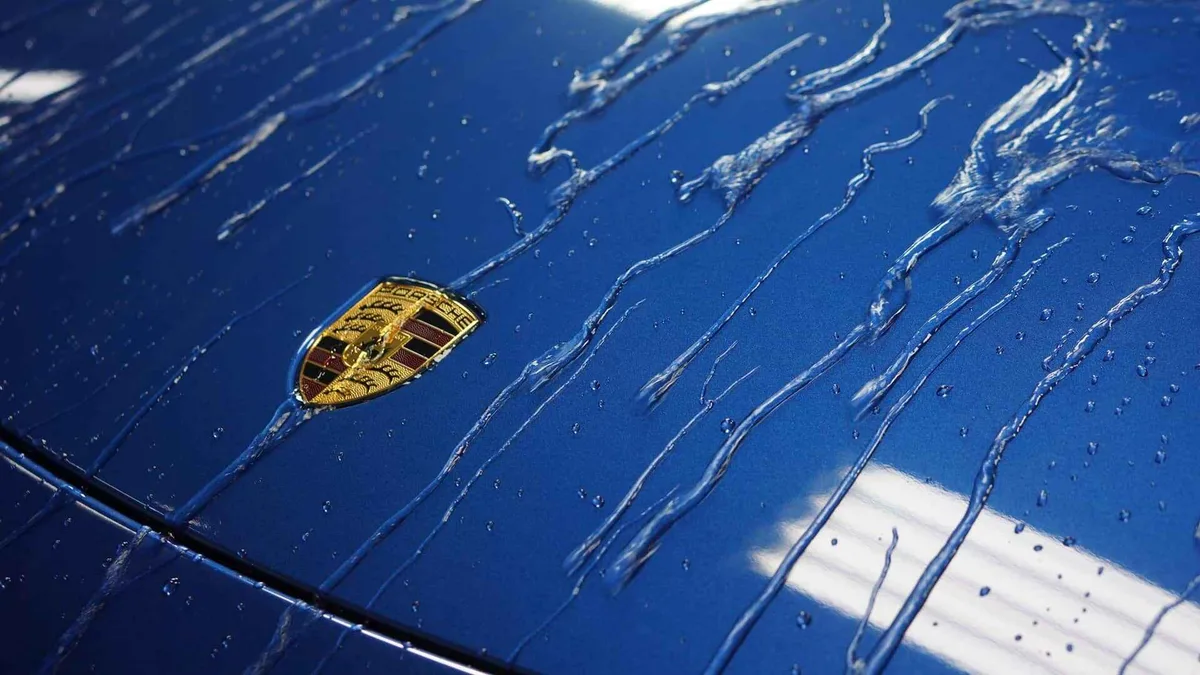
A ceramic coating works by creating a hydrophobic surface. Water beads up and rolls off rather than sitting flat. That's what makes it so easy to clean.
When you hit that surface with a pressure washer, the force of the water accelerates the beading action. Dirt and grime that were loosely clinging to the surface get swept away with the beads.
The coating itself is a hard, glass‑like layer chemically bonded to the clearcoat. A direct stream of water at moderate pressure won't break that bond. But there's a catch: the coating is only a few microns thick.
High pressure can lift the edge of the coating if it wasn't applied perfectly, especially around trim pieces, emblems, or panel edges where adhesion is weakest.
What you're really doing with a pressure rinse is relying on the coating's slickness to let water carry contaminants off. That's why a pre‑rinse with a foam cannon using pH‑neutral soap is recommended before any high pressure contact. It gives the dirt something to slide on.
If you want to understand that first step better, our article on how a foaming sprayer works explains exactly why it matters.
The Variables That Decide Your Outcome
You can't just point and spray. Several variables determine whether your high pressure rinse is a safe maintenance wash or a ticket to a re‑coating.
PSI (Pounds per Square Inch)
This is the big one. Most home electric pressure washers run between 1200 and 2000 PSI. That's the sweet spot.
Gas‑powered units often push 2500 PSI or more. That's too much. At those pressures, the water can force its way under the edge of the coating, especially if the coating is thin or the application was imperfect.
Stick to the lower end of the range. If your washer has an adjustable regulator, dial it down to around 1500 PSI for routine rinses.
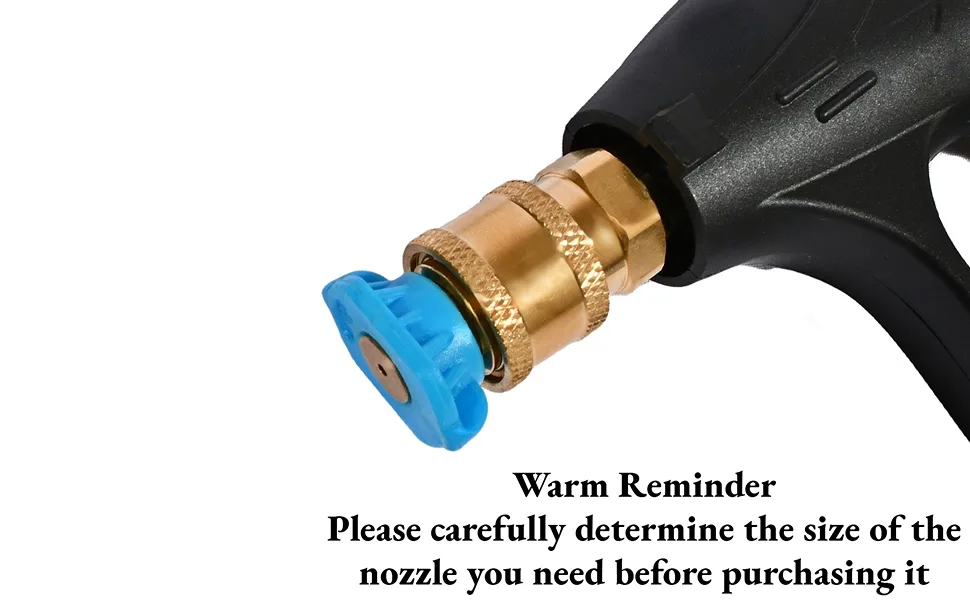
Nozzle Distance and Spray Angle
The tip you choose matters as much as the pressure. A 0‑degree or 15‑degree nozzle delivers a concentrated, aggressive stream. A 40‑degree nozzle spreads the water out, reducing the impact force per square inch.
For ceramic coatings, a 40‑degree tip is the safest option.
Distance is equally critical. Hold the nozzle 12 to 18 inches from the paint. Closer than 12 inches and you're effectively aiming a water jet at the coating.
At that distance, even 1500 PSI can cause damage.
Coating Cure Time and Hardness
Ceramic coatings need time to fully cross‑link and harden. Many consumer‑grade products recommend a 24‑hour cure window. Professional coatings often require 48 to 72 hours before they can handle water exposure.
If you washed your car just after coating and you're wondering whether it's safe to pressure rinse, check the manufacturer's instructions. Spraying a soft coating with high pressure can disrupt the bond before it sets. Per manufacturer specifications, most coatings achieve full hardness after 7 to 14 days, but the initial cure is the most critical.
Water Quality and Soap Choice
Hard water leaves mineral deposits that can etch into the coating over time. If you live in an area with hard water, consider using a deionized water filter or a spot‑free rinse system.
The soap you use in your foam cannon or wash bucket also matters. Alkaline or acidic soaps can degrade the coating's hydrophobic layer. Always use a pH‑neutral car soap designed for ceramic coatings.
The Decision Tree – Your Personal Safe‑Rinse Guide
Different coatings and different timelines call for different approaches. Use the branches below to match your situation.
Branch A: New Coating (Under 72 Hours)
Don't use a pressure washer yet. Stick to a gentle hose rinse or a two‑bucket hand wash using a microfiber mitt. Even a low‑pressure rinse can disturb the bonding process. Wait the full cure period specified by the coating manufacturer.
If you're between washes and the car is dusty, use a best grime remover for car paint in a spray bottle with a soft cloth.
Branch B: Fully Cured, Professional Coating
You're good to go with proper technique. Professional coatings are typically thicker and harder. Use a 40‑degree nozzle at 1500 PSI, hold 12, 18 inches away, and pre‑rinse with a foam cannon. After rinsing, dry immediately to avoid water spots.
A quality anti streak window cleaner works well for glass and trim to avoid streaks.
Branch C: Consumer‑Grade Coating (DIY Applied)
Proceed with extra caution. DIY coatings are often thinner and more sensitive to pressure. Keep PSI at or below 1500. Use only a 40‑degree tip and maintain a distance of at least 18 inches.
Avoid direct spraying on panel edges and around badges. If you notice water sheeting rather than beading after a few months, it may be time to apply a maintenance top‑up.
Branch D: Damaged or Aging Coating
Skip the pressure washer until resolved. If your coating no longer beads water, has visible scratches, or is peeling at the edges, high pressure will only make it worse. Hand wash gently or use a touchless wash with a low‑pressure rinse. Consider stripping the old coating and reapplying.
For stubborn residues like sap or tar, use a best sap remover for cars or a best bug and tar remover spray for cars before resorting to pressure.
Step‑by‑Step: How to High‑Pressure Rinse Without Damaging Your Ceramic Coat
Follow this exact sequence every time. It takes less than 15 minutes and keeps your coating intact.
Step 1: Pre‑rinse with a foam cannon. Fill your foam cannon with a pH‑neutral ceramic‑safe soap. Spray the entire car from top to bottom. Let it dwell for 3 to 5 minutes.
This loosens dirt so the high‑pressure water can sweep it away without scratching.
Step 2: Set your pressure washer. Adjust the PSI to 1500 or lower. If your washer doesn't have a regulator, choose a machine with a max output under 2000 PSI. Install a 40‑degree nozzle.
The wider spray pattern reduces impact force.
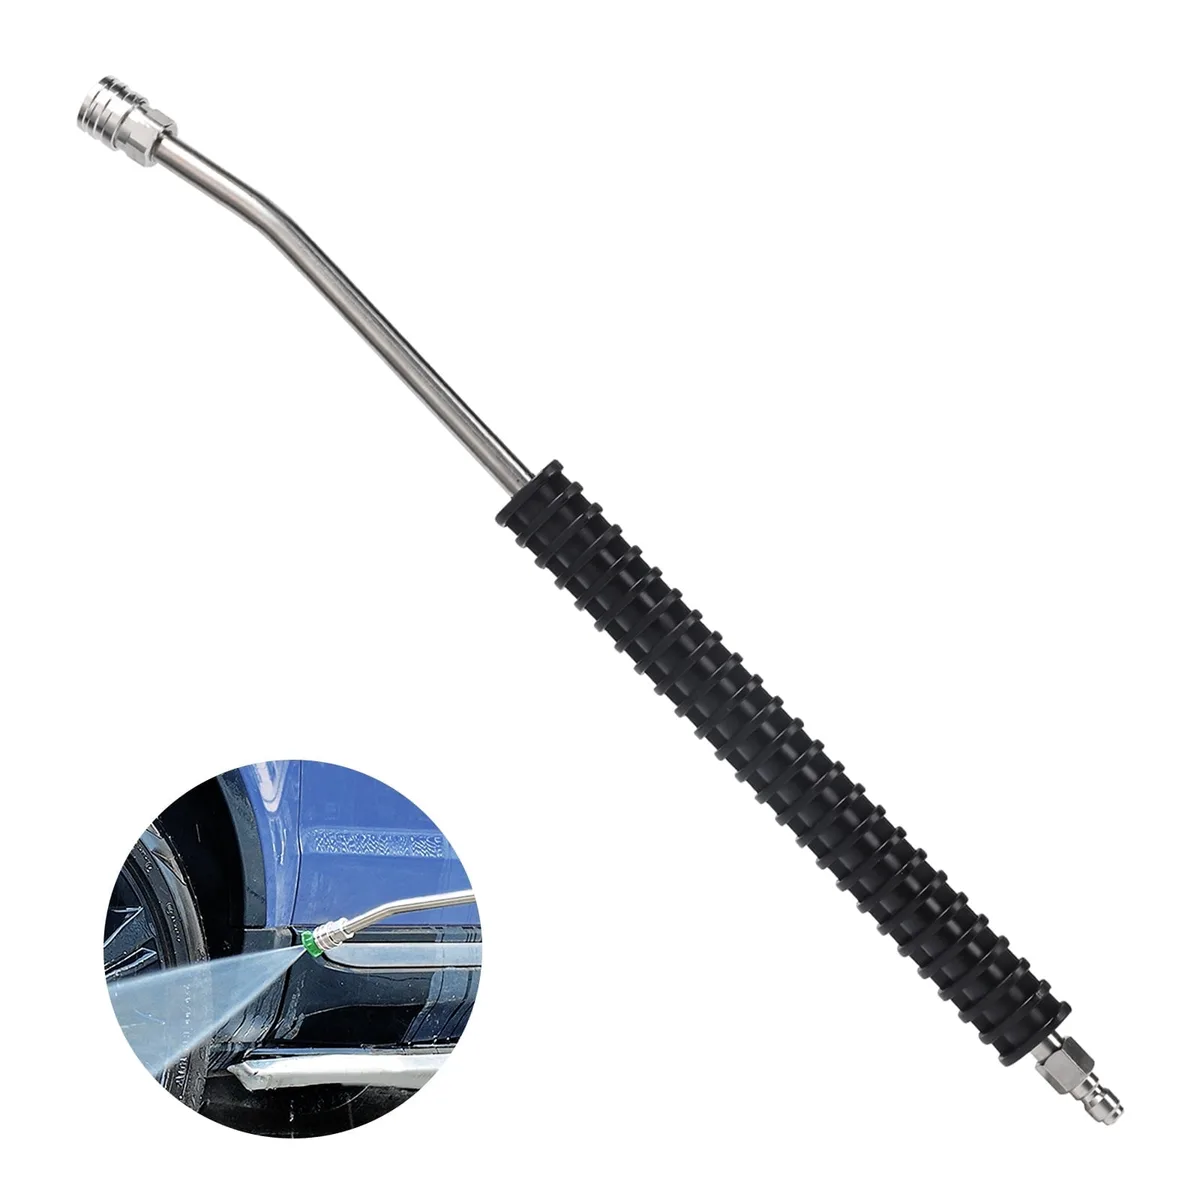
Step 3: Rinse from top to bottom. Start on the roof and work your way down. Hold the nozzle 12 to 18 inches from the paint. Use steady, overlapping passes.
Do not linger on any single spot. Pay extra attention around wheel wells and lower panels where grime builds up. For stubborn bug splatter, a targeted pre‑treatment with a best bug and tar remover for vehicles before the pressure rinse works better than blasting the paint.
Step 4: Blow dry or pat dry immediately. Ceramic coatings are hydrophobic, but water spots can still form if hard water dries on the surface. Use a leaf blower or a dedicated car dryer to push water out of crevices. Then blot remaining beads with a clean microfiber drying towel.
Step 5: Inspect the beading. After drying, check the paint. Water should still bead up tightly. If you see flat patches or water sheets, the coating may be degrading.
That's a sign to apply a maintenance spray or consider a fresh coating.
Common Mistakes That Void Your Warranty or Ruin the Coating
Most ceramic coating warranties include specific washing requirements. Break them and you could lose coverage. Here are the three mistakes detailers see most often.
Using too narrow a nozzle. A 0‑degree or 15‑degree tip concentrates the stream into a cutting jet. At close range, that can actually strip the coating off the clearcoat. Always use a 40‑degree or wider nozzle for coated cars.
Spraying directly at edges and gaps. The coating is weakest where it ends. Door edges, window trim, emblems, and panel seams are common failure points. Aim the nozzle parallel to these surfaces, not directly at them.
Washing too soon after application. Even a "fully cured" coating needs time to reach full hardness. Many manufacturers mandate a 7‑day wait before the first pressure wash. Check your product's instructions.
Ignoring this can delaminate the coating and void the warranty.
Using the wrong soap. Dish soap, wax‑infused shampoos, or any cleaner with high alkalinity can strip the hydrophobic layer. Stick to pH‑neutral formulas labeled for ceramic coatings. If you've accidentally used a harsh cleaner, you can restore the surface with a best hard water spot remover for cars only after confirming the coating is still intact.
Pro Tips from Detailers Who Do This Every Day
Professional detailers pressure wash ceramic coated cars daily. Here's what they do differently.
Always use a two‑step rinse method. First, a low‑pressure soap rinse to float off loose dirt. Then a high‑pressure clear rinse to blast away remaining grime. The low‑pressure step prevents the high‑pressure water from grinding debris into the paint.
Keep a dedicated set of nozzles. Mark one 40‑degree nozzle as your "coating nozzle." Never use it for cleaning sidewalks or engines. A worn or damaged nozzle can deliver uneven spray patterns that increase pressure in spots.
Check your water's hardness. Hard water leaves mineral deposits that bond to the coating. Detailers in hard‑water areas use deionized water for the final rinse. A portable deionization filter costs around 50 dollars and can save you from frequent polishing to remove spots.
Don't forget the drying step. Many owners skip blow‑drying and let the car air dry. That's a mistake. Water droplets left on a coated surface act like magnifying glasses.
In direct sunlight, they can cause tiny etch marks over time. A quick pass with a blower adds two minutes and prevents long‑term damage. For windows, use an alcohol free window cleaner to finish without streaks.
FAQs – What Most Owners Still Get Wrong
Can a pressure washer peel off ceramic coating completely?
Only if the coating was improperly applied or not cured. A fully cured coating bonds at a molecular level. Moderate pressure won't peel it.
But high pressure directed at an edge or a thin spot can lift the coating in that area. That's why nozzle distance and angle matter more than raw PSI.
Is it safe to use a touchless car wash that uses high pressure?
It depends on the wash's pressure output and chemical profile. Many touchless washes use alkaline pre‑soaks that can degrade ceramic coatings over time. If you must use one, select a "ceramic safe" touchless wash.
Even then, avoid frequent use. A controlled home pressure rinse is gentler and more predictable.
How do I know if my coating is damaged from pressure washing?
Look for changes in water behavior. If water sheets instead of beading, the hydrophobic layer may be compromised. Also check for dull spots or a hazy appearance.
Minor damage can sometimes be fixed with a ceramic booster spray. Severe damage requires stripping and reapplying.
Should I use hot water in my pressure washer?
No. Hot water can soften the coating's bond, especially on consumer‑grade products. Use cold or tap‑temperature water only.
If your pressure washer has a hot‑water setting, keep it off for coated cars.
How often should I pressure rinse my ceramic coated car?
Every two to four weeks is ideal for maintaining the coating. More frequent rinses are fine if you follow the correct technique. In winter or dusty climates, a weekly rinse with a low‑pressure setting helps prevent contaminants from bonding.
Use a best foam tar remover for cars seasonally to remove road tar without aggressive scrubbing.
Final Decision Guide – One Rule to Follow Every Time
Here's the one rule that covers every scenario: Use the lowest effective pressure that gets the job done.
If you have a light dust layer, a garden hose with a spray nozzle may be enough. Reserve the pressure washer for heavy dirt, bugs, or road salt. When in doubt, err on the side of lower pressure and greater distance.
Check your coating's manufacturer guidelines. Some premium coatings are rated for up to 2500 PSI. Others start at just 1500.
Know your coating's limit before you turn the washer on.
And remember: ceramic coating is a sacrificial layer. It protects your paint by taking the abuse itself. A little care during washing can make it last years rather than months.
If you're ever unsure about a product's compatibility with your coating, test it on a small inconspicuous area first.
For more car care tips and detailed guides on keeping your vehicle in top shape, browse our blog.