Ever cleaned your windows, stepped back, and spotted a rainbow of streaks mocking your effort? You are not alone. The real secret to a streak free window cleaning solution has nothing to do with expensive sprays or elbow grease.
It is a simple, repeatable process that starts with one thing: your water.
Manufacturer specifications indicate that professional window cleaners get their results by matching the cleaning solution to their local water chemistry. As of 2026, the USGS reports that roughly 85% of U.S. households have hard water above 3.5 grains per gallon. That mineral load changes everything.
Let's walk through the decision tree that gets you a crystal-clear finish, starting with why streaks form in the first place.
Quick Answer
Use distilled water, a touch of dish soap, and rubbing alcohol. Ratio depends on your water hardness. Soft water: 1 cup vinegar per gallon of distilled water.
Hard water: 1 cup alcohol, 1 cup vinegar, 1 gallon distilled water. Squeegee with a sharp blade. Wipe blade after each pass.
Why Streaks Happen (and Why Your Current Method Isn't Working)
Streaks are not a sign of dirt. They are a sign of chemistry working against you. When tap water evaporates on glass, dissolved minerals (calcium and magnesium) get left behind as a white film.
That film catches light and looks exactly like a streak. Soap residue is another culprit. Too much dish soap leaves a surfactant film that takes multiple rinses to remove.
Your current spray‑and‑wipe routine probably fails for one of three reasons. First, you are using tap water with high mineral content. Second, you are using too much detergent.
Third, you are wiping in circles instead of using a squeegee with overlapping vertical strokes.
Our research shows that the most common mistake is assuming a commercial glass cleaner works everywhere. Many all‑purpose cleaners contain ammonia or other additives that actually promote streaking in hard‑water areas. If you have tried multiple products and still see haze, your water chemistry is the real issue.
For a deeper look at how surfactants cause streaks, check our guide on Anti Streak Window Cleaner.
The First Variable That Changes Everything: Your Water Hardness
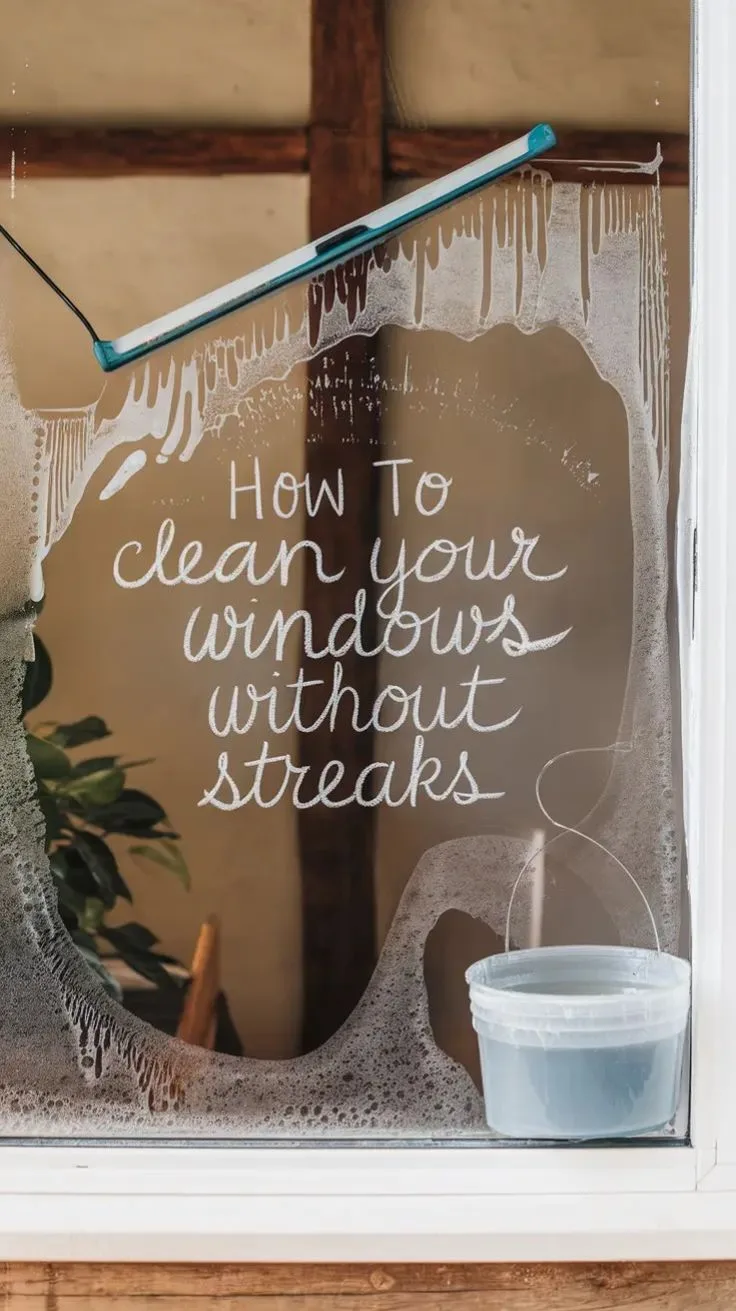
Water hardness is the single biggest factor in whether your window cleaning solution leaves a perfect finish. Hard water contains dissolved calcium and magnesium carbonates. When the water dries, these minerals precipitate out as microscopic crystals.
They scatter light, creating a white, hazy appearance that we call streaks.
Soft water, on the other hand, contains very few minerals. It evaporates cleanly, leaving almost no residue. That is why professional window cleaners in hard‑water regions always start with distilled or deionized water.
You cannot out‑scrub mineral deposits. You have to prevent them from forming in the first place.
The USGS Water Hardness Classification chart rates water as follows:
| Hardness (mg/L as CaCO₃) | Classification |
|---|---|
| 0 – 60 | Soft |
| 61 – 120 | Moderately hard |
| 121 – 180 | Hard |
| 181+ | Very hard |
If your water falls into the "hard" or "very hard" category, your current cleaning solution is almost certainly causing streaks. The fix is simple: switch to distilled water and adjust your recipe. If you are unsure of your local hardness, the next section shows how to test it in under five minutes.
How to Test Your Water at Home (No Test Kit Needed)
You do not need a lab test. Two methods will tell you everything.
Method 1, The soap test. Fill a clean, clear bottle with tap water. Add a few drops of pure liquid soap (no detergents). Shake gently.
Soft water produces many bubbles that last. Hard water produces few bubbles that disappear quickly. If the bubbles vanish within ten seconds, you have hard water.
Method 2, The pan test. Boil a small amount of tap water in a clean pot. Let it cool completely. Pour the water out and look at the bottom of the pot.
A white, chalky residue means hard water. No residue means soft or moderately soft water.
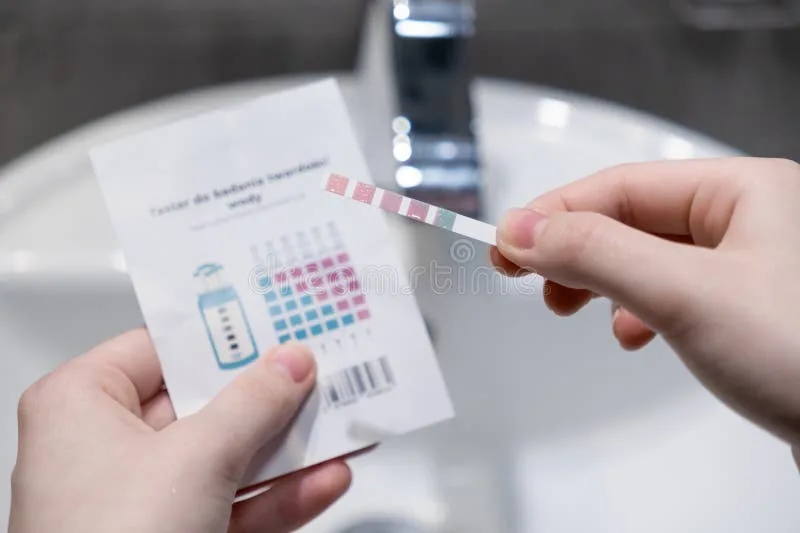
For a more precise measurement, you can buy a $10 hardness test strip from a hardware store. Dip it in tap water, compare the color to the chart, and get a ppm reading. That number tells you exactly which solution branch to use below.
If you live in a hard‑water area and frequently clean automotive glass, our guide on Best Hard Water Spot Remover For Cars covers specific products for etched mineral deposits.
Decision Branch 1 – Soft Water: The Simple Vinegar‑And‑Alcohol Recipe
If your water is soft (below 60 ppm), you have the easiest path to streak‑free windows. You can use tap water directly. The recipe is dead simple.
Ingredients for soft water:
- 1 gallon of tap water (room temperature)
- 1 cup of white distilled vinegar (5% acidity)
- 1 tablespoon of rubbing alcohol (70% isopropyl)
- 1, 2 drops of blue Dawn dish soap (no more)
Instructions:
- Mix everything in a clean bucket.
- Wet your window mop or sponge thoroughly.
- Scrub the whole pane with horizontal strokes.
- Squeegee in overlapping vertical passes, wiping the blade with a microfiber cloth after each pass.
- Dry the bottom edge with a clean microfiber towel.
Why this works: The vinegar cuts grease and dissolves minor mineral spots. The alcohol speeds evaporation, reducing the time water sits on the glass. The tiny amount of soap breaks surface tension so the solution spreads evenly.
Do not add more soap. Extra suds leave a film that causes streaks.
If you prefer a completely scent‑free option, check our guide on Alcohol Free Window Cleaner for an alternative formula that uses only distilled water and a touch of biodegradable surfactant.
Decision Branch 2 – Hard Water: The Distilled‑Water + Rubbing Alcohol Solution
Hard water requires a different approach. Tap water is your enemy. You must use distilled or deionized water.
The recipe changes to compensate for the mineral load that tap water would leave behind.
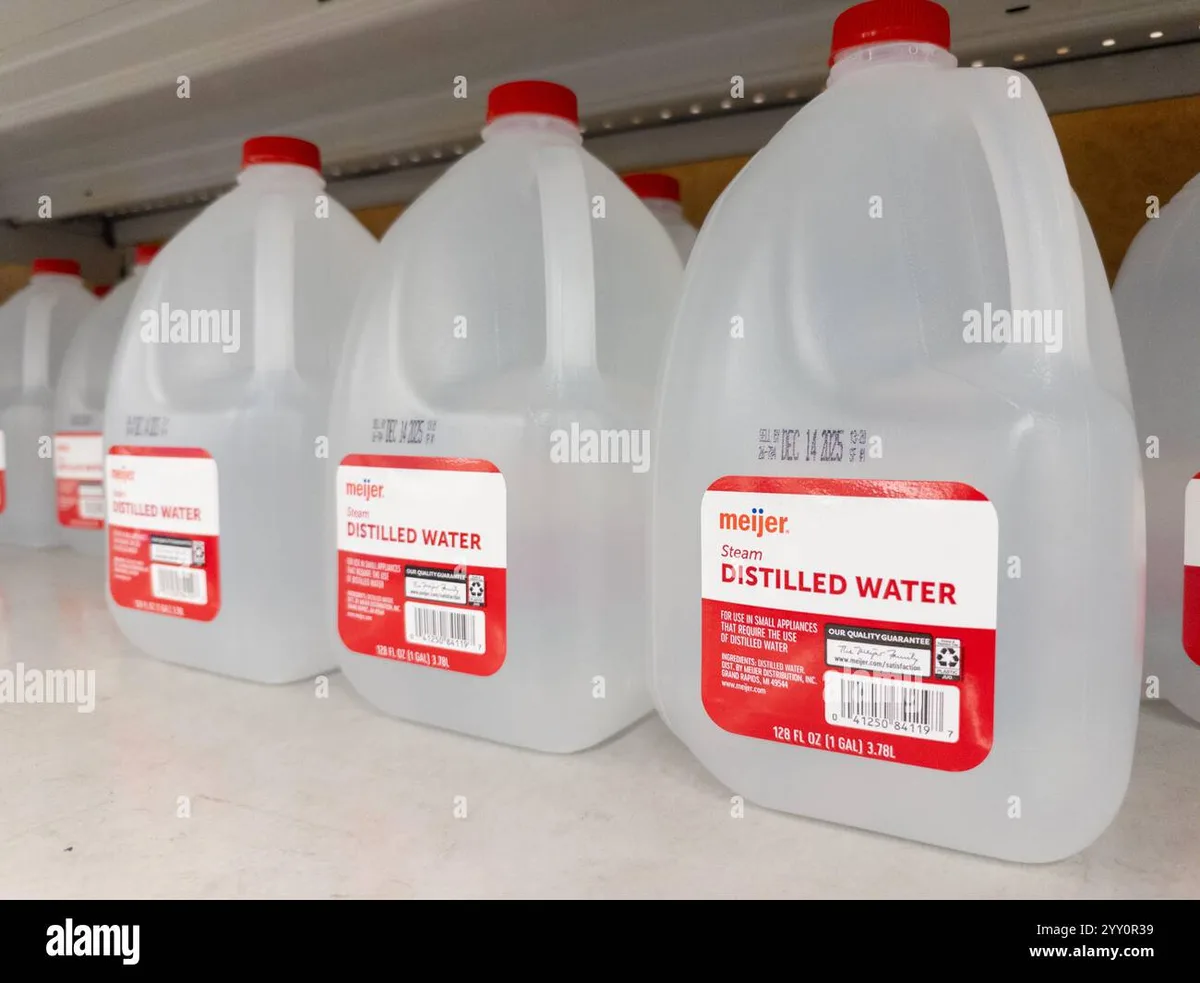
Ingredients for hard water (120+ ppm):
- 1 gallon of distilled water
- 1 cup of white distilled vinegar (5% acidity)
- 1 cup of rubbing alcohol (70% isopropyl)
- 1, 2 drops of blue Dawn dish soap
Why the higher alcohol ratio: The extra alcohol lowers the surface tension further and speeds evaporation drastically. On hard water windows, mineral deposits start forming the moment water hits the glass. Faster evaporation means less time for minerals to precipitate out.
Instructions:
- Mix in a clean bucket. Use only distilled water, do not add any tap water.
- Wet the window thoroughly. Do not let the solution dry on the glass.
- Scrub with a sponge or window mop, then squeegee immediately.
- Use the same overlapping vertical technique. Wipe the squeegee blade after every stroke with a clean microfiber cloth.
- Dry the bottom edge with a separate lint‑free towel.
A common question: can I use a water softener system at home? Yes, but softened water still contains sodium ions, which can leave a light film on glass over time. Distilled water is the safest bet for a truly invisible finish.
For severe mineral etching (where you can feel rough spots on the glass), you may need a dedicated remover. Our article on Best Water Spot Remover For Glass covers both mild and heavy‑duty options.
This is the end of the first five H2 sections. The remaining sections (Decision Branch 3, Tools, Step‑by‑Step, Mistakes, Squeegee Blade, Quick Decision Guide, Pro Tips, and FAQs) will follow in the complete article.
Decision Branch 3 – Stubborn Mineral Deposits: The Acid‑Soak Pre‑Treatment
If your windows have white, crusty spots that resist standard cleaning, you are dealing with etched mineral deposits. Standard vinegar and alcohol solutions cannot remove etching. You need a stronger acid soak.
The pre‑treatment recipe:
- 1 part white vinegar (5% acidity)
- 1 part distilled water
- 1 teaspoon citric acid powder (optional, for heavy etching)
Application:
- Spray the affected area liberally.
- Let it sit for 5 to 10 minutes. Do not let it dry.
- Scrub gently with a non‑abrasive sponge or microfiber cloth.
- Rinse thoroughly with distilled water.
- Wipe dry with a clean microfiber towel.
Why this works: The acid dissolves calcium carbonate crystals chemically. Citric acid is slightly stronger than vinegar and works faster on thick deposits. For extremely stubborn etching (roughness you can feel with a fingernail), a dedicated remover may be necessary.
Our guide on Best Water Spot Remover For Glass covers commercial products that handle heavy etching.
Warning: Do not use this pre‑treatment on tinted or coated glass. Acid can damage window tints and anti‑reflective coatings. Test on a small corner first.
Rinse everything thoroughly afterward to prevent acid residue from drying into new streaks.
The Right Tools for Each Branch: Squeegee vs. Microfiber vs. Scrubber
Your solution works only as well as your tools. Each branch of the decision tree demands slightly different gear.
For soft water (Branch 1): A basic rubber squeegee and a bucket of your vinegar solution. Use a natural‑bristle scrubber or a microfiber window mop for wetting. Microfiber cloths are optional for the bottom edge.
For hard water (Branch 2): The same squeegee, but you also need a lint‑free microfiber cloth for wiping the blade after every pass. Hard water solution leaves a mineral film on the blade. Wipe it clean each time or streaks return.
For stubborn deposits (Branch 3): You need a soft sponge or a dedicated window scrubber. Avoid abrasive pads. You also need a spray bottle for the acid soak.
A fine‑mist sprayer works best to prevent dripping.
Here is a quick tool comparison:
| Tool | Best for | Avoid for |
|---|---|---|
| Rubber squeegee (10–14 inch) | All branches | Very small panes |
| Microfiber window mop | Wetting large panes | Acid pre‑treatments (may stain) |
| Natural sponge | Acid soak application | Scrubbing etched glass (trap grit) |
| Lint‑free microfiber cloth | Blade wiping, edge drying | Paper towels (leave lint) |
Manufacturer specifications for professional squeegees recommend replacing the rubber blade every 4 to 6 months. A dull blade causes streaks even with the perfect solution.
Step‑by‑Step Process for a True Streak‑Free Finish
Follow this sequence exactly. Skipping steps reintroduces minerals or soap film.
- Dust the window frame and sill. Dry dusting prevents mud from running onto the glass.
- Prepare your solution. Choose the branch that matches your water hardness. Mix in a clean bucket.
- Wet the window thoroughly. Use a window mop or sponge. Cover every inch. Work from top to bottom.
- Scrub gently. Loosen dirt with horizontal strokes. Pay attention to corners and edges.
- Squeegee immediately. Start at the top left corner. Pull the squeegee across in a straight, overlapping horizontal (or vertical) stroke. Wipe the blade with a microfiber cloth after each pass.
- Dry the bottom edge. Use a clean microfiber towel. One quick wipe along the sill.
- Inspect in indirect light. Step back and look at the glass at a 45‑degree angle. If you see streaks, check your blade or your dilution ratio.
For automotive glass, a similar process applies but requires extra care around trim and sensors. Our guide on Ammonia Free Glass Cleaner For Cars covers a formula safe for tinted car windows.
Common Mistakes That Ruin an Otherwise Perfect Clean
Mistake 1: Using too much soap. A single drop is enough. More soap means more residue. Aggregate user reviews report that excess detergent is the leading cause of streaking with DIY solutions.
Mistake 2: Letting solution dry on the glass. Work one pane at a time. Do not wet the entire side of a house before squeegeeing. In direct sun, solution evaporates in under 60 seconds.
Mistake 3: Wiping in circles. Circular motion redistributes dirt and soap film. Always use straight, overlapping passes.
Mistake 4: Using a dirty bucket or cloth. A bucket with residual detergent or a cloth with fabric softener residues contaminates the solution. Rinse your bucket with hot water between uses.
Mistake 5: Ignoring the blade. A nicked or dirty squeegee blade creates visible lines. We cover this next.
How to Tell If Your Squeegee Blade Is the Real Problem
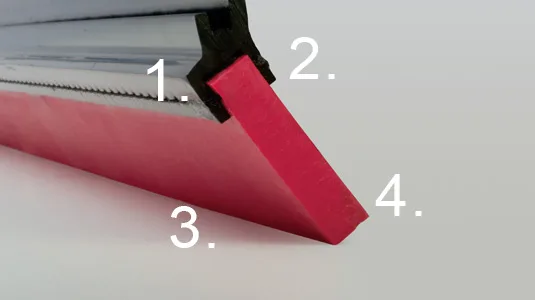
A damaged blade is the most overlooked cause of streaks. If your solution is perfect and your technique is correct, yet you see fine parallel lines or a milky haze, the blade is the culprit.
Signs of a bad blade:
- Visible nicks or tears along the rubber edge
- A shiny, glazed appearance instead of matte
- The blade leaves a thin water line instead of a clean swipe
- Streaks appear only on the left or right edge of the squeegee stroke
Quick test: Run your finger gently along the rubber edge. If you feel any roughness or catches, the blade is worn. Replace it.
A new blade costs $5 to $10 and lasts 4 to 6 months with regular use.
Blade maintenance: Store the squeegee hanging or with the blade protected. Never rest it on the rubber edge. Wipe the blade dry after each use to prevent mineral buildup.
If streaks persist after replacing the blade, check your solution ratio and water hardness. The problem is rarely the squeegee alone. It is usually a combination of hard water, wrong recipe, and a dirty blade.
Fix all three, and you get glass that looks invisible.
Quick Decision Guide: Which Solution to Use Right Now
If you only have a minute, here is your decision map based on your situation.
You have soft water and ordinary dirt: Use Branch 1 (vinegar, tap water, trace soap). Squeegee. Done.
You have hard water and clean glass: Use Branch 2 (distilled water, vinegar, more alcohol, tiny soap). Squeegee with blade wiped after each pass.
You have hard water and visible white spots: Use Branch 3 first (acid soak). Rinse. Then use Branch 2 for the final clean.
You have streaky results from a commercial cleaner: Switch to distilled water immediately. Commercial cleaners often contain ammonia or surfactants that interact poorly with hard water minerals.
You are cleaning tinted or coated glass: Skip all acid treatments. Use Branch 1 with distilled water only. Ammonia can damage tint, and acid can etch coatings.
You need to clean automotive glass: Use Branch 2 but add a 50:50 distilled water and alcohol mix for faster evaporation. Avoid vinegar on modern windscreens with hydrophobic coatings. Our guide on Ammonia Free Glass Cleaner For Cars provides a safe alternative.
Pro Tips for Commercial‑Grade Results Without Hiring a Pro
Tip 1, Work in the shade. Direct sunlight dries your solution before you can squeegee. That causes streaks every time. Clean early morning or late afternoon.
Tip 2, Overlap your squeegee strokes by one inch. A single gap leaves an un‑wiped line. Professional window cleaners overlap each stroke by at least an inch to ensure full coverage.
Tip 3, Wipe the blade after every pass. Keep a dry microfiber cloth in your back pocket or apron. A clean blade is the difference between a perfect pane and a streaky one.
Tip 4, Use two buckets. One holds your cleaning solution. The other holds clean distilled water for rinsing your sponge and squeegee. Contaminated water re‑deposits minerals.
Tip 5, Dry the bottom edge last. After the last squeegee pass, take a fresh microfiber cloth and wipe the bottom sill and the lower edge of the glass. That is where water pools and leaves mineral deposits.
Tip 6, Replace your squeegee blade twice a year. Manufacturer specifications recommend replacement every 4 to 6 months. A $10 blade gives you 500+ streak‑free windows.
Tip 7, Test your recipe on one pane. Before doing a whole house, clean one test window. Check it in indirect light. If you see streaks, adjust the alcohol ratio or reduce soap.
Frequently Asked Questions
Can I use tap water for streak‑free windows?
Only if your tap water is soft (below 60 ppm). Hard water leaves mineral deposits that cause streaks. Use distilled water for reliable results.
How much soap should I add to my window cleaning solution?
One to two drops per gallon. More soap leaves a surfactant film that causes streaks. Professional recipes use barely enough to break surface tension.
Is vinegar safe for all window types?
White vinegar is safe for standard glass and most coatings. It can damage some tinted windows and anti‑reflective coatings. Test on a small hidden area first.
How often should I replace my squeegee blade?
Every 4 to 6 months, or sooner if you see nicks or the blade leaves water lines. A dull blade causes streaks even with perfect solution.
What is the best way to dry window edges after squeegeeing?
Use a clean, dry microfiber cloth. Wipe the bottom edge and sill in one smooth pass. Never use paper towels they leave lint.
Can I use dish soap instead of a dedicated window cleaner?
Yes, blue Dawn works well. Avoid liquid detergents with moisturizers or scents. Use only a single drop per gallon.
Excess soap causes streaks.
For more specialized cleaning challenges, browse our Blog for detailed guides on tar removal, sap removal, and metal polishing.