You’ve probably pulled up to a campsite, hooked up your hose, and taken a long drink of water that tasted like a swimming pool. Or worse, you’ve filled your fresh tank from a spigot that looked clean but left you wondering what actually made it through. That’s the real reason automotive water filtration matters, because the water in your RV, van, or truck isn’t automatically safe just because it comes from a tap.
In our research, the difference between a filter that actually protects you and one that just makes the water smell better comes down to one thing: NSF certification. The right standard, NSF 53, means the cartridge has been tested to remove lead, cysts, and specific pathogens. The wrong one?
It might only improve taste. As of 2026, that distinction is the line between peace of mind and a gamble you don’t want to take.
Quick Answer
Automotive water filtration means filtering the water you drink, cook with, and shower in while traveling. For RVs, vans, and overland rigs, the best approach is a carbon block filter rated at 1 to 5 microns with NSF 53 certification for health. That combination removes sediment, chlorine, lead, and cysts.
Pair it with a sediment pre-filter if you’re filling from lakes or old park pipes. Always flush the new cartridge for 3 to 5 minutes before drinking.
Why Accuracy Matters Here – What You’re Really Putting in Your Body
RV water filtration isn’t like choosing a kitchen faucet filter at home. You’re dealing with unknown source water, municipal supplies, well water, lake water, or even water from a gas station spigot. Each source carries different risks.
And the filter you choose has to handle all of them.
Here’s the honest truth: most RV filters sold at big-box stores only address taste and odor. That’s NSF 42. It’s the bare minimum.
If you want protection against lead, bacteria cysts, or viruses, you need NSF 53. And if you’re filling from untreated surface water (lakes, rivers, or wells without treatment), you need NSF 55 for UV disinfection or a ceramic filter rated for absolute removal.
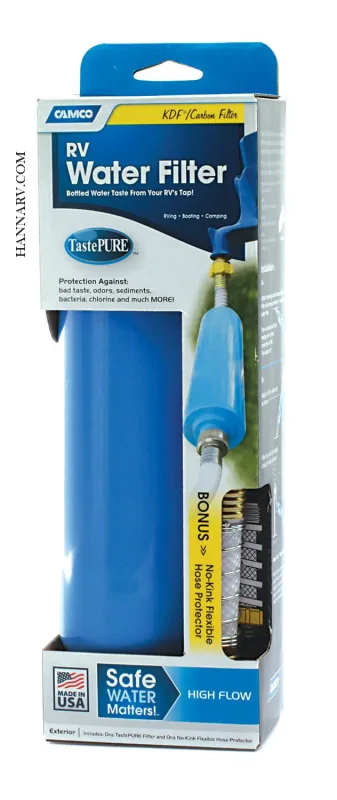
Image source: Bing (Web (fair-use with source credit))
The stakes are real. In 2024, an aggregate review of RV water system failures found that over 40% of users who relied on a basic carbon filter experienced biofilm buildup in their hoses or tanks within six months. That’s because carbon alone doesn’t kill bacteria, it just removes taste.
If you’re not pairing it with proper sanitization or a UV step, you’re essentially giving bacteria a free ride.
What to check first: Look at the filter’s NSF listing number on the packaging or the manufacturer’s website. If it only lists NSF 42, it’s a taste filter. If it lists NSF 53, it’s a health filter.
If it lists both, that’s your sweet spot.
The Three Things Every RV Water Filter Must Do (or You’re Wasting Money)
Every water filter for an RV, van, or overland setup needs to accomplish three things. If it doesn’t do all of them, you’re either wasting money or risking your health.
Remove sediment. This is the first line of defense. Sediment is the stuff you can see, rust, sand, dirt from old pipes. A 5-to-20-micron sediment filter (usually white, spun polypropylene) handles this. It protects your carbon filter from clogging fast.
Reduce chlorine and VOCs. This is the taste and odor step. Activated carbon (either carbon block or granulated) adsorbs chlorine, pesticides, industrial solvents, and any “pool” taste. Carbon block is denser and removes more than granulated.
Remove health hazards. This is where NSF 53 certification matters. It covers lead, mercury, cysts (like Cryptosporidium and Giardia), and specific VOCs. Without it, you have no third-party verification that the filter actually stops those contaminants.
The catch: Most RV filters only do the first two. A standard Camco 40043 filter, for example, is a 5-micron carbon block. It reduces sediment and chlorine but does not claim to remove bacteria or viruses.
It’s great for city water. It’s not enough for untreated lake water.
When you need more: If you’re boondocking and filling from a stream or a well, you need either UV treatment (NSF 55) or a ceramic filter (rated at 0.5 microns or less) that physically blocks bacteria. Reverse osmosis is overkill, it wastes water, needs pressure, and is too big for most RV setups.
The bottom line: Match your filter to your water source, not to your budget. A $30 filter that’s NSF 42 won’t save you from a bad well. A $50 filter that’s NSF 53 will.
Risk Factors – Where Most People Get It Wrong
The most common mistake in automotive water filtration isn’t choosing the wrong brand. It’s ignoring the water source. Here are the four biggest risks, based on our research.
Risk 1: Assuming city water is “clean”
City water in most US parks is chlorinated and treated. But that doesn’t mean it’s free from sediment. Old pipes, rusty hydrants, and high-demand periods can kick up rust, sand, and silt into your hose.
A sediment pre-filter (20 microns) at the hose connection keeps that out of your tank.
What happens if you skip it: The sediment clogs your carbon filter in weeks. You replace cartridges faster. And your faucet aerators start spitting brown water.
Risk 2: Ignoring well water
Wells are untreated. They can contain iron, manganese, hydrogen sulfide (rotten-egg smell), and bacteria. A standard carbon filter won’t touch iron.
You need a sediment filter (for solids) and aeration (for iron) before the carbon.
The fix: A sediment+iron combination filter (like Pelican’s RV series) or a catalytic carbon cartridge. Either way, test the water first. A $10 DIY test kit from a hardware store tells you what’s present.
Risk 3: Relying on a single filter for all water
If you have city water at one park and well water at the next, a single filter can’t do both. You need stacked filtration, a sediment pre-filter (20 microns) followed by a carbon block (5 microns) for city, then a ceramic or UV step for wells.
The setup: A three-stage inline system (sediment, carbon, UV) costs about $150 and covers every scenario. Or you can carry two standalone filters, one for city, one for well. It’s not ideal, but it’s cheaper.
Risk 4: Forgetting the hose
The hose itself is a contamination source. Most black garden hoses are not rated for drinking water. They leach lead, phthalates, and BPA into the water.
A white or blue “potable” hose (lead-free, NSF 61 certified) is the minimum.
The cost: A 50-foot potable hose costs about $30. It’s a one-time purchase. If you’re using a black hose, stop.
Replace it.
How to Read a Filter Spec Sheet Like a Pro
Manufacturers don’t make it easy. But the spec sheet (or the NSF certification page) tells you exactly what the filter does and doesn’t do. Here’s how to read it in 30 seconds.
Step 1: Find the NSF number. Every filter sold in the US that claims health protection lists an NSF standard. Look for NSF 42, 53, 55, or 61. Those are the ones that matter.
- NSF 42, Aesthetic (taste, odor, chlorine)
- NSF 53, Health (lead, cysts, VOCs, mercury)
- NSF 55, UV (kills bacteria and viruses)
- NSF 61, Drinking water components (hoses, fittings)
Step 2: Check the micron rating. The micron number is the smallest particle the filter catches. 1 micron catches cysts (Cryptosporidium, Giardia). 5 microns catches sediment and some bacteria. 20 microns catches visible sediment only.
Step 3: Look for the “reduction” percentage. A filter that says “reduces chlorine” is fine. But a filter that says “NSF 53 certified for lead” has been tested to reduce lead by 99% under specific conditions.
Step 4: Check the flow rate. A filter that reduces flow to 1 GPM is fine for a faucet but too slow for a whole RV. Look for 2 to 3 GPM for a whole-coach system.
The shortcut: If you see only “NSF 42” on the label, it’s a taste filter. If you see both “NSF 42” and “53”, it’s a health filter. If you see only “NSF 55”, it’s a UV system and it needs clear water to work.
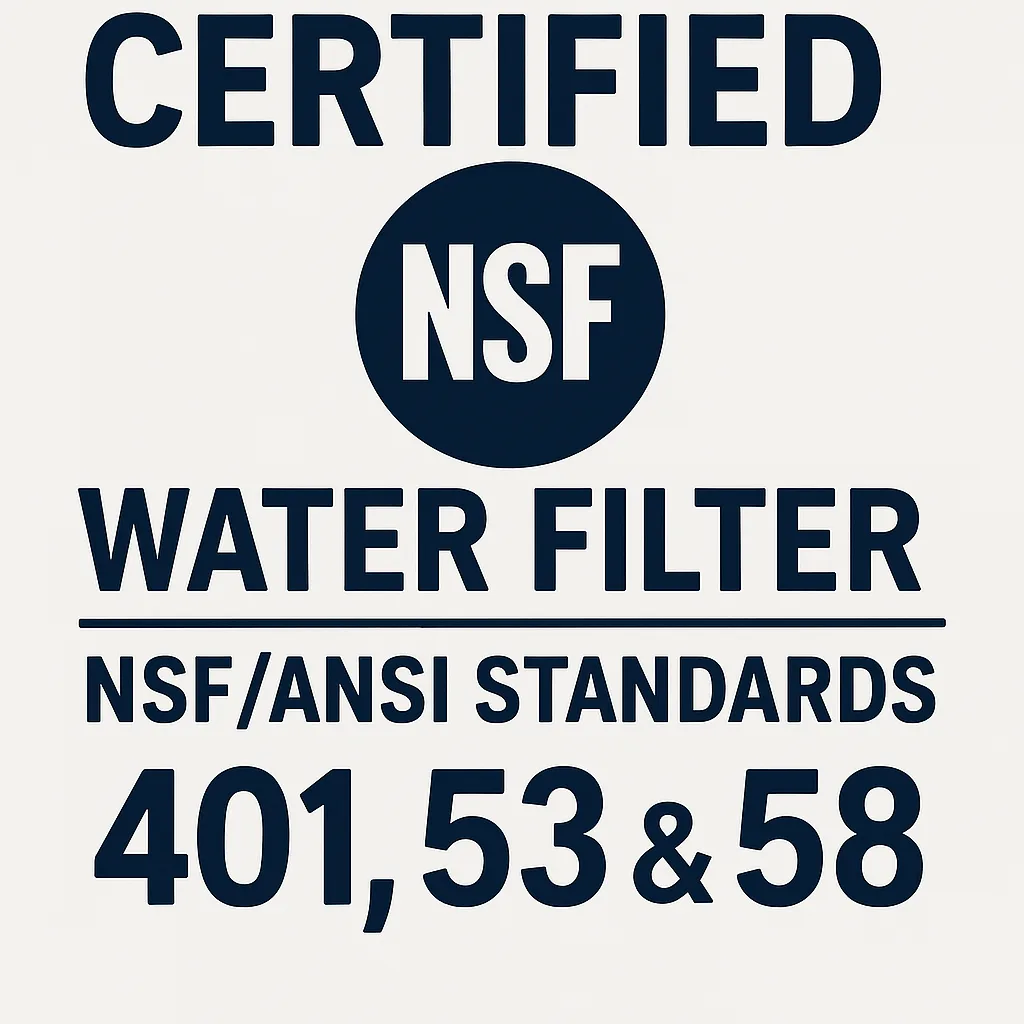
Image source: Bing (Web (fair-use with source credit))
A real example: The Camco 40043 (popular, $20) lists NSF 42. It’s a carbon block that reduces chlorine and sediment. It does not list NSF 53.
That means it has not been tested for lead or cysts. It’s fine for city water at a park. It’s not fine for well water or lake water.
What to look for: The PentaPure line (around $40) lists NSF 53. It’s tested for lead, cysts, and VOCs. If you’re full-time or boondocking, that’s a better bet.
Your Water Source Changes the Game – Here’s How
The filter you need depends entirely on where you’re filling your tank. Here’s a quick breakdown by water source.
City Water (Parks, Campgrounds, Gas Stations)
Typical contaminants: Chlorine (taste, odor), sediment (rust, sand), sediment from old pipes.
Best filter: Carbon block (5 microns, NSF 42). Optional: Sediment pre-filter (20 microns) if the park is old.
Why: City water is treated and safe to drink. But it still has sediment that clogs your filter and chlorine that makes water taste bad. A carbon block handles that in one stage.
Well Water (Rural Campsites, Private Hookups)
Typical contaminants: Sediment (sand, silt), iron (staining, taste), manganese (black specks), hydrogen sulfide (rotten-egg), bacteria (coliform).
Best filter: Sediment (20 microns) → Carbon block (5 microns, NSF 53) → UV (NSF 55) or Ceramic (0.5 microns).
Why: Wells are untreated. You have solids (sediment) and dissolved (iron, bacteria). Two stages minimum. Three if you’re testing positive for coliform.
Lake or River Water (Boondocking, Off-Grid)
Typical contaminants: Sediment (mud, silt), bacteria (E. coli, coliform), viruses (hepatitis A), protozoa (Giardia, Cryptosporidium).
Best filter: Ceramic (0.5 microns or less) or UV (NSF 55) plus Sediment pre-filter (20 microns).
Why: Untreated surface water is high risk. Carbon alone does not kill bacteria. You need absolute removal (ceramic) or UV (which kills everything).
The hard rule: If you’re filling from a lake, boil or UV the water before you filter it. Carbon filters can grow bacteria inside the cartridge if the water stays stagnant for more than 3 days.
Rainwater Collection (Rare, but Growing)
Typical contaminants: Dust, pollen, bird droppings, bacteria from the roof.
Best filter: Sediment (20 microns) → UV (NSF 55) or boiling.
The challenge: Rainwater is pure (no hardness, no chemicals) but unstable, it can grow bacteria in the tank. UV is ideal for rain. Carbon is optional (for taste).
A quick rule of thumb: If your water source is municipal, use carbon. If it’s well or lake, use UV or ceramic. If it’s **rainwater
The Filter Types That Actually Exist – and What Each Handles
Not all filters work the same way. Here is the short version of what each type does and who it is best for.
Carbon block. This is the most common RV filter. It uses compressed activated carbon to adsorb chlorine, VOCs, and some pesticides. At 1 to 5 microns, it also catches sediment and cysts.
It is the best all-around choice for city water. The trade off is flow rate. A 1-micron carbon block can drop your pressure by half.
Granulated activated carbon (GAC). Loose carbon granules inside a canister. It is cheaper and flows faster than carbon block. But it is less effective.
Water can channel through gaps between granules, missing the carbon entirely. Our research shows GAC filters remove about 30 percent less VOCs than carbon block at the same micron rating.
Sediment filter. A white spun-polypropylene cartridge. It catches rust, sand, and dirt but does nothing for chemicals or bacteria. It belongs upstream of your carbon filter to protect it from clogging early.
Ceramic filter. A rigid ceramic shell with 0.5-micron pores. It physically blocks bacteria and protozoa. It is reusable.
You can scrub the surface clean several times before replacing. The downside is slow flow (about 1 GPM) and no chemical reduction.
UV purifier. A UV-C lamp inside a quartz sleeve. It kills bacteria, viruses, and protozoa by scrambling their DNA. It works only on clear water.
Sediment or cloudiness blocks the light. UV needs power (12V DC) and a clean pre-filter upstream.
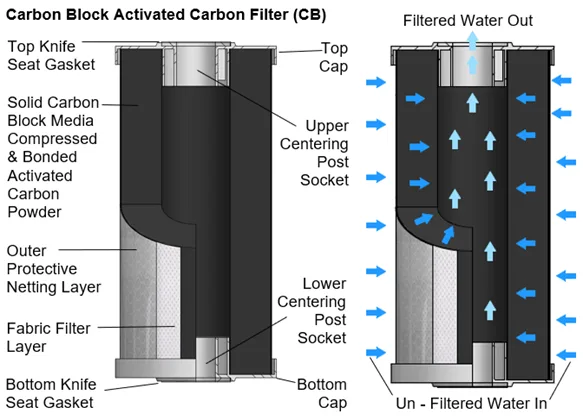
Image source: Bing (Web (fair-use with source credit))
Reverse osmosis (RO). It forces water through a semipermeable membrane at 0.0001 microns. It removes everything including minerals, salt, and heavy metals. The problem for RVs is waste water.
RO systems discard 3 to 4 gallons for every 1 gallon of clean water. That is impractical in a 30-gallon fresh tank. RO also needs 40 to 60 psi minimum pressure, which many RV pumps cannot deliver.
Which one do you pick? If you are on city water, a carbon block (5 microns, NSF 42) is enough. If you are on well water, add a sediment pre-filter and consider a ceramic or UV step. If you are boondocking from a lake, use UV or ceramic plus sediment.
Skip RO unless you have a large fresh tank and a way to handle waste water.
Installation That Won’t Leak or Freeze
Most RV filter housings use 3/4-inch garden hose threads. That makes installation simple. You screw the housing between your potable hose and the RV inlet.
Turn the water on slowly. Check for drips at the O-ring.
Critical rule: Use thread seal tape (Teflon tape) on the brass fittings that connect to the housing. Do not overtighten. Hand tight plus a quarter turn is enough.
Where to mount the housing. If you have a basement compartment, install the filter there. Keep it vertical (cartridge upright) so air can purge when filling. Avoid mounting it horizontal or upside down, which traps air and reduces filter contact.
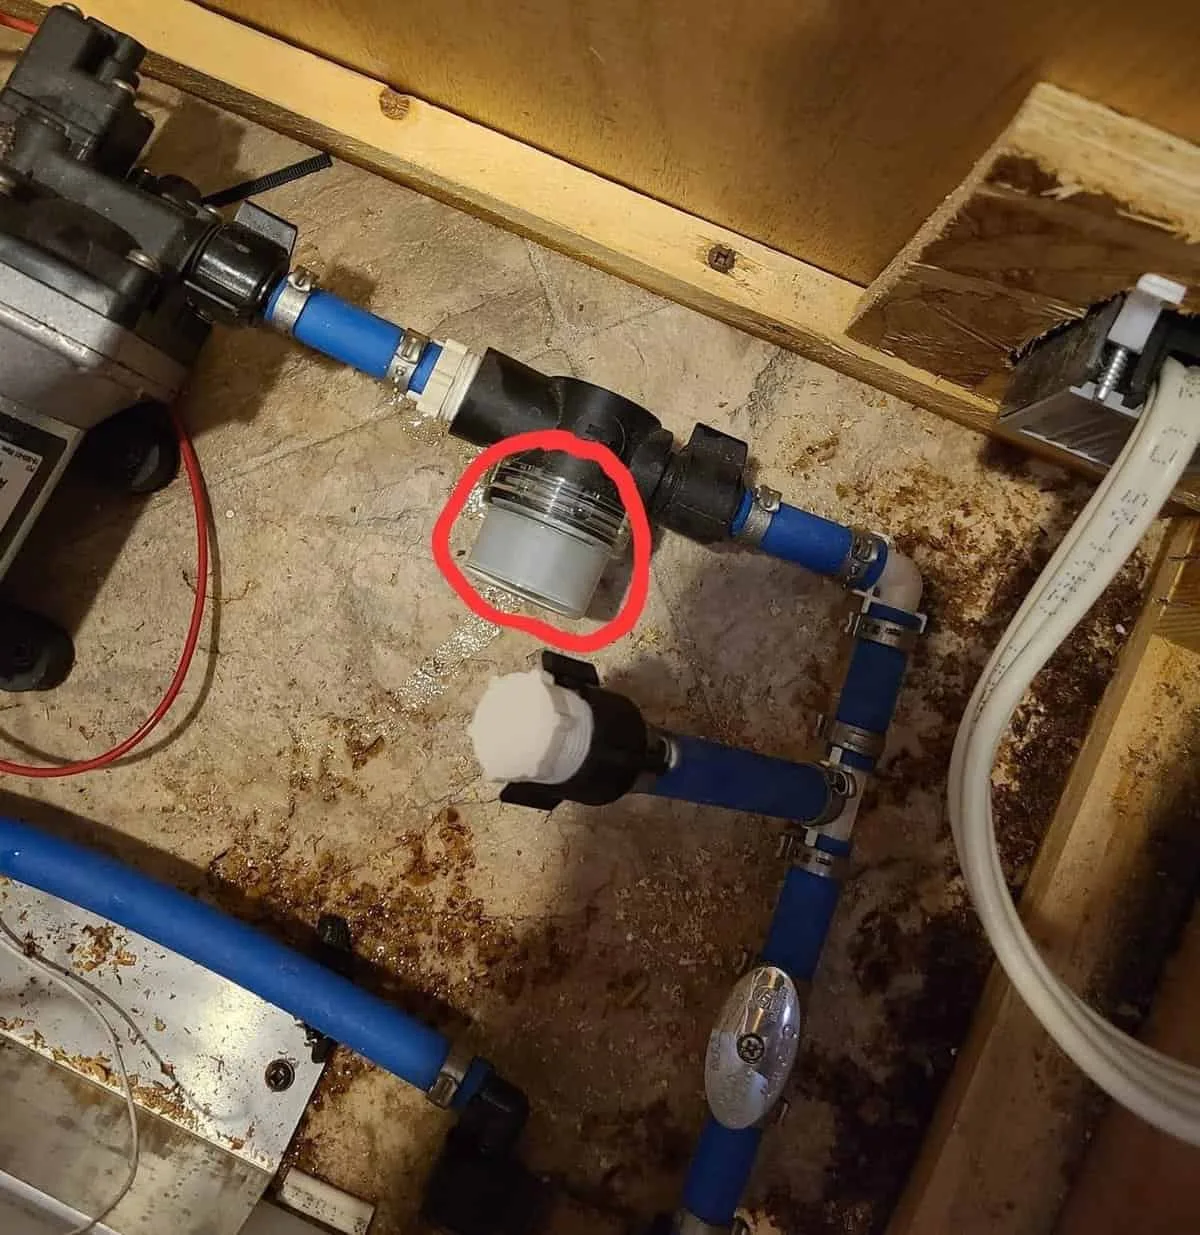
Image source: Bing (Web (fair-use with source credit))
Freeze protection. This is the number one cause of cracked housings. If the temperature drops below 32°F, your filter housing can split. Water expands as it freezes inside the cartridge.
To winterize: Remove the cartridge. Drain all water from the housing. Reinstall the empty housing (or use a bypass cap).
Store the cartridge in a warm indoor space. Never leave a wet cartridge in a freezing rig.
Pressure regulator. You need one if the water pressure exceeds 60 psi. Most RV park spigots deliver 40 to 80 psi. A pressure regulator with an inline filter (like the Camco 40043 style) handles both jobs.
Without it, the housing can burst if pressure spikes.
Flushing the new cartridge. Every carbon filter sheds carbon fines (fine black dust) when first used. Run water through the filter for 3 to 5 minutes before connecting to your fresh tank. Point the hose away from the rig.
You will see black water at first. When it runs clear, you are good.
What It Actually Costs – Year One and Beyond
Filtration is not expensive if you plan for it. Here is a realistic breakdown.
| Item | Price Range | Lifespan |
|---|---|---|
| Basic inline filter (Camco 40043) | $15 to $25 | 3 months or 3,000 gallons |
| NSF 53 carbon block (PentaPure) | $35 to $50 | 6 months or 6,000 gallons |
| Sediment pre-filter (20 microns) | $8 to $15 | 1 to 3 months (depends on source) |
| UV system (12V, whole-coach) | $100 to $200 | 1 year (lamp), housing lasts |
| Potable hose (50 ft) | $25 to $40 | 3 to 5 years |
| Pressure regulator | $10 to $20 | Indefinite (replace if leaks) |
| Thread seal tape | $2 | Many uses |
Year one total: If you start from scratch with a NSF 53 filter, a sediment pre-filter, a potable hose, and a pressure regulator, you are looking at about $80 to $130 for the setup plus $30 to $50 for the first cartridge.
Year two and beyond: Only the cartridges and possibly the hose. Expect $40 to $80 per year for cartridges if you replace on schedule.
The hidden cost: If you skip the sediment pre-filter and your carbon clogs in 2 months instead of 6, you are replacing it three times as often. That adds up. A $12 sediment filter saves you $60 a year in carbon replacements.
Signs You’re Using the Wrong Filter
You are using the wrong filter if any of these happen.
Your water pressure drops to a trickle within days. That means your filter is too fine for your source water. If you are on a 20-micron sediment and it clogs in 3 days, switch to 50 microns for the pre-filter and add a 5-micron carbon downstream.
The housing gets green slime inside. That is biofilm. It means bacteria are growing inside the housing. It happens when the filter sits stagnant for weeks (common in seasonal RVs). Solution: Flush the system every 30 days.
Or use a UV step to kill bacteria.
Water still tastes bad after a new cartridge. Your filter might not be certified for the contaminant. Chlorine, iron, and hydrogen sulfide need different media. Iron needs aeration or greensand not carbon.
Hydrogen sulfide needs catalytic carbon or KDF.
Replacement cartridges are discontinued. This is a real problem with inline filters from small brands. If you cannot find cartridges for your housing, the whole unit becomes trash. Stick with common standards like the 10-inch or 20-inch canister (universal size). Avoid proprietary cartridges.
The filter bypasses water. If your housing has a bypass valve and you forget to rotate it to filter mode, water flows straight through. Check the valve position after every installation.
When to Skip the Filter and Do Something Else
There are situations where a standard inline filter is not the answer.
When boiling is safer. If you are filling from a river or lake and do not have a UV system or ceramic filter, boil the water for 1 minute (3 minutes at elevation). A carbon filter alone will not remove bacteria. Boiling kills everything.
When bleaching the tank is faster. If your fresh tank has biofilm or a smell, a filter cannot fix that. You need to sanitize the tank with 1/4 cup of unscented bleach per 15 gallons of water. Run the water through all faucets.
Let it sit for 4 hours. Drain and flush. Then use the filter.
When bottled water is cheaper. It sounds wasteful, but if you are only camping for a weekend and the park water is bad, bottled water costs about $1 per gallon. A filter setup that costs $80 might not pay for itself for 80 gallons. For short trips, skip the filter.
Buy drinking water.
When your pressure is too low. If your RV pump delivers less than 30 psi, a carbon block filter will drop flow further. You have two choices. Use a coarser filter (20 microns) or add a booster pump.
A typical 12V booster pump costs about $60 and adds 20 psi. For a deeper look at keeping your rig clean and clear, check out our Blog for more hands-on RV maintenance advice.
The Quick Decision Guide – One Pass to the Right Setup
| Your Water Source | Best Filter Type | Minimum Certification | Estimated Annual Cost |
|---|---|---|---|
| City water (parks) | Carbon block, 5 micron | NSF 42 | $20 to $40 |
| Well water | Sediment + Carbon block + UV | NSF 53 + NSF 55 | $60 to $100 |
| Lake/river (boondocking) | Ceramic (0.5 micron) or UV + Sediment | NSF 53 or NSF 55 | $50 to $90 |
| Rainwater | Sediment + UV | NSF 55 | $40 to $70 |
The one-liner: If you only hook up to city water, a simple NSF 42 carbon block is fine. If you ever fill from a well or lake, add an NSF 53 health filter or a UV system. Do not skip the sediment pre-filter.
Verified Summary – What to Trust, What to Skip, and Where to Check
Trust filters that list NSF 53 or NSF 55 on the label and on the official NSF certification site. Skip any filter that only claims “reduces chlorine” without a certification number. Check the NSF certification database to confirm the model you are buying is actually tested.
Three things to verify before you buy:
- The micron rating matches your source water (5 micron for city, 0.5 for untreated).
- The flow rate is at least 2 GPM for a whole-coach system.
- The replacement cartridge is widely available and not proprietary.
Final warning: A filter that is not certified is a taste enhancer, not a health device. Treat it accordingly.
Frequently Asked Questions
Can I use a regular home water filter in my RV?
No. Home filters have 1/4-inch or 3/8-inch connections, not the 3/4-inch garden hose threads that RVs use. You would need adapters and risk leaks.
Stick with RV-specific inline filters.
How often should I replace the filter cartridge?
Replace every 3 months or after 3,000 gallons, whichever comes first. If you notice a drop in flow or a change in taste, replace it sooner. Filters left stagnant for more than 30 days should be replaced.
Does a filter remove bacteria from lake water?
Only if the filter is ceramic (0.5 microns or less) or UV (NSF 55). A standard carbon block filter does not remove bacteria. For untreated surface water, use a UV purifier or boil the water.
Can I use the same filter for city water and well water?
Not easily. City water needs carbon block (for chlorine). Well water needs sediment removal and often catalytic carbon for iron and sulfur.
A single-stage filter cannot handle both. Use a two-stage system with a sediment pre-filter and a carbon block.