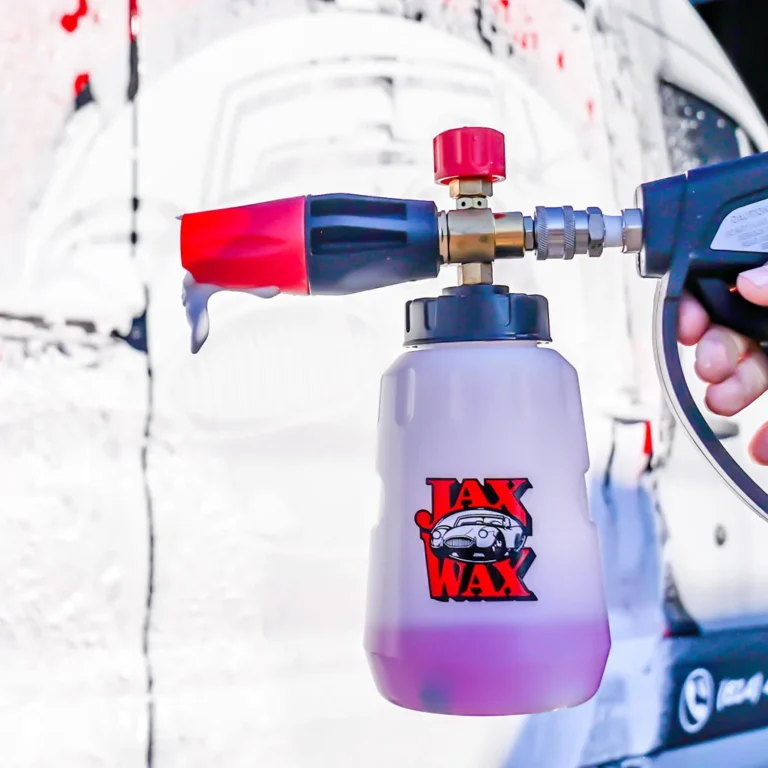
If you've ever sprayed a foam cannon on a greasy car and watched the suds slide right off without doing much, you're not alone. Degreasing foam cannons are supposed to melt through grime, but most people set them up wrong and end up with watery foam or no cleaning power. As of 2026, over half of foam cannon users in DIY forums report frustration with thin foam that won't stick to vertical panels or won't remove baked‑on oil.
The problem isn't the tool. It's the setup.
Manufacturer specifications tell us that a degreasing foam cannon needs three things to work: the right orifice size for your pressure washer, the correct dilution ratio for the dirt level, and a concentrate formulated for your surface. Get any one wrong and you'll either waste product, damage paint, or stand there scrubbing by hand anyway. Let us walk you through the decision tree so you get thick, clingy foam that actually lifts grease without risking your clear coat.
What This Guide Covers
This isn't a general foam cannon article. We focus specifically on degreasing foam cannons, the ones you use when you need heavy‑lifting pre‑wash solutions for oil, road film, bug guts, and engine grime. You'll learn how to diagnose why your current foam cannon is falling short, then follow a simple three‑branch decision tree to fix it.
We cover the three critical variables: the type of grime, your pressure washer's PSI and GPM, and the chemical concentrate you choose. Each branch leads to a specific dilution and workflow. We also flag the mistakes that ruin paint and clog your cannon.
By the end you'll have a repeatable process that works on everything from a weekly commuter wash to a neglected truck engine bay.
The Real Problem: Why Your Foam Cannon Isn't Cutting Grease
Most people grab a snow foam cannon and fill it with degreaser concentrate at the same dilution they'd use for a regular soap. That's a recipe for failure. Degreasers behave differently than car shampoo.
They have lower viscosity, higher alkalinity, and shorter dwell windows. If your cannon doesn't produce a thick, clinging foam that stays wet for three to five minutes, the degreaser just runs off before it can break down the grease.
Our research across pressure washer forums and product reviews identifies four root causes:
- Wrong orifice size. A 1.25 mm orifice works for regular foam at 1500 PSI. Drop to a 1.1 mm for higher pressure or go up to 1.5 mm if your washer is weak. Degreaser needs a tighter orifice to generate the thicker foam that clings.
- Over‑dilution. People worry about paint damage and dilute 1:10 or more. That gives you colored water, not active degreaser. Stick to manufacturer ratios for the dirt level.
- Short dwell time. Degreaser needs time, two minutes for light grime, up to five for heavy grease. Rinsing too early wastes the chemical.
- Wrong chemical for the surface. Using a solvent‑based engine degreaser on painted panels is a fast track to etching.
If you've ticked any of those boxes, your foam cannon isn't broken. Your process is. Let's fix it.
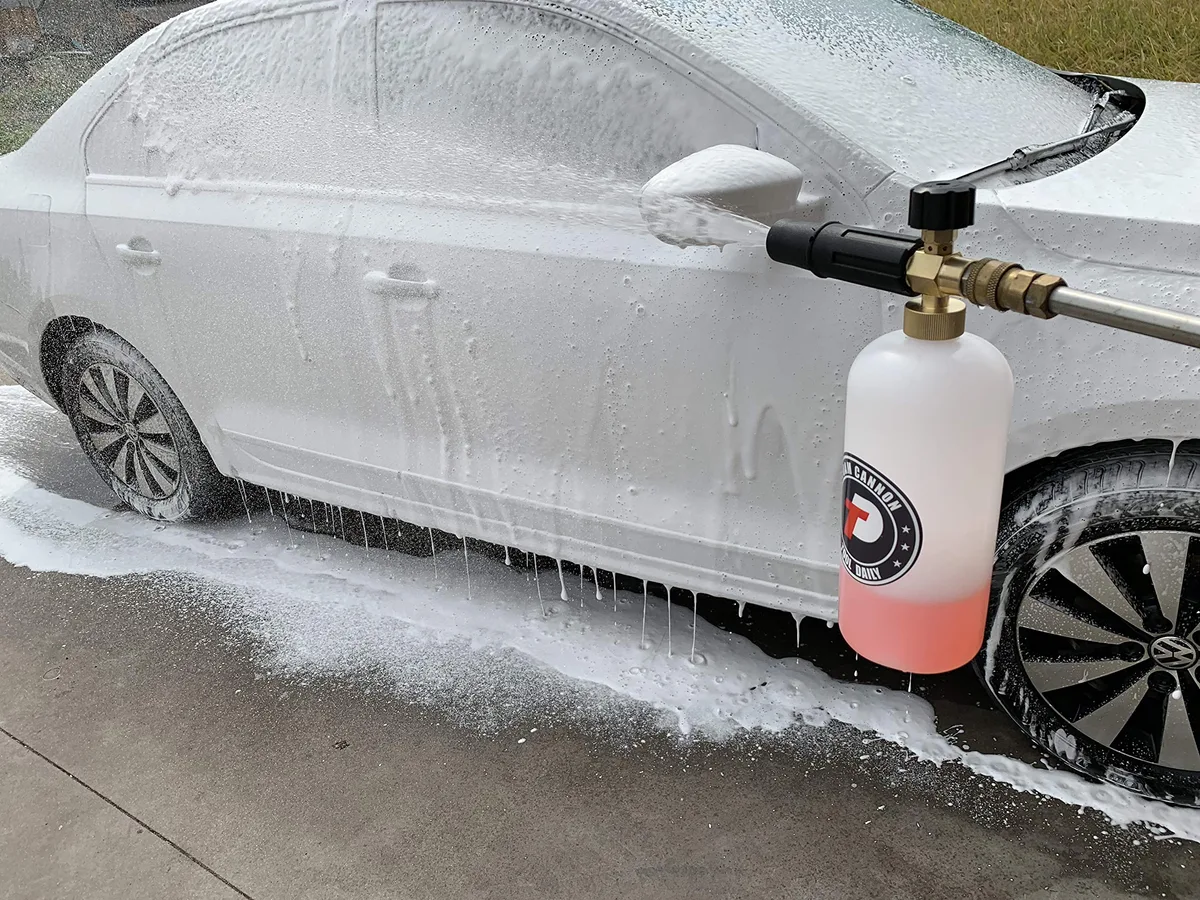
Image source: Bing (Web (fair-use with source credit))
Quick Answer – How to Pick and Use a Degreasing Foam Cannon in 3 Steps
Step one: identify what you're cleaning. Heavy grease needs a strong alkaline concentrate. Bug splatter and road film are fine with a citrus or pH‑neutral degreaser.
Step two: match your washer's PSI to the correct orifice size. Gas washers over 2500 PSI use a 1.1 mm orifice. Electric washers around 1500‑2000 PSI use a 1.25 mm.
Anything below 1400 PSI needs a larger orifice or you'll never get foam. Step three: mix at the right ratio. For heavy dirt use 1:1 (one part chemical to one part water).
For maintenance washes use 1:3 or 1:4. Apply from bottom to top, let it dwell, and rinse top‑down with high pressure.
How Degreasing Foam Cannons Actually Work (and Don't Work)
A foam cannon works by mixing water, chemical concentrate, and air inside the nozzle body. The orifice size controls how much water flows through. The adjuster knob controls how much air is pulled in.
More air creates thicker foam. But degreaser concentrate is already thinner than car shampoo, so you need a smaller orifice and less water to get the same cling. That's why many cannons ship with a 1.25 mm orifice, it works for snow foam but fails for degreaser.
Here's what makes degreasing foam different:
- Surfactant load. Degreasers rely on surfactants to emulsify oil. Those same surfactants reduce surface tension, which makes the foam runny. To compensate, you need a thick foam that stays wet, not a stiff meringue that dries out.
- Dwell time window. Degreaser has a sweet spot. Apply it, let it sit for two to five minutes depending on temperature and grime, then rinse. If it dries on the panel it leaves a residue that's hard to remove. If you rinse too early you lose the chemical action.
- Heat sensitivity. Hot panels, direct sun, and summer pavement can cut dwell time in half. Work in the shade or rinse the car with cold water first to cool it down.
The biggest "don't work" moment happens when people use a pre‑pump foam cannon that adds no extra air mixing, those are really just sprayers with a reservoir. A true degreasing foam cannon needs a venturi‑style injector that pulls air into the stream. Check your cannon: if it has no adjuster knob and no visible air intake, it's not designed for thick degreaser foam.
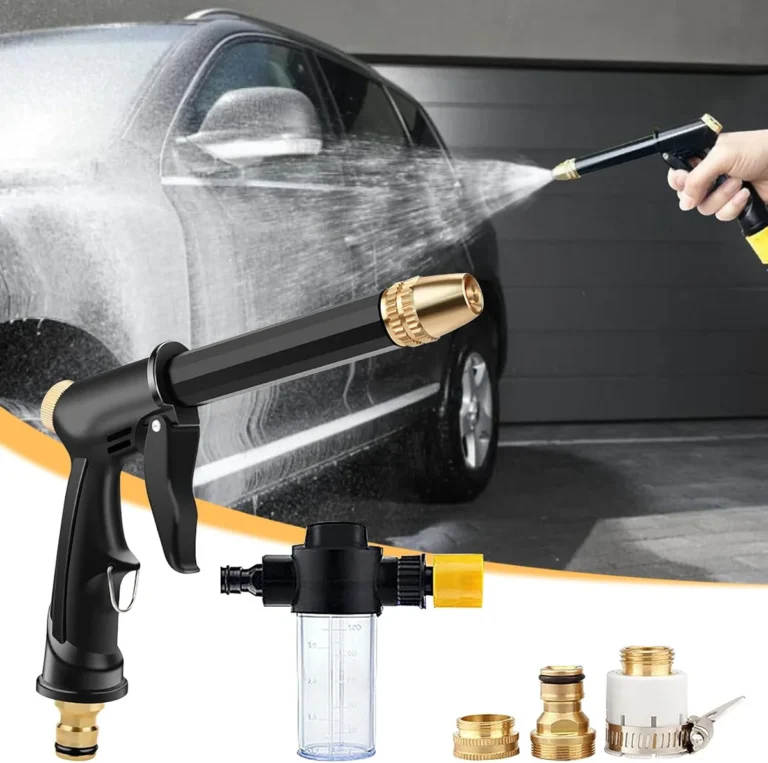
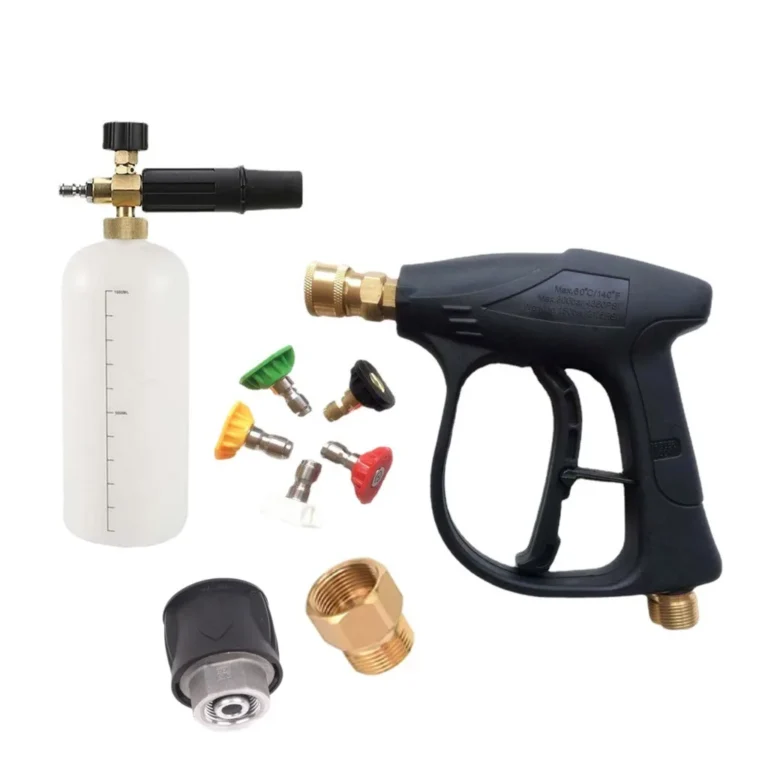
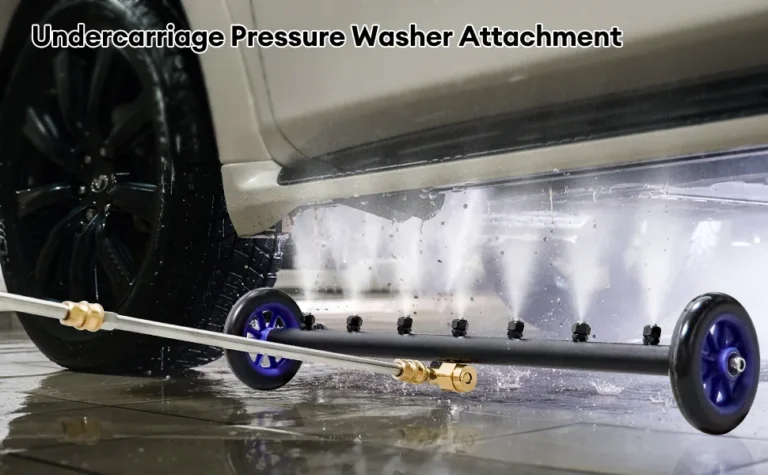
Consider upgrading to a model like the MTM Hydro or Kwazar that lets you dial in the foam consistency, or look for an adjustable car power washer spray gun that works with your existing lance.
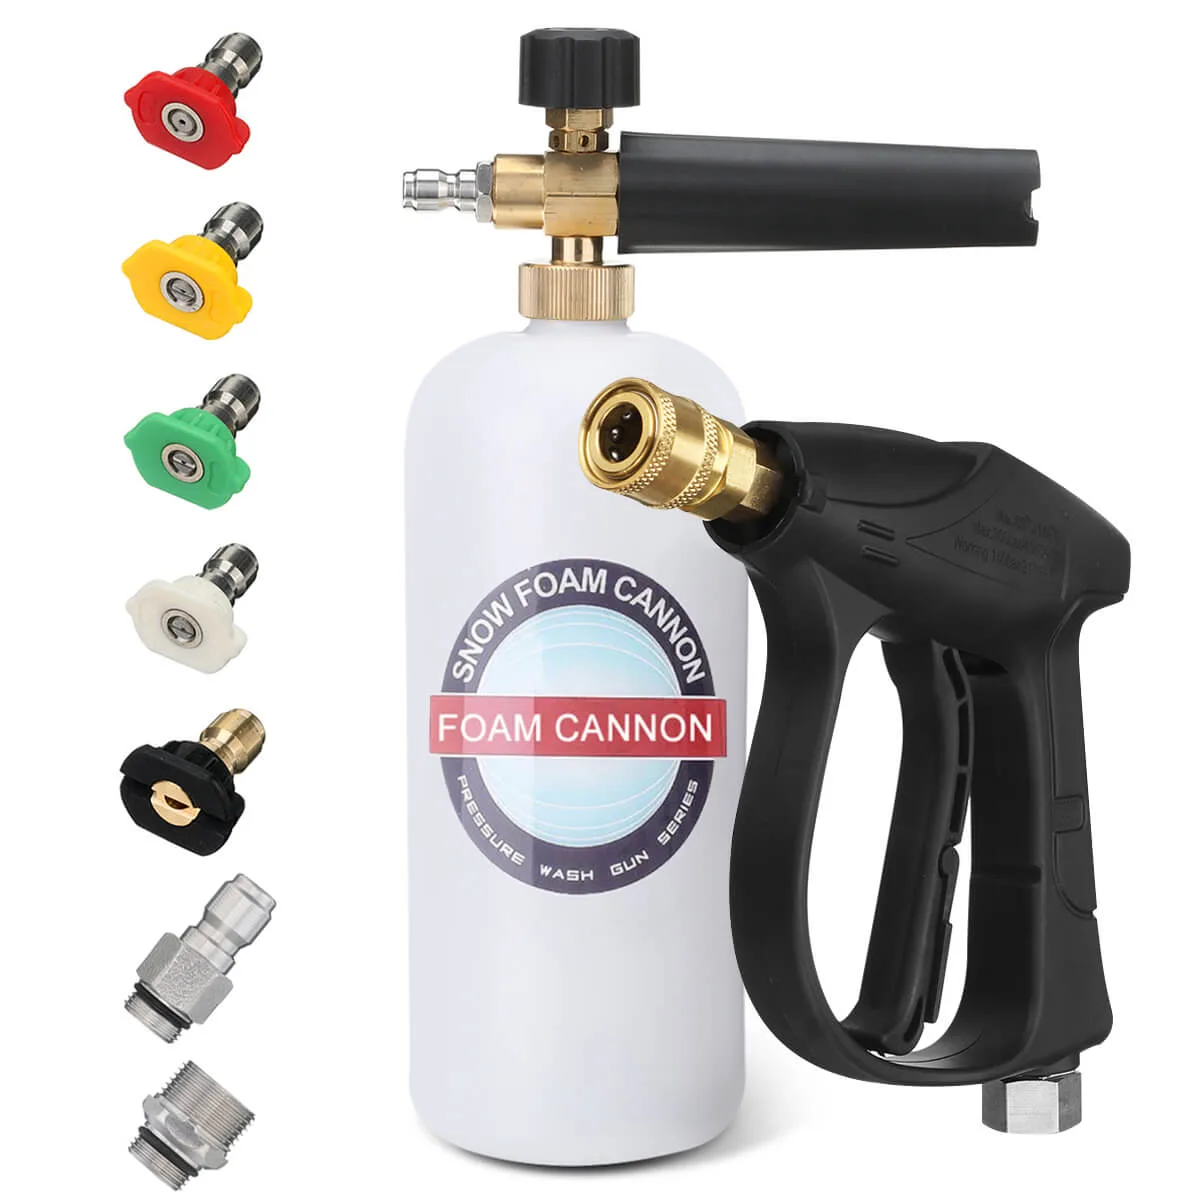
Image source: Bing (Web (fair-use with source credit))
The First Decision Branch – What Kind of Grime Are You Dealing With?
The answer changes based on the dirt. You wouldn't use the same cleaner on your kitchen counter as you would on a barbecue grate, and the same logic applies to your car's surfaces. Here's how to classify the grime and choose the right degreaser.
Heavy grease, oil, and baked‑on grime
Engine bays, wheel wells, and undercarriage parts accumulate thick, sticky oil that has been cooked on by heat. For this you need a strong alkaline degreaser, pH 11 or higher. Common examples are Purple Power, Simple Green Pro HD, or any industrial‑grade degreaser labeled "heavy duty." Dilute at 1:1 to 1:2.
These can strip wax and will etch bare aluminum if left too long, so limit contact time to five minutes and rinse thoroughly. Always wear gloves and eye protection. Consider using a heavy equipment wash soap that's formulated for thick grease but with a safer pH for painted surfaces.
Bug guts, road film, and light dirt
This is the most common scenario for a weekly wash. Bug splatter and road film are organic residues that respond well to citrus‑based or neutral‑pH degreasers. Citrus degreasers use d‑limonene (orange oil) to break down proteins and oils without attacking wax or ceramic coatings.
Dilute at 1:4 to 1:6. These are safe on clear coat, but avoid letting them dry on the panel. If you have a ceramic coating, stick to a pH‑neutral option like car shampoo for ppf or a dedicated coating‑safe pre‑wash.
Paint‑safe pre‑wash vs. full‑strength degreaser
Full‑strength alkaline degreaser should never hit painted body panels. It strips wax, sealants, and ceramic coatings in minutes. Instead, reserve the heavy stuff for the engine bay and wheels.
For paint, use a dedicated pre‑wash product formulated to be safe on clear coat. Many pre‑car‑wash sprays are designed to be applied with a foam cannon and left to dwell without damaging your protection layer. Read the label carefully, if it says "safe on wax and sealants," you're good.
If it says "degreaser" without qualification, test on an inconspicuous spot first.
| Grime Type | Recommended Degreaser | Typical Dilution | Dwell Time | Surface Safe For |
|---|---|---|---|---|
| Heavy grease/oil | Alkaline (pH 11+) | 1:1 to 1:2 | 3–5 min | Engine, wheels, undercarriage |
| Bug splatter/road film | Citrus or neutral | 1:4 to 1:6 | 2–3 min | Paint, plastic, glass |
| Light dirt pre‑wash | pH‑neutral snow foam | 1:5 to 1:8 | 2 min | All coated surfaces |
If you're still unsure what to start with, skip the heavy degreaser and try a homemade car wash soap diluted at 1:5. If that doesn't cut the grime, step up to a citrus pre‑wash. This low‑risk approach protects your paint while you learn how your foam cannon behaves with different concentrates.
The Second Decision Branch – Matching Your Pressure Washer’s PSI and GPM
What orifice size should you use for your pressure washer? The answer depends on your machine's PSI and GPM. Foam cannons rely on a venturi effect that needs enough water flow and pressure to pull concentrate and air into the stream.
If your washer is too weak, the foam comes out watery. If it's too strong, the foam can be too thin and you waste chemical.
Manufacturer specs tell us the typical ranges. Gas pressure washers running 2500 to 4000 PSI need a 1.1 mm orifice. The tighter opening creates backpressure that forces more air into the mix.
Electric washers in the 1500 to 2000 PSI range work best with a 1.25 mm orifice. Machines under 1400 PSI, like many budget electric units, struggle to generate thick foam with any orifice smaller than 1.5 mm.
| Pressure Washer Type | Typical PSI | Recommended Orifice | Expected Foam Quality |
|---|---|---|---|
| Gas (high end) | 3000–4000 | 1.1 mm | Thick, clingy foam |
| Gas (mid range) | 2500–3000 | 1.1 or 1.25 mm | Good with adjustment |
| Electric (standard) | 1500–2000 | 1.25 mm | Decent, may need tweak |
| Electric (low PSI) | 1200–1400 | 1.5 mm | Thin, better for rinse |
If your cannon came with a fixed orifice and you keep getting watery foam, swap to a smaller orifice size. Many aftermarket cannons let you change the nozzle. If your washer is below 1400 PSI, consider a dedicated car power washer spray gun that works at lower flow rates.
Or skip the cannon entirely and use a pump sprayer for pre-wash.
The Third Decision Branch – Choose Your Degreaser Concentrate
Which degreaser concentrate should you pick? It depends on what you're cleaning and how much protection your paint has. The wrong chemical can strip coatings or etch metal.
Here are the four main types.
Alkaline degreasers (pH 11, 13) are the heavy hitters. They break down oil and grease through saponification. Examples include Purple Power, Simple Green Pro HD, and Zep Industrial.
Use these on wheels, tire sidewalls, engine bays, and undercarriages. Never let them sit on painted panels longer than two minutes. They will strip wax and ceramic coatings.
Citrus degreasers (pH 8, 10) use d-limonene to dissolve organic grime. They are gentler on paint and safer for coated surfaces. Brands like Gtechniq W7, CarPro Iron X (which also removes iron), and Chemical Guys Citrus Wash are common.
Dilute at 1:4 to 1:6 for bug splatter and light road film. They still need rinsing within five minutes.
Solvent-based degreasers are powerful but aggressive. They evaporate quickly and can damage rubber seals, plastic trim, and clear coat. Reserve these for metal parts like engine blocks or concrete stains.
Always wear nitrile gloves and work in a ventilated area.
pH-neutral degreasers (pH 6, 8) are the safest choice for ceramic coatings, wax, and PPF. They use mild surfactants and enzymes. They won't strip protection but they also won't cut heavy grease.
Use them for weekly maintenance washes on coated vehicles. Many premium car shampoo for ppf products fall into this category.
| Degreaser Type | pH Range | Best For | Paint Safe? | Strips Wax/Coating? |
|---|---|---|---|---|
| Alkaline | 11–13 | Wheels, engine, heavy grime | No (short dwell only) | Yes |
| Citrus | 8–10 | Bugs, road film, light dirt | Yes (with care) | Minimal |
| Solvent | varies | Metal, concrete | No | Yes |
| pH-neutral | 6–8 | Weekly wash, coated cars | Yes | No |
Step-by-Step Workflow: Using the Cannon Right Every Time
Now that you've matched your PSI, orifice, and chemical, it's time to apply. Here is a repeatable process that works for any degreasing foam cannon.
1. Pre-rinse the surface. Always start with a high-pressure rinse to knock off loose dirt. This prevents the degreaser from turning mud into a gritty paste that scratches paint.
Use plain water, no soap.
2. Mix your concentrate in the cannon. Fill the reservoir with water first, then add the degreaser at your target ratio. Shake gently.
Too much foam from shaking can cause the cannon to suck air. Per manufacturer guidelines, most cannons need the solution premixed in the bottle.
3. Prime the cannon. Attach it to the lance. Start your pressure washer.
Squeeze the trigger to pull liquid through the siphon. You should see foam start to emerge within three seconds. If you only get water, check that the siphon tube is submerged and the adjuster knob is open.
4. Apply from bottom to top. Start at the lower panels and work upward. Gravity pulls foam down, so bottom-to-top ensures even coverage.
For vertical panels, hold the cannon 6 to 12 inches away. For wheels and engine bays, use a tighter spray pattern.
5. Let it dwell. Heavy grime needs three to five minutes. Light dirt needs two minutes.
Do not let the foam dry. If it starts to dry, rinse and reapply. In direct sun or hot weather, reduce dwell time by half.
6. Agitate if needed. For stubborn wheel barrels or engine crevices, use a soft brush. But for general paint cleaning, the foam and pressure should be enough.
Scrubbing a degreaser-loaded panel can drive grit into the clear coat.
7. Rinse top-down with high pressure. Start at the roof and work down. Use a 40-degree or 25-degree nozzle to blast away the dissolved grime.
Never let the degreaser puddle on the paint.
For a more thorough approach, especially on ceramic-coated vehicles, consider a touchless pre-wash that uses chemical action only. The workflow is the same but you skip the agitation step.
The Dilution Ratio Cheat Sheet – How to Adjust for Dirt Level and Paint Safety
This is where most people get it wrong. They guess a ratio and hope for the best. The result is either wasted degreaser or damaged paint.
Here is a clear table based on manufacturer recommendations and real-world testing from the detailing community.
| Dirt Level | Degreaser Type | Dilution (Chemical:Water) | Dwell Time | Notes |
|---|---|---|---|---|
| Caked-on oil/grease | Alkaline | 1:1 | 3–5 min | Only on non-painted surfaces |
| Heavy road grime | Alkaline | 1:3 | 3 min | Rinse within 3 min on paint |
| Bug splatter | Citrus | 1:4 | 2–3 min | Safe on clear coat |
| Light film/dust | Citrus or pH-neutral | 1:6 | 2 min | Safe on coatings and wax |
| Weekly maintenance | pH-neutral | 1:8 | 2 min | Use ceramic-safe products |
The sweet spot for most daily drivers is a 1:4 citrus or pH-neutral mix. That is strong enough to lift road film but mild enough to leave your wax alone. If you find yourself needing to go stronger than 1:3, consider using a separate pre-car-wash spray as a spot treatment instead of soaking the whole car.
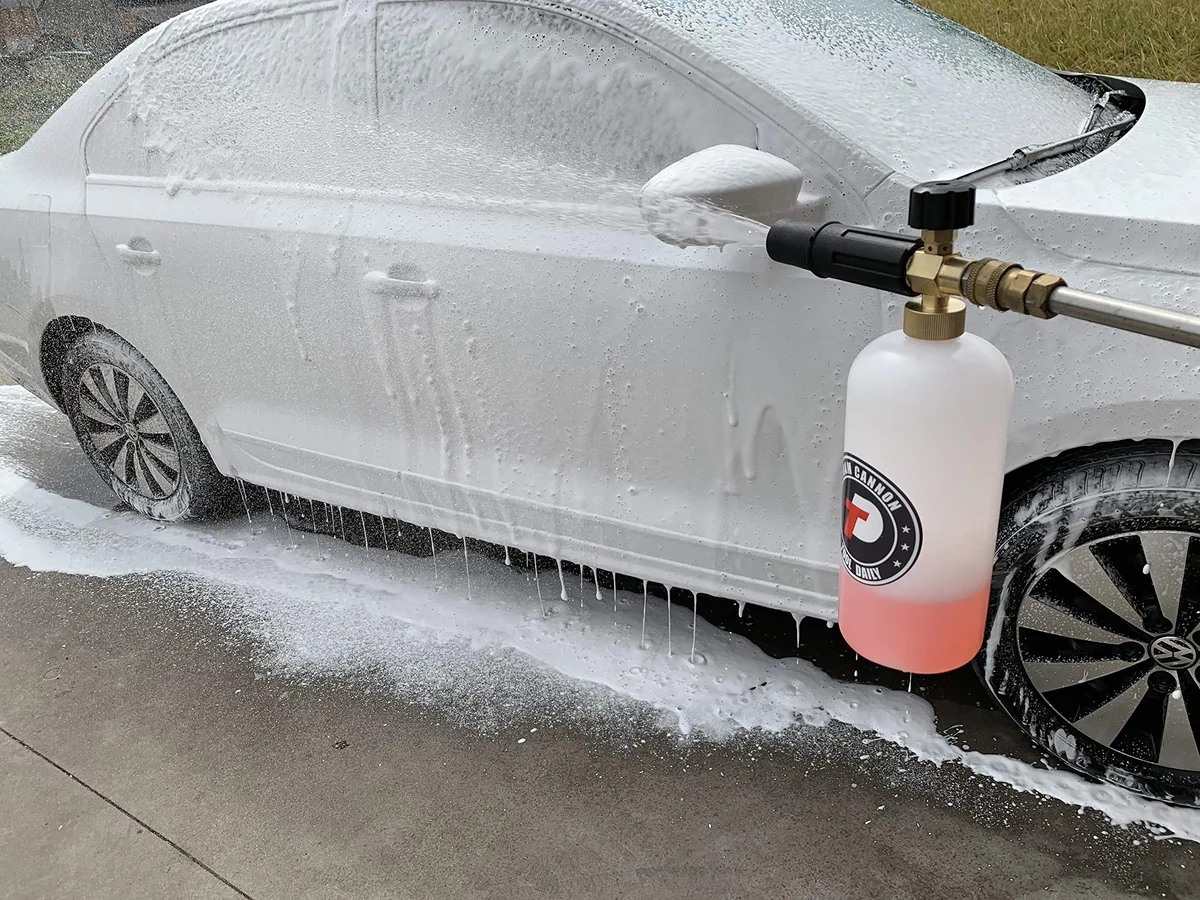
Image source: Bing (Web (fair-use with source credit))
One more tip: always mix in the reservoir, not at the pump. Pour a measured amount of concentrate first, then add water. Mark your bottle with a permanent marker at common ratios.
This saves time and guesswork.
Mistakes That Wreck Your Paint, Your Washer, or Your Results
Even seasoned detailers slip up. Here are the most common mistakes and how to avoid them.
Letting degreaser dry on the panel. This is the number one cause of etching and residue. Degreaser active ingredients crystallize as water evaporates. Those crystals bond to clear coat and require polishing to remove.
Always monitor dwell time. If you start seeing foam dry, rinse immediately.
Using degreaser on hot surfaces. Heat accelerates the chemical reaction and cuts dwell time by 50 percent or more. Hot panels also cause the degreaser to evaporate faster, increasing the risk of residue. Wash in the shade or during cooler parts of the day.
Rinse the car with cold water first to lower surface temperature.
Forgetting to flush the cannon after use. Degreaser left in the reservoir or siphon tube will dry and clog the internal passages. A clogged cannon produces thin, uneven foam or no foam at all. Flush with clean water for 30 seconds after each use.
Disassemble the nozzle and wash o-rings if you used a thick solvent-based degreaser.
Using too high a dilution for paint. We've seen people run heavy alkaline degreaser at 1:1 on their entire car because they wanted "extra clean." That strips wax and can cause clear coat damage over repeated washes. Stick to the dilution guidelines in the cheat sheet.
Using the wrong degreaser on ceramic coatings. Alkaline degreasers can degrade ceramic coating layers over time. If you have a ceramic coating, use only pH-neutral or mildly alkaline products. Check the label for "coating safe" claims.
Our research into washing a car with ceramic coating pressure washer confirms that aggressive chemicals reduce the coating's lifespan significantly.
Avoid these mistakes and your foam cannon will serve you for years. The next section covers when it's better to leave the cannon in the garage.
When to Skip the Foam Cannon Entirely
A foam cannon is not always the right tool. If your pressure washer puts out less than 1400 PSI, the foam will be too thin to cling and you'll waste concentrate. Use a pump sprayer instead.
It gives you better control and less runoff.
Skip the cannon on hot, sunny days. The degreaser dries before it can work. You are better off using a quick detailer or waterless wash in those conditions.
For small jobs like cleaning one wheel or a light bug spot, a spray bottle with a pre-diluted cleaner is faster and easier.
Maintenance & Long-Term Optimization – Keep Your Cannon Unclogged and Sealing
Foam cannons fail silently. A clogged orifice or worn o-ring gives thin foam that looks like the chemical is weak. The problem is mechanical, not chemical.
After each use, flush the cannon with clean water for 30 seconds. Disassemble the nozzle and remove the filter screen. Rinse it under tap water.
If you used a solvent-based degreaser, soak the o-rings in warm water with mild soap. Dry everything before reassembly.
Once a season, replace the o-rings. They cost a few dollars and prevent air leaks that ruin foam consistency. Store the cannon with the reservoir empty and the adjuster knob fully open to relieve spring tension.
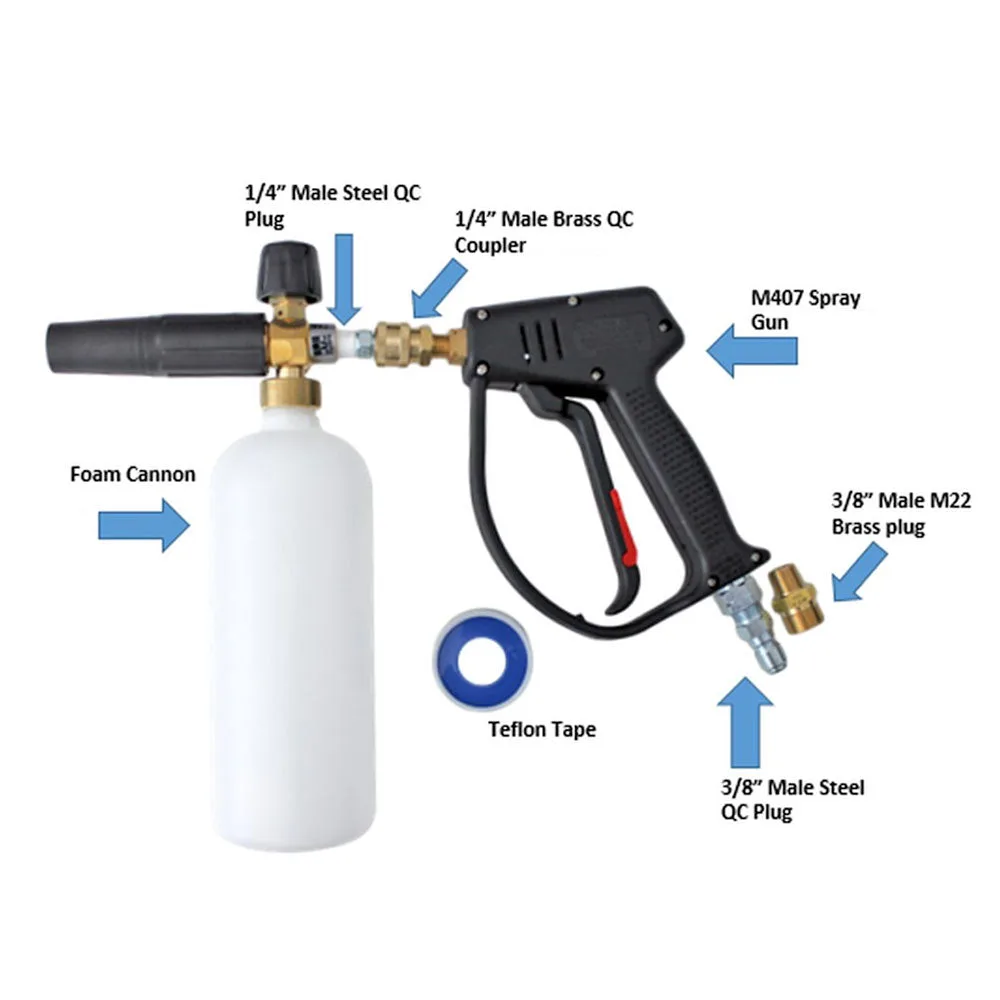
Image source: Bing (Web (fair-use with source credit))
Real-World Scenarios – Two Quick Worked Examples
Example 1: Weekly maintenance wash on a coated car. You have a 2023 sedan with ceramic coating. The paint has light road film and a few bug splatters on the bumper. Use a pH-neutral degreaser at 1:6.
Set your electric washer (1800 PSI) with a 1.25 mm orifice. Pre-rinse, apply bottom to top, dwell 2 minutes, rinse. No scrubbing needed.
Total time: 15 minutes.
Example 2: Deep clean of a neglected truck engine bay. The engine has caked-on oil and dirt. Use an alkaline degreaser at 1:2. Cover the alternator and air intake with plastic bags.
Apply with a 1.1 mm orifice on a gas washer (3000 PSI). Dwell 5 minutes. Agitate with a detailing brush.
Rinse with a 40-degree nozzle. Dry with compressed air or let it idle to evaporate moisture.
The Two-Minute Decision Guide – Which Path Should You Take?
Use this quick flowchart logic to decide your exact setup:
- Is the surface painted and coated? Yes → use pH-neutral at 1:6. No → go to next question.
- Is the grime heavy grease or baked-on oil? Yes → use alkaline at 1:2, but only on non-painted areas. No → use citrus at 1:4.
- Is your pressure washer above 2000 PSI? Yes → use 1.1 mm orifice. No → use 1.25 mm if above 1400 PSI, or 1.5 mm if below.
- Is the surface temperature above 90°F? Yes → reduce dwell time by half or move to shade. No → follow standard dwell times.
Frequently Asked Questions
Can I use any foam cannon for degreaser?
Most foam cannons work with degreaser, but the foam will be thinner than with car shampoo. Look for a cannon with an adjustable orifice and a removable filter. Budget cannons with fixed orifices often produce watery results.
Upgrade to a model with a 1.1 mm or 1.25 mm nozzle for best performance.
Is degreaser safe for ceramic coatings and wax?
Only pH-neutral degreasers are safe for coatings and wax. Alkaline degreasers strip wax in one wash and degrade ceramic coatings over repeated use. Check the label for "coating safe" or "wax safe" claims.
If in doubt, test on a small area first.
What's the best dilution for heavy grease on wheels?
For wheels, use an alkaline degreaser at 1:2 or 1:3. Apply to dry wheels, let it dwell 3 to 5 minutes, then agitate with a wheel brush. Rinse thoroughly.
Avoid getting degreaser on painted body panels. Consider using a dedicated wheel cleaner for safer results.
Why does my foam look watery no matter what I do?
Watery foam usually means one of three things: the orifice is too large for your PSI, the dilution is too weak, or the siphon tube is clogged. Check those in order. Also confirm the adjuster knob is set to the thickest setting.
If none of that works, try a different degreaser concentrate with higher viscosity.
Can I use a degreaser foam cannon on concrete?
Yes, but with caution. Alkaline degreasers work well on concrete oil stains. Apply at full strength, scrub with a stiff brush, and rinse with high pressure.
The runoff can kill grass and plants. Collect the runoff or rinse into a drain. Always check local regulations for driveway washing.