You've seen the videos where guys blast their engine bay with a pressure washer and a foam cannon, and it looks satisfying. But here's the truth: washing for motor and cars is one of the highest-risk DIY car care jobs you can take on. Do it wrong, and you're looking at a check engine light, a dead alternator, or even a small electrical fire.
Manufacturer specifications from multiple automakers indicate that modern engine compartments contain upwards of 50-70 electrical connectors, each vulnerable to moisture intrusion. And as of 2026, with more computers per square inch than ever before, that number keeps climbing. So before you reach for the hose, let's walk through what actually needs to happen to get your engine bay clean without breaking anything.
Why Cleaning Your Engine Bay Is Actually Risky (And Why You Might Still Want To)
An engine bay doesn't need to be clean to make your car run. It's not like changing the oil or rotating the tires. So why do people do it?
A clean engine bay lets you spot leaks early. Oil seeps, coolant drips, and cracked hoses stand out against a clean block. If everything's caked in grime, you won't notice a slow leak until it's a big problem.
And if you're selling the car, a clean bay signals that the vehicle was maintained. Buyers notice it.
But the real risk is simple. Water plus electronics equals trouble. If you're not careful, a quick wash turns into a diagnostic nightmare.
So here's the bottom line: cleaning your engine bay is worth doing, but only if you respect what's under the hood. If you just want to clear off some surface grime from a spill, you can spot-clean. The key is knowing when to say full wash and when to keep it minimal.
What Lives Under Your Hood: Understanding What Can and Can't Get Wet
Pop the hood on most cars built after 2000, and you'll see a mix of stuff that's surprisingly waterproof and stuff that absolutely isn't. The difference matters.
What's generally fine with moisture:
- The engine block itself (cast iron or aluminum)
- Metal coolant lines and heater hoses
- The radiator and cooling fan assembly
- Your AC condenser lines
- Most hard plastic shrouds and beauty covers
These parts can handle a rinse without damage. They're designed for weather exposure.
What's sensitive:
- The alternator (bearings and diodes hate water)
- Your air intake system (especially if it has an oiled filter)
- The fuse box and relay box
- Ignition coils and spark plug wells
- The ECU (engine control unit) and other computers
- Wire harness connectors that aren't properly sealed
- The serpentine belt (degreaser can make it slip)
Many modern connectors have rubber seals that do a decent job. But those seals eventually dry out, crack, or get pushed aside. The older your car is, the more likely those seals are compromised.
Image source: Wikimedia Commons / Gunn, Thomas Butler, 1826-1903
A good rule of thumb: if it has wires going into it, treat it like it can't get wet. If it's sealed metal or plastic, it's probably fine. When in doubt, cover it.
The Biggest Dangers: Water, Chemicals, and Your Car's Electronics
Let's talk about what actually goes wrong when people wash their engine without thinking. It's not just about getting water in the wrong place. It's about pressure, chemicals, and heat.
A pressure washer at full blast can force water past seals that would stop a garden hose. Those rubber boots around your spark plug wells are designed to keep out rain and splash, not a direct jet of water at 1200 PSI. Once water gets in there, you get a misfire.
And a misfire means rough idle, poor acceleration, and sometimes a check engine light.
Degreasers aren't gentle. Many are highly alkaline with a pH of 10 or higher. They can dry out rubber hoses, crack plastic connectors, and leave a residue that turns into white crust when it dries.
That residue can cause intermittent electrical problems for weeks after the wash.
Cold water on a hot engine is a real problem. If you pull into the driveway after a drive and immediately spray down the bay, you're thermal shocking components. The exhaust manifold is hot enough to vaporize water instantly, which can crack thin metal or cause warping.
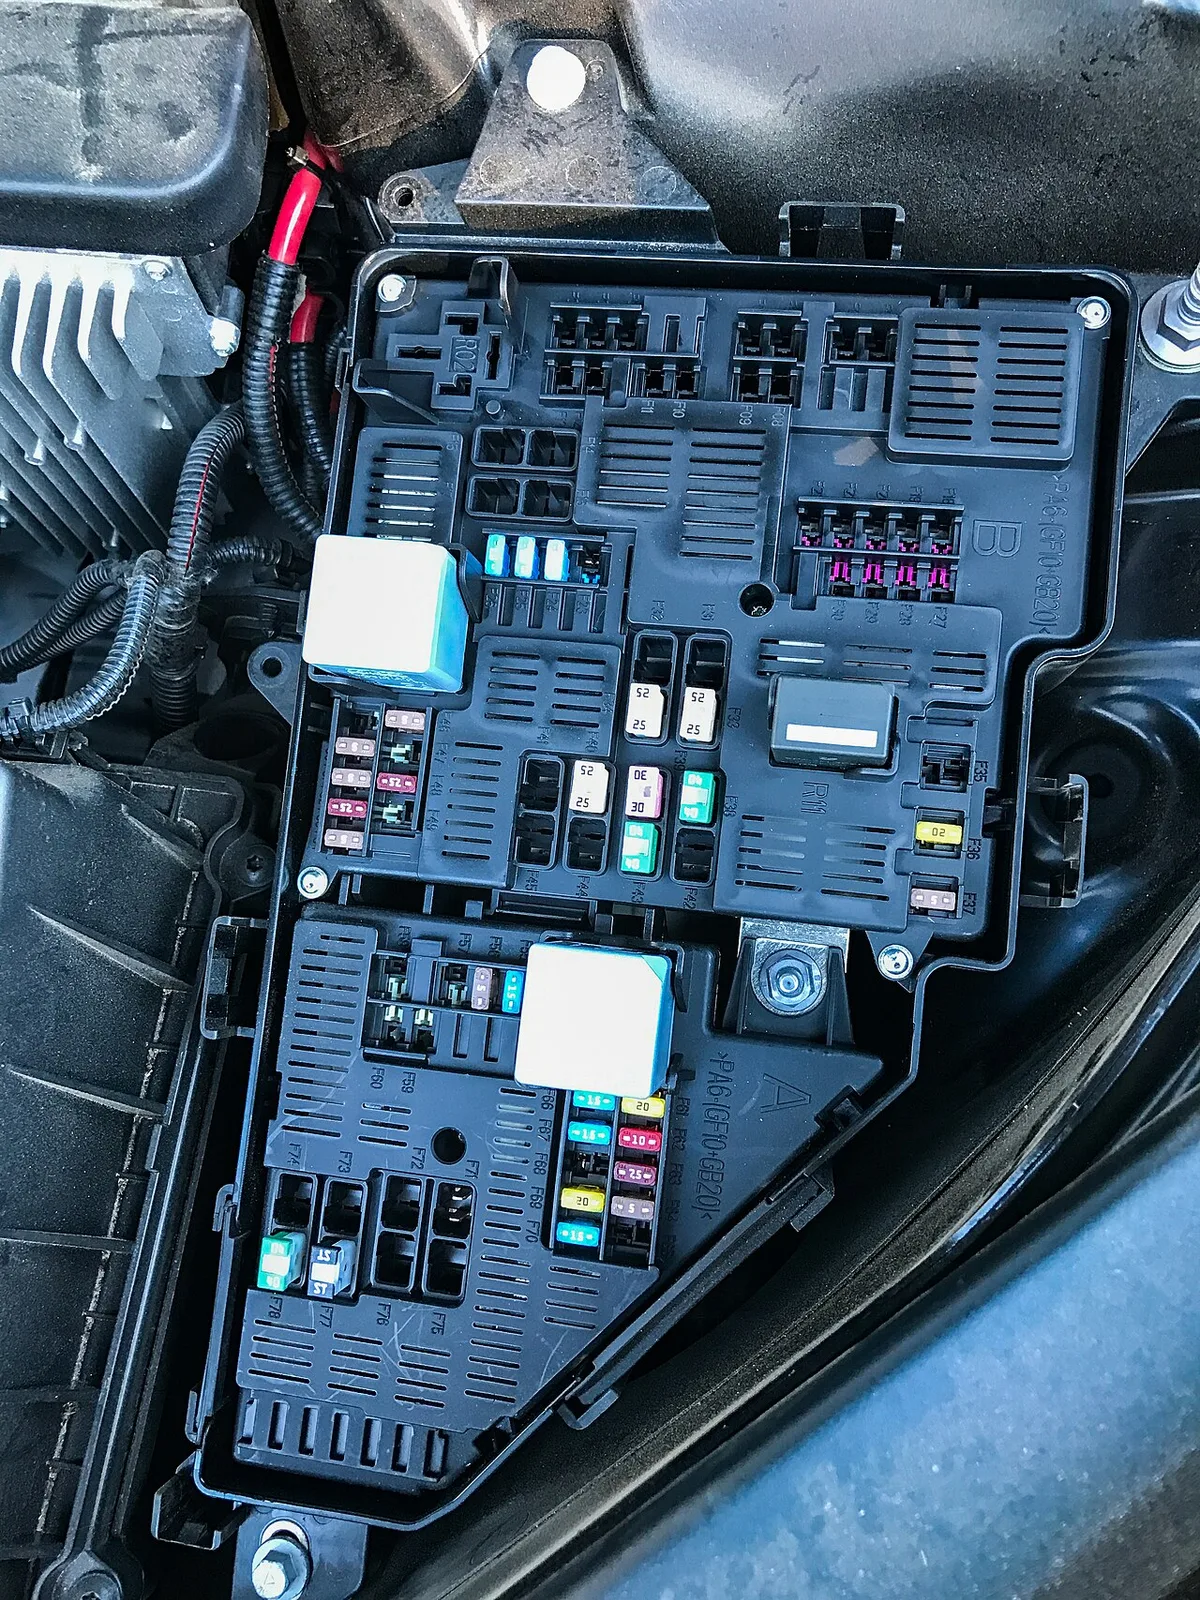
Image source: Wikimedia Commons / Tony Webster (CC BY)
And then there's the subtle stuff. Water trapped in low spots can sit there for days. It seeps into connectors one drop at a time.
It corrodes terminals slowly. You might not notice a problem until a month later when your car won't start, and you've forgotten you even washed the engine.
When You Should Absolutely NOT Wash Your Motor (Even If It's Dirty)
There are some situations where a full engine wash is a genuinely bad idea. If any of these apply, either skip the wash entirely or stick to a gentle spot-clean with a damp microfiber.
Hot engine. Never wash a hot engine. Let it cool for at least 30-45 minutes after driving. Ideally, the engine should be warm to the touch but not hot.
Known oil leaks. If you have an active leak at the valve cover gasket, oil pan, or somewhere else, washing will push degreaser into the leak. That degreaser can then get onto belts, hoses, and sensors. Fix the leak first, then clean.
Recent work on the engine. If you just changed spark plugs, replaced a valve cover gasket, or swapped out a sensor, wait a few weeks before washing. New seals haven't fully seated yet, and fresh gaskets are easier to dislodge with high-pressure water.
Older wiring or known electrical gremlins. If your car already has intermittent electrical issues, don't add water to the equation. You'll chase problems for months.
Cold climate and salt season. If you live somewhere with winter road salt, a spring engine wash makes sense. But doing it in the middle of winter when the car is already wet and salty will just trap more salt against components. Wait for a dry, warmer day.
If you hit any of these conditions, the smart move is to wait. A dirty engine bay will still run fine. A water-damaged ECU won't.
The Right Way to Do It: A Safe, Step-by-Step Process
Assuming you've checked the conditions above and decided to go ahead, here's the correct process.
Step 1: Let That Engine Cool Down
A hot exhaust manifold can reach 400-600 degrees Fahrenheit. Cold water hitting that surface turns to steam instantly, which can crack the manifold or damage nearby plastic components. The rapid temperature change can cause seals to contract and expand unevenly, creating gaps that let water in.
What's the right temperature? Warm but comfortable to touch. If you can hold your hand on the valve cover for five seconds without pulling away, you're good.
A 30-minute cooldown after normal driving is usually enough. An hour is better.
Step 2: Cover the Vulnerable Spots
Before you spray anything, grab some heavy-duty plastic bags and rubber bands or zip ties. Specifically, cover:
- The alternator. A plastic bag over it, secured with a rubber band. Don't seal it airtight; just keep direct spray off.
- The air intake opening. If your intake has an exposed filter or a snorkel opening, bag it. Even a small amount of water sucked into the intake can hydrolock your engine.
- The fuse box. If the lid has a rubber gasket, it's designed to be splash-resistant but not pressure-wash-proof. Bag it anyway.
- The battery terminals and any exposed wiring. If you see a connector that doesn't have a rubber boot, cover it.
This step takes five minutes and saves you hours of troubleshooting. Skip it at your own risk.
Step 3: Choose Your Cleaner Carefully
This is where a lot of people make their first mistake. They grab a citrus degreaser that says heavy duty and assume it's fine. It might strip oil, but it can also strip protective coatings off aluminum and corrode sensitive seals.
For engine bays, you want a water-based degreaser with a neutral or slightly alkaline pH between 7 and 9. Avoid anything that says caustic or has a pH above 10. Products labeled engine cleaner rather than heavy duty degreaser are formulated to break down grease without attacking plastic, rubber, and painted surfaces.
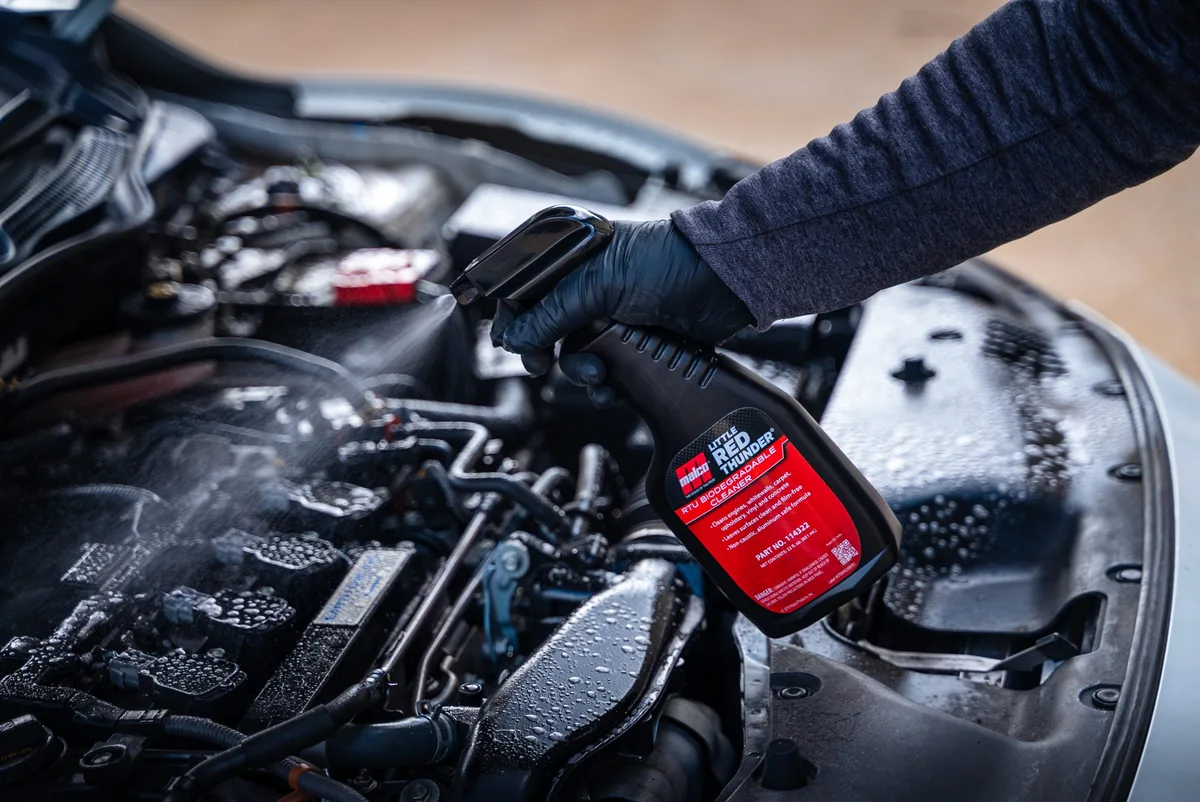
Image source: Bing (Web (fair-use with source credit))
Spray the cleaner onto the engine bay, focusing on greasy areas like around the valve cover, the oil dipstick tube, and any power steering fluid residue. Let it sit for 3-5 minutes. Don't let it dry.
If you're in direct sunlight, work in sections so the cleaner doesn't bake onto surfaces.
Step 4: Low Pressure, Gentle Rinse
You are not washing a driveway. You are rinsing a sensitive electrical environment. Use low pressure at 600-800 PSI maximum and a wide spray pattern.
A 40-degree or 65-degree nozzle is your friend. A zero-degree nozzle is your enemy.
Keep the wand angle at 45 degrees or more from direct perpendicular. You want water to move across the surface, not dig into crevices. Never spray directly at electrical components, even if they're bagged.
The seal isn't perfect.
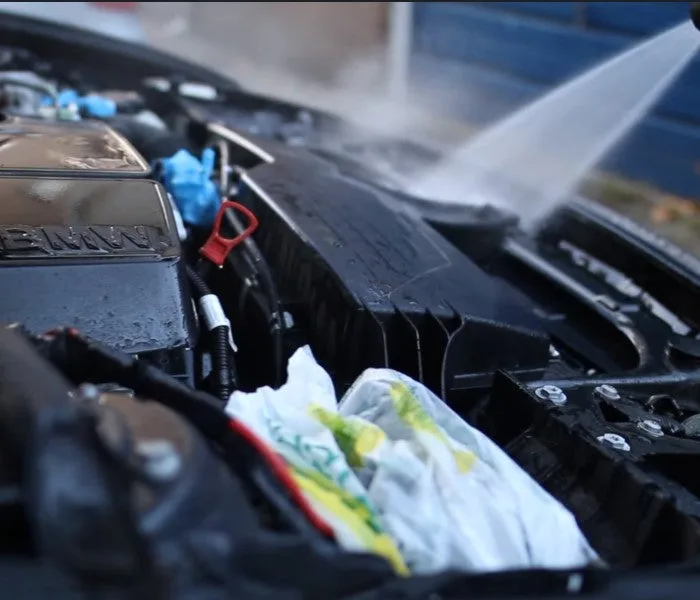
Image source: Bing (Web (fair-use with source credit))
For crevices where grime builds up, use a detailing brush with soft bristles and the same cleaner you already sprayed. Agitate gently, then rinse with the same low-pressure approach. Don't use a wire brush or anything abrasive.
Step 5: The Drying Step Nobody Talks About
Here's where most DIY engine washes go wrong. They rinse, they close the hood, and they think they're done. Then water sits in crevices for days.
After rinsing, do the following in order:
- Remove the plastic bags from the alternator, fuse box, and intake.
- Start the engine and let it idle for 10-15 minutes. The heat will evaporate leftover moisture. Keep an eye on the temperature gauge.
- Use compressed air or an electric leaf blower to blow out low spots. Focus on spark plug wells, the area around the alternator, and where the wiring harness sits against the firewall.
- Wipe down accessible surfaces with a clean microfiber. Plastic shrouds and valve covers can be dried by hand.
- Inspect connectors for standing water. If you see any, blow them out again or gently dab with a microfiber corner.
Step 6: What to Do After You Fire It Up
The first few minutes after startup are your diagnostic window. Stay outside the car. Listen for any unusual sounds: an alternator whining, a belt squeaking, or a rough idle.
If the idle is choppy, it could mean water in the spark plug wells. Let it run for 10-15 minutes. The heat helps dry everything, but if the misfire persists, you'll need to pull the plugs and check for moisture.
If the check engine light comes on, don't panic. Sometimes it's just moisture on a sensor, and it will clear after a few drive cycles. But if it stays on, have the codes read.
A P0300 or P030X code points to water intrusion.
One more thing: if you applied a dressing or protectant to the plastic, wait until the engine is fully dry and cool. Spraying dressing onto hot plastic traps moisture underneath. Go easy on the application.
Too much dressing creates a greasy film that attracts dust and dirt within a day.
Tools of the Trade: What You Actually Need vs. What's Overkill
You don't need a full detailing setup to clean an engine bay safely. But you do need the right stuff.
What you really need:
- A water-based engine degreaser with a pH between 7 and 9
- Heavy-duty plastic bags and rubber bands or zip ties
- A few clean microfiber towels dedicated to engine work
- A detailing brush set with soft bristles
- A garden hose with an adjustable spray nozzle
- An electric leaf blower or compressed air source
What's optional but helpful:
- A pressure washer kept below 1200 PSI with a 40-degree tip
- A foam cannon to help distribute cleaner evenly
- Dielectric grease for re-waterproofing connectors after drying
What's overkill or risky:
- Steam cleaners (easy to overheat sensitive electronics)
- Solvent-based degreasers (too aggressive for modern plastics and seals)
- Wire brushes (scratch aluminum, damage rubber boots)
- High-GPM pressure washers over 2.5 gallons per minute
If you already own a pressure washer, check the nozzle. A 40-degree or 65-degree tip is what you want. The zero-degree or 15-degree tips are for stripping paint, not cleaning engine bays.
Our research into the recommended psi for washing cars found that staying under 1200 PSI dramatically reduces the risk of water intrusion.
Common Mistakes That Can Kill Your Alternator or Blow a Fuse
Let's call these out directly because they're the most expensive errors people make.
Spraying the alternator directly. Even sealed alternators have vent holes. Water gets in, bearings rust, diodes short. Cost to replace runs $200 to $600 depending on the car.
Bag it.
Using dish soap instead of degreaser. Dish soap leaves residue that attracts moisture. And it strips protective coatings off metal components. We covered this in detail when we looked at whether you can wash a car with dish soap.
The answer for engine bays is the same: don't.
Forgetting to dry the spark plug wells. Water pools in the recess around each plug. On the next startup, it causes a misfire that can damage the coil pack. The fix is simple: blow them out with compressed air before starting.
Using too much pressure. High pressure forces water past seals that are designed for splash protection, not direct spray. A garden hose on shower setting is safer than a pressure washer at full blast.
Leaving degreaser on too long. Let it dwell for 3-5 minutes, then rinse. Let it dry on there, and it becomes a sticky residue that attracts more dirt than you started with.
When to Call a Professional (And When It's Fine to DIY)
Not every engine bay wash needs to be a professional job. But some situations absolutely do.
DIY is fine when:
- You're just cleaning up surface dust and light grime
- The engine is easily accessible with no tight nooks packed with wiring
- You have the basic tools: bags, brushes, low-pressure rinse
- You're willing to spend 45-60 minutes doing it carefully
Call a professional when:
- The engine bay has decades of built-up grease and oil
- You have an older European car with known sensitive electronics
- You're prepping a car for sale and need showroom-level results
- You don't have access to compressed air for drying
- The vehicle has an aftermarket intake or modified wiring that's hard to protect
Professional detailers typically charge $80 to $150 for an engine bay wash. That includes proper covering, degreasing, low-pressure rinse, air drying, and often a dressing application. For the peace of mind, it's worth it if you're nervous about doing it yourself.
One thing to check before you DIY: know what you should remove before washing the engine. Some beauty covers pop off easily and make the job much simpler.
How to Avoid Environmental Fines and Nasty Surfaces
Engine degreaser runoff is not something you want flowing into storm drains. Many municipalities have regulations about washing vehicles at home. The concern is that oil, grease, and chemical cleaners end up in local waterways.
If you're washing in your driveway, here's how to be responsible:
- Use biodegradable, water-based cleaners
- Keep the runoff away from storm drains
- Absorb any visible oil or grease before you start
- Don't wash if rain is expected within 24 hours
Professional detailers use wash mats that collect all the water for proper disposal. At home, you won't have that setup. But you can still be smart about where the water goes.
If your driveway drains directly into the street, consider moving the car onto the lawn or gravel for the wash.
Should You Dress the Plastic After? The Truth About Engine Bay Shine
Dressings and protectants make plastic look new. They also create a slick surface that's easier to wipe clean next time. But they come with trade-offs.
Silicone-based dressings:
- Last longer, several weeks
- Look very glossy
- Can leave a greasy film that attracts dust
- Can cause rubber belts to slip if overapplied
Water-based dressings:
- Look more natural with a matte finish
- Wash off faster, a couple weeks
- Less likely to cause belt slip
- Safer around electrical connectors
Our advice: use a water-based product and apply it sparingly. Spray it onto a microfiber, not directly onto the engine. Then wipe it into the plastic.
Avoid getting it on belts, pulleys, or the alternator. If you want more guidance on restoring plastic trim, check out our blackwash treatment plastic tutorial. The same principles apply under the hood.
Never dress a hot engine. The dressing can trap heat and moisture against plastic surfaces, leading to cracking over time. Wait until everything is dry and cool.
Quick Decision Guide: Should You Wash Your Engine Today?
If you're standing in your driveway staring at a dirty engine bay, here's a quick framework to decide right now.
Wash it today if:
- The engine is cool to the touch
- You have plastic bags and rubber bands ready
- You can dedicate 45-60 minutes without rushing
- The weather is dry and warm above 60 degrees Fahrenheit
Wait or spot-clean if:
- The engine is hot from recent driving
- You don't have compressed air or a blower for drying
- You're in direct sunlight and degreaser will dry too fast
- The car has active oil leaks or known electrical issues
Skip it entirely if:
- You just did engine work involving new gaskets, plugs, or sensors
- The car is going into winter salt season
- You're rushing and plan to bag nothing
A dirty engine bay won't strand you. A rushed, wet one might. When in doubt, wait for a better day.