
If you’ve ever pulled your car out of the driveway after a wash and noticed a constellation of white spots baked into the paint, you know the frustration. Removing hard water stains from car surfaces isn’t as simple as grabbing a bottle of vinegar and a rag, get that wrong and you can permanently etch the clear coat. Hard water spots are mineral deposits (mostly calcium and magnesium carbonates) left behind when water evaporates on a hot surface. They look like dull rings or hazy patches, and the longer they sit, the harder they bond.
In our research, we found that water with a hardness level above 180 parts per million (ppm), classified as “very hard” by the U.S. Geological Survey, can leave visible deposits in under 60 seconds on a sun-heated panel. That’s why a rinse-less wipe-down on a 90-degree afternoon can turn into a multi-hour fix.
The good news? Most spots are reversible if you match the right method to the stain severity. Let’s walk through exactly how to do that without damaging your paint.
Quick Answer
Hard water stains are mineral deposits left on paint after water evaporates. To remove them, first determine if the stain sits on the surface or has etched into the clear coat. For fresh surface spots, use a diluted vinegar solution (1:10 with distilled water) or a dedicated water spot remover.
For etched spots, you’ll need a clay bar followed by a fine polish. Always work on a cool surface, rinse thoroughly, and protect the paint with wax or sealant afterward.
Why Hard Water Stains Are a Different Beast Than Regular Dirt
Normal dirt and road grime wash off easily with car soap. Hard water stains don’t. They’re not just sitting on top, they chemically bond to the surface.
Think of it like this: a splash of muddy water dries and leaves a film you can wipe away. A splash of hard water dries and leaves a crystal‑hard crust that grips the clear coat at a microscopic level.
The real trouble starts when that crust sits in direct sunlight. The minerals can literally embed themselves into the clear coat, creating a shallow depression, an etch. Regular washing won’t touch it.
Even a clay bar may not be enough if the etching is deep. That’s why the first step is always diagnosis: surface deposit or etch.
Another difference: hard water stains attract more dirt. The rough, porous mineral surface holds onto grime, making the car look dull even after a wash. So ignoring them just compounds the problem.
The Real Culprit – Understanding Mineral Deposits vs. Etched Spots
You’ve got two distinct enemy types here. Mineral deposits are the white crust you can feel with your fingertip. They’re raised, powdery, and often come off with a gentle chemical cleaner. Etched spots are the opposite, they’re depressions in the clear coat. You can’t feel them as raised bumps; instead, the surface feels smooth but the stain remains visible, like a watermark on a table.
Here’s a quick way to tell them apart:
| Stain Type | Visual | Feel | Removable by washing? |
|---|---|---|---|
| Surface deposit | White, chalky or cloudy | Raised, rough | No |
| Light etch | Ring or halo shape | Smooth to touch | No |
| Heavy mineral crust | Thick white layer, flaky | Very rough | No |
| Deep etch | Pitted, dull area | Rough to fingernail | No |
The key takeaway: if you can feel a ridge, it’s a deposit. If the surface is smooth but the spot is still there, you’re dealing with etching. That distinction determines whether you grab a chemical remover or a polishing compound.
Quick Check – Is Your Clear Coat Safe? (The Fingernail Test)
Before you apply anything acidic or abrasive, you need to know the condition of your clear coat. This test takes ten seconds and costs nothing.
Wash and dry the affected area. Run your fingernail gently across the stain. If your nail catches on the deposit, like dragging a stick through sand, that’s a heavy mineral crust.
If the surface feels smooth and your nail slides without resistance, you’re likely dealing with a light etch or a thin deposit.
Now test the clear coat itself. Pick an inconspicuous spot, like the inside of the door jamb. Rub a small amount of polish or compound on a microfiber cloth and make a few passes.
If the paint looks dull or hazy afterward, your clear coat is thin or compromised. In that case, skip aggressive methods and opt for the gentlest chemical approach, or call a pro.
The fingernail test isn’t perfect, but it’s a reliable indicator of mineral buildup versus clear coat damage. Use it before any decision.
Decision Tree – Which Method Is Right for Your Stain?
Here’s the if‑then logic that saves you time and risk.
Branch A: Fresh Surface Deposits (No Rain Spots Visible After Washing)
If the stain appeared within the last day or two and you can wipe it off with a damp microfiber (but it returns once dry), you’re in the surface deposit zone. This is easiest to fix. Use a diluted vinegar solution: one part white vinegar (5% acidity) to ten parts distilled water.
Spray it on a cool panel, let it dwell for 30 seconds, then wipe with a clean microfiber. Rinse immediately with distilled water or a spot‑free rinse. Follow up with car wax.
Branch B: Light Etching (Visible Rings When Dry, Smooth to Touch)
If the surface feels smooth but you still see rings or halos, a chemical remover alone may not cut it. Start by washing the car with a pH‑neutral shampoo. Then use a fine clay bar with plenty of lubricant to lift any remaining mineral particles.
If the rings persist after claying, apply a fine‑cut polish by hand or with a dual‑action polisher. This removes a microscopic layer of clear coat, only enough to level the etch.
Branch C: Heavy Mineral Crust (White Chalky Layer, Rough Surface)
This is the thick stuff. Don’t reach for vinegar, it’ll take too long and may soften the clear coat before the minerals dissolve. Instead, use a dedicated water spot remover (acid‑based, typically pH 2, 4).
Follow the product instructions to the letter. Apply to a cool, shaded panel. Let it dwell for the recommended time (usually 30, 60 seconds), then wipe and rinse.
You’ll likely need to repeat for stubborn areas. After removal, wash the panel again and inspect for residual etching.
Branch D: Deep Etching (Stains Stay After Washing, Rough to Fingernail)
If your fingernail catches on the stain, the clear coat is physically damaged. Chemical removers won’t fully fix this, they may dissolve the mineral crust but the depression remains. The only reliable solution is paint correction using a dual‑action polisher with a medium‑cut compound and a cutting pad.
Work in small sections, using slow passes. Check progress frequently. If the etch is deeper than about 0.5 mils (the thickness of a human hair), consider professional wet‑sanding.
This is not a beginner job.
Step-by-Step – How to Remove Light Surface Spots Safely
Let’s walk through Branch A and B in detail, because these are the scenarios most people face.
1. Gather Your Tools
- Distilled water (1, 2 gallons)
- White vinegar (distilled, 5% acidity)
- Two clean microfiber towels (high‑GSM, edgeless)
- pH‑neutral car shampoo
- Clay bar (fine grade) and lubricant
- Car wax or sealant
2. Prepare the Car
Park in the shade. Let the paint cool completely, a hot panel will cause the chemical mixture to evaporate too fast and can damage clear coat. Rinse the area with distilled water to remove loose dust.
3. Mix and Apply the Vinegar Solution
Combine 1 part vinegar with 10 parts distilled water in a spray bottle. Mist the stained area lightly. Do not soak.
Let it sit for 30 seconds. Do not exceed 60 seconds. Wipe with a damp microfiber in a single direction, do not rub aggressively.
Rinse immediately with distilled water.
4. Inspect and Repeat
Dry the area with a clean microfiber. If the spots are gone, move to protection. If they’re lighter but still visible, you can repeat the vinegar step once more.
If no change after two attempts, the stains are likely etched and need the clay‑and‑polish method.
5. Protect the Paint
After removal, the clear coat is temporarily more porous. Apply a coat of car wax or a sealant to seal the surface. This also repels water, reducing future mineral bonding.
That’s it for light surface spots. For heavier deposits and etching, we’ll cover the next steps in detail, but always start with this gentlest method first. Nine times out of ten, it works.
Step-by-Step – Removing Heavy Mineral Crust Without Scratching
Heavy mineral crust looks like a white chalky layer. It feels rough and gritty. Scrubbing it with a sponge will only push the minerals deeper into the clear coat.
Start with a dedicated water spot remover. These products use mild acids (pH 2‑4) that dissolve calcium and magnesium on contact. Work on a cool panel in the shade.
Spray the remover onto a microfiber towel, not directly onto the paint. Gently wipe the stained area using light pressure. Let the product dwell for the time stated on the label (usually 30‑60 seconds).
Do not let it dry.
Rinse thoroughly with distilled water. Inspect the area. If the crust is gone, wash the panel with pH‑neutral shampoo and dry immediately.
If some crust remains, repeat the process once more. Avoid over‑working the product, multiple light applications are safer than one aggressive rubbing session. After removal, apply a coat of wax or sealant to restore protection.
Step-by-Step – Fixing Etched Stains (Polish or Compound Work)
Etched stains require physical removal of a thin layer of clear coat. This is paint correction. You’ll need a dual‑action polisher, a fine‑cut polishing compound, and a foam cutting pad.
Doing this by hand is possible for small areas but takes far longer and risks uneven results.
Start by claying the panel to remove any surface contaminants. Then apply a small pea‑sized amount of compound to the pad. Work on a low speed (1‑2) to spread the product, then increase to speed 3‑4.
Move the polisher in overlapping passes: left to right, then top to bottom. Use moderate pressure, let the machine do the work. After two passes, wipe off the residue and inspect.
If the etch is still visible, make one or two more passes. Stop as soon as the spot disappears. Removing too much clear coat can expose the base paint.
For deep etches that don’t lift after four passes, consider professional wet‑sanding. Polish the area afterward with a finishing polish to restore gloss, then seal with wax or a ceramic coating.
Can you skip the polisher and use a hand-applied scratch remover?
For very shallow etches, a quality hand‑applied scratch remover can work. But it requires significant elbow grease and consistent pressure. Our research suggests that most DIY users achieve better results with a dual‑action polisher, even an entry‑level one.
What About Glass, Trim, and Chrome? – Different Rules
Hard water stains on glass are easier to remove than on paint. Glass is non‑porous and chemically resistant. A 50/50 vinegar and distilled water solution applied with a microfiber will dissolve most mineral deposits.
Use a razor blade at a shallow angle for stubborn spots, just wet the glass first to avoid scratches.
Plastic trim is more delicate. Avoid vinegar and acidic removers. They can dull or discolor plastic.
Instead, use a dedicated plastic cleaner or isopropyl alcohol (70% diluted with water). Apply with a soft cloth, rinse, and dry. For heavy deposits on trim, use a plastic polish with a gentle hand pad.
Chrome is tough but can be scratched by abrasive compounds. Use the same vinegar solution as for glass. Apply gently, rinse, and dry immediately.
Never use steel wool or aggressive scrub pads on chrome, they leave permanent micro‑scratches that collect dirt.
| Surface | Safe Cleaner | Avoid |
|---|---|---|
| Paint | Vinegar 1:10, water spot remover | Undiluted vinegar, abrasive pads |
| Glass | Vinegar 1:1, razor blade | Metal scrapers on dry glass |
| Plastic trim | Isopropyl alcohol, plastic cleaner | Vinegar, acidic removers |
| Chrome | Vinegar 1:1, mild soap | Steel wool, abrasive compounds |
The Vinegar Trap – Why It Works Sometimes and Wrecks Paint Other Times
Vinegar is a go‑to for many DIYers because it’s cheap and effective on glass. But on car paint, it’s a double‑edged sword. The acetic acid in vinegar (pH about 2.5) can soften and etch modern clear coats if left on too long or used at full strength.
The problem is that clear coats are engineered to be durable but not chemically inert. Extended contact with vinegar can cause a dull haze or even micro‑cracking. This is especially true for cars with thin or aged clear coats, often vehicles older than 10 years or those that have been previously polished.
If you decide to use vinegar, follow these rules:
- Always dilute it 1:10 with distilled water.
- Apply to a cool panel only.
- Limit dwell time to 30 seconds.
- Rinse immediately with distilled water.
- Never let it dry on the surface.
For most light water spots, a dedicated water spot remover is a safer choice. It’s formulated to dissolve minerals without attacking the clear coat. The extra few dollars are worth the peace of mind.
Common Mistakes That Turn a Quick Fix Into a Paint Correction Bill
The biggest mistake is using too much pressure. Scrubbing hard with a dry towel or a stiff brush embeds mineral particles into the clear coat. You end up with both water spots and swirl marks.
Another frequent error is working on a hot surface. Heat accelerates chemical reactions. Vinegar or acid remover on a hot panel can etch the clear coat in seconds.
Always park in the shade and wait until the paint is cool to the touch.
Skipping the rinse step is also common. Chemical residue left on the paint can attract dirt and cause new spotting. Always rinse with distilled water or a spot‑free rinse after using any remover.
Using the wrong tool for the wrong stain type is another pitfall. Trying to polish away a heavy mineral crust without first dissolving the minerals will grind them into the paint. Follow the decision tree guidance from earlier.
Finally, forgetting to protect the paint after removal leaves the clear coat vulnerable. Freshly cleaned paint has no barrier. Apply wax, sealant, or ceramic coating to prevent new spots from bonding as quickly.
Prevention – How to Stop Hard Water Stains From Coming Back
The simplest prevention method is to dry your car immediately after washing. Use a clean microfiber drying towel and blot the surface. Do not let water air dry on the paint.
That single habit eliminates most new spot formation.
Consider using a spot‑free rinse system. These attach to your garden hose and use deionization or reverse osmosis to remove minerals from the water. A basic unit costs $30 to $60 and treats hundreds of gallons.
For frequent washers in hard‑water areas, it pays for itself quickly.
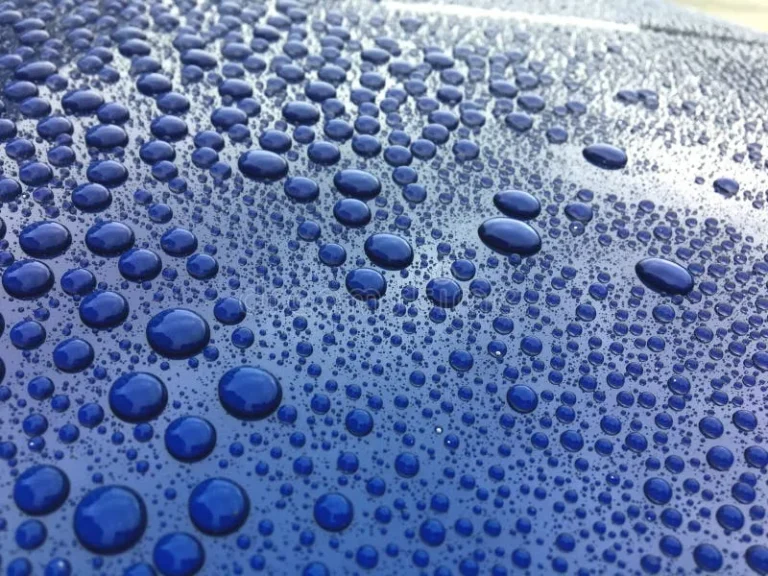
Applying a ceramic coating or high‑quality sealant creates a slick surface that water beads off instantly. With less contact time, minerals have less chance to bond. Reapply wax or sealant every three to four months for continued protection.
Parking in shade or a garage also reduces evaporation speed, which cuts down on spot formation.
When to Throw in the Towel and Call a Professional
If the stain remains after two rounds of the appropriate method, or if you can feel a deep depression with your fingernail, you’re beyond DIY territory. Deep etching often requires wet‑sanding, which removes a precise amount of clear coat. Do that wrong and you burn through to the base paint.
Signs you need a pro: visible rings that don’t lift after polishing, a hazy patch that won’t clear up, or any stain on a matte or satin finish. Matte paint cannot be polished without destroying the finish. Only a professional with a paint thickness gauge and the right compounds can handle that safely.
A professional paint correction for a single panel runs $100 to $250 depending on severity. For the whole car, expect $300 to $800. Compare that to the cost of repainting a panel after a botched DIY attempt, usually $500 to $1,500.
The math is clear.
Quick Reference – Stain Severity → Method → Product Table
| Severity | Visual Clue | Best Method | Typical Product Type |
|---|---|---|---|
| Surface deposit | White dust, wipes off but returns | Diluted vinegar 1:10 or water spot remover | pH‑neutral acid cleaner |
| Light etch | Ring shape, smooth to touch | Clay bar then fine‑cut polish | Fine‑cut compound |
| Heavy mineral crust | Thick chalky layer, rough | Commercial water spot remover | Acid‑based spray (pH 2‑4) |
| Deep etch | Visible depression, rough to nail | DA polisher with medium compound | Cutting compound + foam pad |
Use this table as a quick checklist before you start. It saves time and prevents the wrong tool from causing damage.
Final Decision Guide – Your Next Move Based on What You See Right Now
Walk outside and look at your car in direct sunlight. If you see no spots, you’re good. If you see white chalky residue, grab diluted vinegar and a microfiber.
If you see rings that feel smooth, get a clay bar and fine polish. If you see a thick white crust, reach for a commercial water spot remover. If you see pits or depressions, book a professional detailer.
One stain type may appear in multiple areas. Treat the worst spot first. Reassess.
Repeat only on spots that need it. Once all stains are gone, apply a wax or sealant to lock in the job. Then adjust your washing routine to avoid starting over.
A few minutes of prevention now saves hours of correction later.
Frequently Asked Questions
Can I use lemon juice instead of vinegar for hard water spots?
Lemon juice works similarly but is slightly more acidic (pH 2.0 to 2.5). Dilute it 1 part lemon juice to 4 parts distilled water. Follow the same 30‑second dwell time and rinse immediately.
Lemon juice may leave a sticky residue, so a full wash afterward is recommended.
How long does it take to remove hard water stains from a car?
Light surface deposits take 30 to 45 minutes. Heavy mineral crust or etched spots can take 1.5 to 3 hours if you include claying, polishing, and protection. Deep etching requiring professional correction may take a full day.
Will a clay bar remove hard water stains?
A clay bar removes surface contaminants but does not dissolve mineral deposits. It works best as a second step after chemical removal to pick up any remaining particles. For etched stains, clay alone is insufficient.
Is it safe to use WD-40 on water spots?
WD‑40 can lift fresh surface deposits because its solvents break down mineral bonds. Spray on a cool panel, let sit 30 seconds, then wipe. Rinse and wash afterward.
Do not use WD‑40 on etched stains or on plastic trim, it may leave a greasy film.
Can hard water stains damage car paint permanently?
Yes, if left untreated for weeks or months the minerals can etch into the clear coat. Once the clear coat is physically pitted, only polishing or wet‑sanding can remove the damage. Prevention is far easier than correction.