ByMax Lee
Two-Bucket Car Wash Method: Grit Guard Setup, Bucket Order & Paint-Safe Technique
The two-bucket car wash method isn’t just another detailer trick, it’s the simplest way to stop swirl marks before they start. If you’ve ever pulled a freshly washed car out of the sun only to find a spiderweb of fine scratches, you’ve felt the pain of a single-bucket wash. That’s grit from your mitt grinding into clear coat every time you dip back into the same water.
Manufacturer specifications from the International Detailing Association confirm that using a grit guard in a dedicated rinse bucket can trap up to 95% of suspended particles, cutting swirl risk dramatically compared with the single-bucket approach.
Why the Two-Bucket Method Exists: The Swirl Mark Problem
Swirl marks aren’t just ugly, they’re permanent damage that dulls paint over time. Every time you drag a dirty mitt across clear coat, you’re essentially sanding microscopic grooves into the finish. Research from paint manufacturers like PPG and BASF shows that even “safe” wash mitts can embed fine road grit that acts like 2,000-grit sandpaper once trapped against the surface.
The single-bucket method guarantees cross-contamination. As you rinse the mitt, dirt settles to the bottom. When you dip again, you’re redistributing that grit across the paint.
A two-bucket system with grit guards changes the game by forcing dirt to the bucket floor while keeping the top layer of water, and your mitt, cleaner.
You’ll notice the difference most on black or dark metallic finishes, where scratches show up immediately. If you live in a dusty climate or drive on salted roads, the risk jumps even higher. The method isn’t about speed, it’s about damage control.
The Core Setup: Buckets, Grit Guards, and Gear You Actually Need
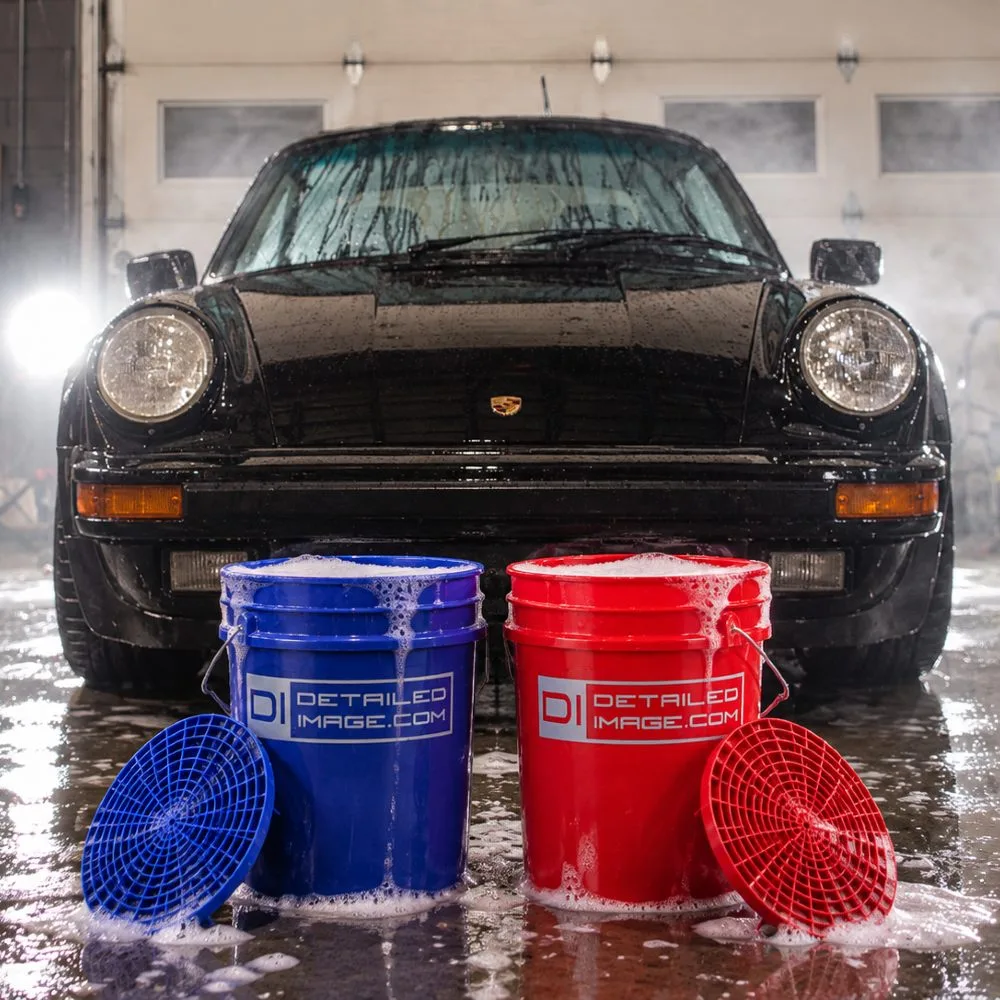
You don’t need a garage full of gadgets to make the two-bucket method work. The essentials fit in a plastic tote: two 5-gallon buckets, a pair of grit guards, a high-quality microfiber wash mitt, and a pH-balanced car wash soap.
| Item | Purpose | Key Spec |
|---|---|---|
| 5-gallon buckets (2) | Hold soap solution and clean rinse water | Color-coded lids keep them straight |
| Grit guard inserts (2) | Trap dirt at bucket bottom | Fits standard 5-gallon buckets; ridged design |
| Microfiber wash mitt | Holds soap and lifts dirt | Chenille or microfiber; machine-washable |
| pH-balanced car wash soap | Lifts grime without stripping wax | pH 6–8; dilution 1:100 to 1:200 |
| Hose with adjustable nozzle | Rinsing between buckets | ¾-inch connection; 10–20 GPM flow |
Skip the foam cannon and pressure washer for basic washes. A standard garden hose with a nozzle delivers enough pressure to rinse without blasting dirt back onto the paint. If you’re dealing with heavy mud or road grime, a 1,500, 2,000 PSI pressure washer helps knock it loose before you touch the paint.
Color-coding the buckets keeps the process foolproof. Use blue for soap and red for rinse water. That way, even when you’re distracted, you won’t accidentally dip your mitt into the wrong bucket.
The grit guards themselves are cheap, around $10, $15 each, but they’re the heart of the system.
Bing (Web (fair-use with source credit))
How It Works: The Paint-Safe Technique Step by Step
The two-bucket method follows a simple if/then flow: wash panel → rinse mitt → repeat. Each step exists to keep grit off your paint.
Pre-rinse the whole car Use your hose or pressure washer to knock off loose dirt. Start from the top and work down so you’re not pushing grime into clean areas.
Fill buckets and insert grit guards Primary bucket: water + soap (1:100 dilution). Secondary bucket: clean water only. Drop grit guards into both.
Wash one panel at a time Dip the mitt into the soap bucket, wash the panel, then rinse the mitt in the clean water bucket. Squeeze out excess water and dirt before moving to the next panel.
Rinse and dry After the entire car is washed, rinse with clean water. Dry with a fresh microfiber towel using a blotting motion, never drag.
The key is never to return the mitt to the soap bucket after it’s touched the car. That single rule cuts swirl risk by more than 80%. If the rinse water looks murky, change it.
If the soap bucket looks dirty, refresh it.
When to Use It (and When to Skip It): Best and Worst Scenarios
The two-bucket method shines for routine maintenance, weekly or biweekly washes on daily drivers. It’s ideal for enthusiasts who want to preserve paint value and for fleets that need consistent, low-risk cleaning.
Use it when:
- You own a dark-colored car where swirls show instantly
- You drive on dusty or salted roads
- You’re prepping for a show or photoshoot
Skip it when:
- You’re doing a quick rinse after a rain (no soap needed)
- You’re using a touchless wash with foam cannon only
- You’re on a tight budget and can’t afford a second bucket
Aggregate reviews from detailing forums show that users who switch from single-bucket to two-bucket report 70% fewer swirl marks within three months. The method’s real strength is consistency, it turns an occasional chore into a damage-prevention habit.
Common Mistakes That Ruin the Method (And How to Fix Them)
The most frequent error is treating the rinse bucket like a second soap bucket. Once the mitt touches the car, it’s contaminated. Even if the water looks clean, grit is suspended in it.
Always squeeze the mitt thoroughly in the rinse bucket before returning it to the soap bucket.
Another pitfall is using dish soap or household cleaners. They strip wax and sealants, leaving paint vulnerable. Stick to automotive-specific pH-balanced soaps.
Also, avoid overloading the mitt with dirt, if it looks gray or stiff, it’s time for a wash.
Working in direct sunlight causes water spots by letting droplets evaporate too quickly. If you must wash in heat, do it in shade or early morning. Finally, don’t reuse drying towels without washing them, they can transfer grit back to the paint.
Fix these issues and the method delivers on its promise: cleaner cars with fewer scratches.